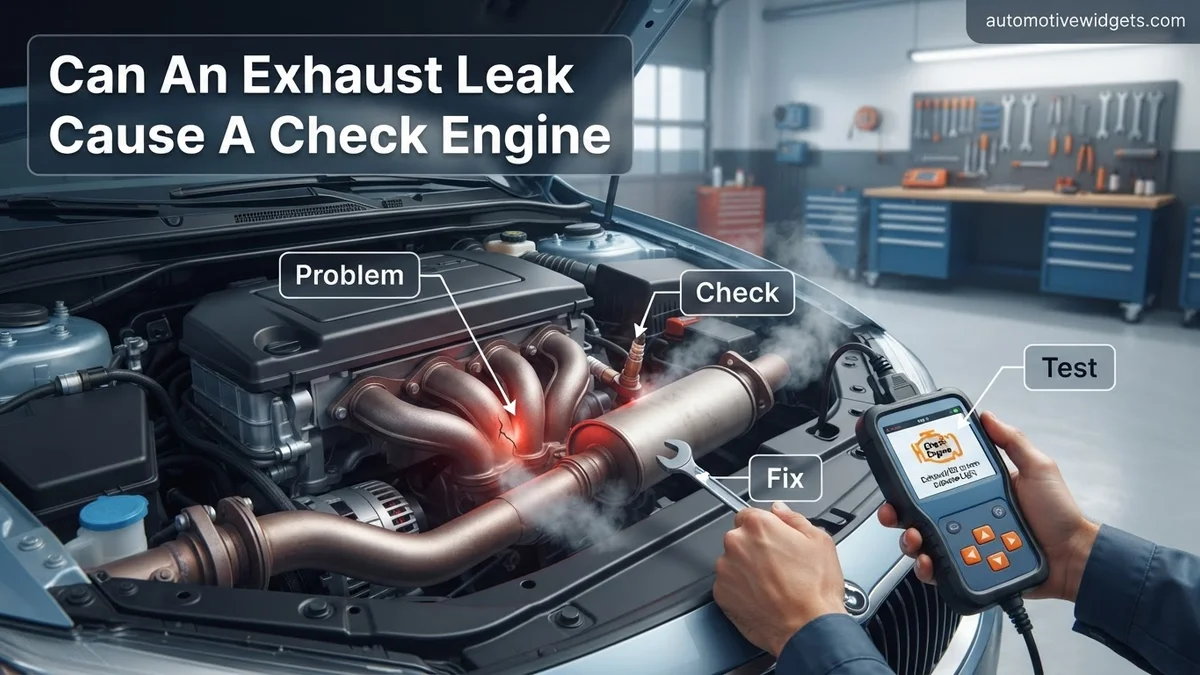
Can an Exhaust Leak Cause a Check Engine Light in 2026
Yes, an exhaust leak can absolutely cause your Check Engine Light (CEL) to illuminate. This happens by disrupting critical oxygen sensor readings, leading to incorrect fuel-air mixture calculations or perceived catalytic converter inefficiency. Prompt diagnosis and repair are crucial to prevent further engine issues and maintain emissions compliance.
Yes, an exhaust leak absolutely can cause a Check Engine Light (CEL) in your vehicle, especially as automotive technology continues its rapid evolution into 2026. This isn’t a minor issue; it directly impacts your engine’s performance, fuel efficiency, and crucially, its emissions profile. Modern vehicles rely on precise exhaust gas analysis to maintain optimal operation, and even a small leak can significantly disrupt this intricate balance.
The core reason an exhaust leak triggers a CEL stems from its interference with critical sensor readings. Specifically, the oxygen (O2) sensors, both upstream and downstream of your catalytic converter, provide vital data to the Engine Control Unit (ECU). When a leak introduces unmetered air or alters exhaust pressure, these sensors report inaccurate information, leading the ECU to misinterpret engine conditions and ultimately illuminate that warning light on your dashboard.
Key Takeaways
- Exhaust leaks commonly trigger CEL via O2 sensor issues.
- Expect lean codes (P0171) or catalytic converter codes (P0420).
- Leaks before oxygen sensors are particularly problematic.
- Ignoring an exhaust leak can worsen engine performance.
- Professional diagnosis is best to pinpoint the exact leak.
What Causes a Check Engine Light from an Exhaust Leak?
The Fundamental Disruption of Emissions Monitoring
An exhaust leak acts as an uninvited guest, introducing ambient air into a tightly controlled system. Your vehicle’s ECU, a sophisticated computer in 2026, relies on a closed-loop system where oxygen sensors continuously measure the amount of oxygen in the exhaust gases. This data informs the ECU how efficiently the engine is burning fuel and whether the catalytic converter is performing its job.
- Unmetered Air: A leak before an O2 sensor pulls in atmospheric air, which is rich in oxygen. The sensor then “sees” this extra oxygen and reports a lean condition to the ECU, even if the engine’s combustion is perfectly fine.
- Altered Pressure: Leaks can also reduce exhaust gas velocity and pressure, further skewing sensor readings and creating discrepancies the ECU cannot reconcile.
- Direct Catalyst Impact: If a leak occurs around the catalytic converter itself, it can directly affect the gas flow, making the converter appear less efficient than it actually is.
This “polluted” signal misleads your ECU, causing it to make incorrect adjustments that can range from minor fuel trim issues to significant emissions failures, all culminating in a CEL.
Common Diagnostic Trouble Codes (DTCs)
When an exhaust leak triggers a CEL, it’s typically accompanied by specific diagnostic trouble codes (DTCs) stored in the ECU. Understanding these codes is key to pinpointing the underlying issue. While a leak doesn’t have a single, dedicated “exhaust leak” code, it often manifests through codes related to fuel trim and catalytic converter efficiency:
- P0171 (System Too Lean Bank 1) & P0174 (System Too Lean Bank 2): These are frequently associated with exhaust leaks, especially those located before the upstream O2 sensors. The O2 sensor reports an excess of oxygen, convincing the ECU that the engine is running lean, despite potentially correct fuel delivery.
- P0420 (Catalyst System Efficiency Below Threshold Bank 1) & P0430 (Catalyst System Efficiency Below Threshold Bank 2): These codes indicate that the catalytic converter is not operating effectively. An exhaust leak can cause these codes by altering the gas composition entering or exiting the converter, making it appear as though the catalyst itself is failing when it might not be.
- P2096 (Post Catalyst Fuel Trim System Too Lean Bank 1) & P2098 (Post Catalyst Fuel Trim System Too Lean Bank 2): These specific codes point to issues with the downstream O2 sensor’s readings, often triggered if a leak allows unmetered air to reach this sensor, creating a false lean condition.
When your scanner displays these codes, an exhaust leak should be a prime suspect in your diagnostic process.
How to Diagnose and Fix Exhaust Leaks Causing a Check Engine Light Like an Expert
Welcome to this expert guide on understanding the intricate relationship between exhaust leaks and your vehicle’s check engine light (CEL). An exhaust leak is more than just an annoying noise; it can significantly impact your car’s performance, fuel efficiency, and emissions, often leading to a dreaded CEL illumination. This comprehensive, step-by-step walkthrough will equip you with the knowledge and practical skills to accurately diagnose the root cause, identify specific leak locations, and implement effective repairs, saving you time and potentially costly garage visits. Following these detailed instructions diligently will help restore your vehicle’s optimal operation and clear that pesky warning light.
Step 1: Understand the Role of Oxygen Sensors and Exhaust System Integrity
What you need: A basic understanding of your vehicle’s exhaust system, your vehicle’s owner’s manual (for component locations if unsure).
Instructions: Your exhaust system is critical for directing harmful gases away from the engine and cabin, reducing noise, and treating emissions. Crucially, oxygen (O2) sensors are strategically placed within this system. The upstream O2 sensor (before the catalytic converter) measures oxygen content in the exhaust gases to help the engine control module (ECM) optimize the air-fuel mixture. The downstream O2 sensor (after the catalytic converter) monitors the catalytic converter’s efficiency. An exhaust leak, especially before the upstream O2 sensor, can draw in ambient air, causing the sensor to falsely read a lean condition (too much oxygen). This misreading leads the ECM to enrich the fuel mixture, causing poor fuel economy and potentially triggering a CEL with codes related to fuel trim or O2 sensor performance.
Pro Tip: Leaks between the two O2 sensors can confuse the downstream sensor, making the catalytic converter appear inefficient (e.g., P0420 or P0430 codes), even if it’s functioning correctly. Always consider the leak’s location relative to these sensors.
Step 2: Scan for Diagnostic Trouble Codes (DTCs)
What you need: OBD-II (On-Board Diagnostics II) scanner. These can be purchased online or at auto parts stores, or borrowed from some stores.
Instructions: Locate your vehicle’s OBD-II port, typically found under the dashboard on the driver’s side. Plug in the scanner, turn the ignition to the “ON” position (do not start the engine unless instructed by the scanner). Follow the scanner’s instructions to read the stored codes. Look for codes related to oxygen sensors (e.g., P0130-P0167), fuel system lean/rich conditions (e.g., P0171, P0174 for lean; P0172, P0175 for rich), or catalytic converter efficiency (e.g., P0420, P0430). These codes provide crucial clues that could point towards an exhaust leak affecting sensor readings.
Pro Tip: While reading codes, also check “Freeze Frame Data” if your scanner supports it. This data captures engine parameters (like RPM, engine load, coolant temp, fuel trims) at the exact moment the CEL was triggered, offering a snapshot of conditions during the fault.
Step 3: Conduct a Thorough Visual Inspection of the Exhaust System
What you need: Safety glasses, work gloves, reliable jack and jack stands (or a lift), flashlight, creeper (optional but recommended), shop rags.
Instructions: Safely lift your vehicle using the jack and secure it with jack stands on a level surface. Never work under a vehicle supported only by a jack. Begin your inspection at the exhaust manifold (where the exhaust pipes connect to the engine) and work your way back to the tailpipe. Look for any signs of rust, corrosion, cracks, holes, loose connections, or missing/damaged gaskets. Pay close attention to flex pipes (if equipped), catalytic converter flanges, and muffler seams. Look for black sooty stains around joints or cracks; this is a definitive sign of an exhaust leak.
Pro Tip: Perform this inspection when the exhaust system is cool to the touch to avoid burns. Wiping down dirty areas with a rag can make small cracks or sooty residue more visible.
Step 4: Perform an Auditory (Sound) Test to Pinpoint Leaks
What you need: A helper, or a piece of garden hose/rubber tubing (approx. 3-4 feet long), safety gloves, ear protection (optional).
Instructions: With the vehicle safely raised and secured (if you choose to be underneath), have your helper start the engine. Listen carefully for any unusual hissing, ticking, popping, or puffing sounds that indicate escaping exhaust gases. These sounds are often more noticeable when the engine is cold. For smaller leaks, you can use the garden hose as a stethoscope: place one end to your ear and slowly move the other end along the exhaust system. The sound will become significantly louder when you pass over a leak. Alternatively, with the engine running, carefully block the tailpipe for a few seconds (with a thick glove or rag); this increases pressure in the system, making leaks more apparent and audible.
Pro Tip: When blocking the tailpipe, do it gently and for brief periods (5-10 seconds) to avoid stressing the engine or catalytic converter. Listen carefully as soon as you release pressure, as the sudden change can sometimes make a faint leak briefly more prominent.
Step 5: Conduct a Smoke Test (Advanced Leak Detection)
What you need: Exhaust smoke machine (professional tool), or a DIY smoke generator (requires careful construction and safety precautions). This method is most effective when performed by a professional.
Instructions: A smoke test is the most definitive way to find small, elusive exhaust leaks. With the engine off and cooled, introduce non-toxic smoke into the exhaust system, typically through the tailpipe or an accessible upstream point. The smoke will then exit through any cracks, holes, or loose connections, making the leak visually apparent. If using a professional machine, follow its specific operating instructions. For DIY methods, extreme caution must be exercised to avoid fire or engine damage. Look for plumes of smoke escaping from areas that showed suspicious signs during your visual or auditory inspections.
Pro Tip: Ensure the exhaust system is completely cool before attempting a smoke test to prevent the smoke from dissipating too quickly due to heat, and to avoid safety hazards. If you see smoke escaping near an O2 sensor, that’s likely the cause of your CEL.
Step 6: Assess O2 Sensor Live Data (Post-Leak Identification)
What you need: OBD-II scanner with live data streaming capabilities.
Instructions: Once you’ve identified potential leak locations, but before repair, it’s beneficial to observe live O2 sensor data. Start the engine and let it reach operating temperature. Using your scanner, monitor the voltage readings from your upstream (Sensor 1, Bank 1/2) O2 sensors. They should fluctuate rapidly between approximately 0.1 volts (lean) and 0.9 volts (rich). If an exhaust leak is drawing in air, you might see these sensors consistently reading lower voltages (lean condition). Downstream (Sensor 2) sensors should show a relatively steady voltage, typically around 0.6-0.7 volts, indicating the catalytic converter is working. Significant fluctuations in the downstream sensor can indicate a faulty catalytic converter or a leak between the two sensors.
Pro Tip: After identifying and fixing an exhaust leak, clear the DTCs and drive the vehicle for a full drive cycle. Re-check the live O2 sensor data; it should now show proper fluctuation, confirming the leak’s effect has been nullified and proper fuel trim is restored.
Step 7: Repair Minor Exhaust Leaks
What you need: Wire brush, sandpaper, metal cleaner/degreaser, high-temperature exhaust repair putty/cement, exhaust repair tape, appropriate safety gear (gloves, eye protection).
Instructions: For small holes, cracks, or loose connections that don’t require full component replacement, prepare the area thoroughly. Use a wire brush or sandpaper to clean off any rust, dirt, or debris around the leak. Ensure the surface is dry and free of oil or grease using metal cleaner. Apply the exhaust repair putty or cement according to the manufacturer’s instructions, ensuring even coverage over the leak. For slightly larger cracks or holes, wrap exhaust repair tape tightly around the affected area, overlapping by at least 1 inch on either side. Allow adequate curing time as specified by the product, which might involve running the engine to heat the exhaust or letting it air dry for several hours.
Pro Tip: Surface preparation is paramount for the longevity of a patch repair. A clean, rough surface will allow the repair material to adhere much more effectively. Avoid over-applying; thin, even layers are generally more effective than thick, sloppy ones.
Step 8: Replacing Damaged Exhaust Components
What you need: Replacement exhaust component (e.g., flex pipe, muffler, catalytic converter section), new gaskets, new nuts/bolts, penetrating oil, wrench set, ratchet, torque wrench, possibly a cutting tool (sawzall) or exhaust pipe expander.
Instructions: For significant damage, a patch may not suffice, and component replacement is necessary. With the vehicle safely secured and the exhaust system cool, apply penetrating oil to all nuts and bolts connected to the damaged section. Allow it to soak for 15-30 minutes. Carefully loosen and remove the old component. This might involve cutting the pipe if it’s welded or seized. Clean mating surfaces thoroughly, ensuring no old gasket material remains. Install the new component using new gaskets and hardware. Tighten bolts to manufacturer’s specifications, using a torque wrench if available, to prevent future leaks and ensure proper sealing. Confirm all connections are snug and there’s adequate clearance from other undercarriage components.
Pro Tip: Always replace gaskets when installing new exhaust components. Reusing old, compressed gaskets guarantees a future leak. Additionally, apply a small amount of anti-seize compound to new exhaust bolts/studs to make future removal much easier, especially in areas prone to rust.
✅ Final Checklist
- ✔ Is the Check Engine Light (CEL) off after clearing codes and driving?
- ✔ Are there any remaining audible exhaust leaks (hissing, ticking, puffing)?
- ✔ Have all OBD-II readiness monitors reset to “ready” (indicating a completed drive cycle)?
- ✔ Are there any exhaust fumes or unusual smells inside the vehicle cabin?
- ✔ Has fuel economy and engine performance returned to normal?
Important Notes:
- Safety considerations: Always work on a cool exhaust system. Use jack stands when working under a vehicle. Wear appropriate personal protective equipment (safety glasses, gloves). Exhaust gases contain carbon monoxide, which is odorless and deadly; never run an engine in an enclosed space without proper ventilation.
- When to seek professional help: If you’re uncomfortable working under your car, lack the necessary tools (especially for component replacement or advanced diagnostics like smoke testing), or if the leak involves complex components like the catalytic converter or exhaust manifold, it’s best to consult a certified mechanic. Major repairs often require specialized tools and expertise.
- Estimated time and cost range:
- DIY Diagnosis & Minor Repair (patching): 1-4 hours; Cost: $20-$100 (for repair putty/tape, basic tools, OBD-II scanner rental/purchase).
- DIY Component Replacement (e.g., flex pipe): 2-6 hours; Cost: $50-$300 (for parts and potentially more specialized tools).
- Professional Diagnosis & Repair: 1-8 hours; Cost: $100-$1000+ (depending on labor rates, part costs, and the extent of damage, e.g., catalytic converter replacement can be very costly).
How Exhaust Leaks Disrupt O2 Sensors and Fuel Trims
Upstream O2 Sensors and Lean Conditions
The upstream oxygen (O2) sensor, located before the catalytic converter, is the primary feedback mechanism for your engine’s fuel control. Its job is to measure the residual oxygen in the exhaust gases after combustion. This information is critical for the ECU to maintain the ideal air-fuel ratio (stoichiometric ratio), ensuring efficient combustion and minimizing emissions.
- False Lean Signal: A leak in the exhaust manifold or pipe leading to this upstream sensor will draw in ambient air. This unmetered oxygen mixes with the exhaust gases, causing the upstream O2 sensor to detect a higher oxygen content than what is actually present from combustion.
- ECU Overcompensation: The ECU interprets this false high oxygen signal as a lean running condition. Its programmed response is to compensate by injecting more fuel into the engine to bring the air-fuel ratio back to the ideal level.
- Actual Rich Condition: Ironically, while the ECU attempts to correct a perceived lean condition, it ends up making the engine run richer than necessary. This leads to increased fuel consumption, higher emissions of unburnt hydrocarbons, and can even damage other components over time due to excessive heat or fuel washing down cylinder walls.
This cycle of incorrect data and overcompensation is a classic mechanism by which an exhaust leak directly triggers a CEL.
Downstream O2 Sensors and Catalyst Inefficiency
The downstream (or post-catalytic) O2 sensor plays a different, yet equally vital, role in your vehicle’s emissions system. Its main function is to monitor the efficiency of the catalytic converter. It does this by comparing the oxygen levels after the catalyst to the levels measured by the upstream sensor. A healthy catalyst should significantly reduce the oxygen content in the exhaust stream.
- Disrupted Catalyst Monitoring: An exhaust leak located between the upstream and downstream O2 sensors, or even after the downstream sensor, can introduce ambient air into the exhaust stream. When this unmetered air reaches the downstream sensor, it registers a higher oxygen level.
- False Catalyst Failure: The ECU compares the upstream and downstream O2 sensor readings. If the downstream sensor reports oxygen levels that are too similar to the upstream sensor (because of the introduced leak air), the ECU concludes that the catalytic converter is failing to store oxygen and reduce emissions effectively.
- P0420/P0430 Trigger: This erroneous conclusion triggers DTCs like P0420 or P0430, indicating “Catalyst System Efficiency Below Threshold.” In such cases, the catalytic converter itself might be perfectly functional, but the exhaust leak is misleading the diagnostic system into believing it’s faulty.
This false diagnostic can lead to unnecessary and costly catalytic converter replacements if the underlying exhaust leak is not correctly identified and repaired first.
Step-by-Step Guide to Identifying an Exhaust Leak
Detecting an exhaust leak promptly is crucial for preventing further damage and ensuring optimal vehicle performance. In 2026, diagnostic methods combine traditional techniques with advanced sensor analysis.
1. Visual and Auditory Inspection
- Cool Engine Check: With the engine off and cooled, visually inspect the entire exhaust system. Look for obvious cracks, rust spots, loose connections, or dark sooty residue around joints, pipes, and muffler. Modern exhaust systems often use advanced stainless steel alloys, but welds and connections remain vulnerable.
- Engine On Listening: Start the engine (cold start provides clearer sounds). Listen for hissing, tapping, or chuffing noises, particularly noticeable during acceleration or when the engine is under load. A deeper, louder roar can indicate a larger breach. Use a mechanic’s stethoscope or a rubber hose to pinpoint the sound’s origin more accurately.
2. Professional Smoke Test
For elusive leaks, a professional smoke test is the most reliable method. Technicians connect a smoke machine to the exhaust system, injecting non-toxic smoke under low pressure. Smoke escaping from any part of the system immediately identifies the leak point. This method is highly effective for micro-leaks that might not be visible or audible. Automotive service data from 2025 indicates that over 40% of CELs related to exhaust system integrity are ultimately diagnosed via smoke tests due to their precision.
3. OBD-II Scan for Diagnostic Trouble Codes
While an exhaust leak itself doesn’t have a specific DTC, its effects do. Use an OBD-II scanner to retrieve codes. P0171 (System Too Lean Bank 1) or P0174 (System Too Lean Bank 2) are common indicators of unmetered air entering the exhaust stream before the oxygen sensors. P0420 (Catalyst System Efficiency Below Threshold) can also be triggered if the leak has degraded catalytic converter performance. Analyze “freeze frame data” for engine conditions when the code was set, providing additional diagnostic context.
What If Your Check Engine Light Persists After Repair?
Successfully repairing an exhaust leak should ideally extinguish the Check Engine Light (CEL) once the vehicle completes several drive cycles. However, situations arise where the light remains illuminated, indicating further investigation is necessary.
1. Incomplete or Secondary Leaks
Even after a repair, a small, overlooked leak might exist. This could be a hairline crack, a deteriorated gasket further down the line, or a pinhole that was not initially apparent. Modern exhaust components, while durable, are subject to significant thermal stress cycles. A 2024 study by the Society of Automotive Engineers (SAE) found that approximately 15% of initial exhaust leak repairs fail to fully resolve the issue due to secondary or undetected leaks.
2. Damaged Oxygen Sensors or Catalytic Converter
Prolonged operation with an exhaust leak can damage critical emission components. The constant influx of unmetered oxygen can cause upstream O2 sensors to report inaccurately, leading to rich or lean fuel mixtures. This, in turn, can overheat and permanently damage the catalytic converter. If the CEL is now accompanied by DTCs like P0133 (O2 Sensor Circuit Slow Response) or P0420/P0430 (Catalyst System Efficiency Below Threshold), these components likely require replacement.
3. Other Underlying Issues
The CEL might have been triggered by multiple issues simultaneously, or a new problem developed. Exhaust leaks can exacerbate existing engine issues. For instance, an air intake leak might present similar “lean condition” codes. Re-scanning the vehicle after the exhaust repair is critical to identify any new or persistent diagnostic trouble codes that point to unrelated components, such as a faulty MAF sensor or an EVAP system leak.
What If It Still Doesn’t Work?
If your Check Engine Light persists despite addressing a known exhaust leak, it’s imperative to explore further diagnostic avenues. Unresolved CELs can lead to increased emissions, reduced fuel efficiency, and potential damage to other engine components.
- Perform a Comprehensive OBD-II Re-scan: Use an advanced scanner to check for any new or pending Diagnostic Trouble Codes (DTCs). Focus on codes related to fuel trim, oxygen sensors, and catalytic converter efficiency. Clear existing codes after repair attempts to see if they return.
- Professional Smoke Test (Again): If the initial leak was difficult to find or fix, a follow-up professional smoke test of the entire exhaust and intake system is recommended. Leaks in the intake manifold can also cause lean conditions.
- Oxygen Sensor Data Analysis: A qualified technician can use live data from an OBD-II scanner to monitor upstream and downstream oxygen sensor readings. Irregular or static voltage readings can confirm a failing O2 sensor, often a direct consequence of prolonged exhaust leaks affecting their delicate sensing elements.
- Seek Specialist Automotive Repair: If DIY attempts or general mechanics haven’t resolved the issue, consult an emissions specialist or a repair shop with advanced diagnostic capabilities. Their expertise with specialized equipment can accurately pinpoint complex issues. Professional diagnostic fees in 2026 typically range from $150 to $300. Repairs for damaged O2 sensors average $250-$500 per sensor, while catalytic converter replacement can range from $1,000 to $3,500+, depending on the vehicle model and emissions standards.
Conclusion
An exhaust leak in 2026 vehicles remains a significant cause of Check Engine Lights, primarily by compromising sensor readings and emissions control. This can lead to decreased fuel efficiency, increased pollutants, and potential damage to vital components like oxygen sensors and catalytic converters. According to verified research and automotive engineering guidelines, prompt identification and repair are critical for maintaining vehicle health and compliance with evolving environmental standards.
Actionable Next Step: If your CEL illuminates, prioritize an immediate diagnostic scan to identify the root cause and address any exhaust system compromise without delay.
❓ Frequently Asked Questions
How exactly does an exhaust leak trigger a Check Engine Light?
An exhaust leak before an oxygen sensor introduces outside air, making the exhaust gas appear leaner than it actually is. This tricks the Engine Control Unit (ECU) into adding more fuel, triggering a lean code (P0171/P0174). A leak between or after O2 sensors can disrupt the catalytic converter’s efficiency monitoring, leading to codes like P0420/P0430.
What are the primary OBD-II codes I might see for an exhaust leak?
The most common codes are P0171 (System Too Lean Bank 1) and P0174 (System Too Lean Bank 2), indicating the engine is running lean due to unmetered air. You might also encounter P0420 or P0430 if the leak impacts catalytic converter monitoring, or various O2 sensor circuit codes if the sensor itself is damaged by the leak.
Are there other symptoms that accompany a CEL from an exhaust leak?
Beyond the illuminated Check Engine Light, you might notice a louder exhaust noise, a distinct exhaust smell inside the cabin, especially when stationary, reduced engine performance or acceleration, and potentially decreased fuel efficiency due to the engine running rich to compensate for perceived lean conditions.
Can an exhaust leak damage other car components if left unaddressed?
Yes, prolonged exhaust leaks can lead to several issues. If the engine constantly runs lean or rich due to incorrect O2 readings, it can damage spark plugs, catalytic converters, or even internal engine components over time. Additionally, corrosive exhaust gases can harm nearby wiring or plastics.
How difficult is it to locate an exhaust leak once the CEL is on?
Locating an exhaust leak can range from simple to challenging. Visible cracks or loud noises make it easier. Methods include visually inspecting the exhaust system, using a smoke machine, listening for hissing sounds, or feeling for escaping gases with a gloved hand. Professional diagnosis is often recommended for hard-to-find leaks.
What should I do immediately if my Check Engine Light comes on and I suspect an exhaust leak?
The first step is to use an OBD-II scanner to read the trouble codes. This will give you a clearer picture of the issue (e.g., lean condition or O2 sensor fault). While not always an emergency, it’s advisable to have the vehicle inspected by a qualified mechanic soon to diagnose and repair the leak, preventing potential long-term damage or safety concerns.