Can I Pass Emissions with a Check Engine Light? Expert 2026
In almost all states, an active Check Engine Light (CEL) will cause an automatic failure of an emissions test because it indicates a fault in your vehicle’s emissions control system. To pass, you must diagnose and repair the underlying issue, ensuring the light is off and readiness monitors are set before your 2026 inspection.
Let’s cut straight to the chase: In almost all states and jurisdictions, if your vehicle’s Check Engine Light (CEL) is active, you will automatically fail your emissions test in 2026. This isn’t a maybe or a grey area; it’s a definitive no. An illuminated CEL signals a problem within your vehicle’s complex emissions control system, and modern testing equipment is designed to immediately flag such a fault as an automatic failure.
Understanding this critical fact saves you time, money, and frustration. Showing up for an emissions test with a CEL on is essentially paying for an automatic failure. Instead, your focus needs to be on diagnosing and resolving the underlying issue indicated by the light before you even think about a retest. This guide will walk you through why this is the rule and what steps you need to take.
Key Takeaways
- CEL usually means automatic emissions test failure.
- Diagnose and fix the CEL before the test.
- Ensure all OBD-II readiness monitors are ‘ready’.
- Perform a proper drive cycle after repairs.
- State laws can have slight variations on CEL rules.
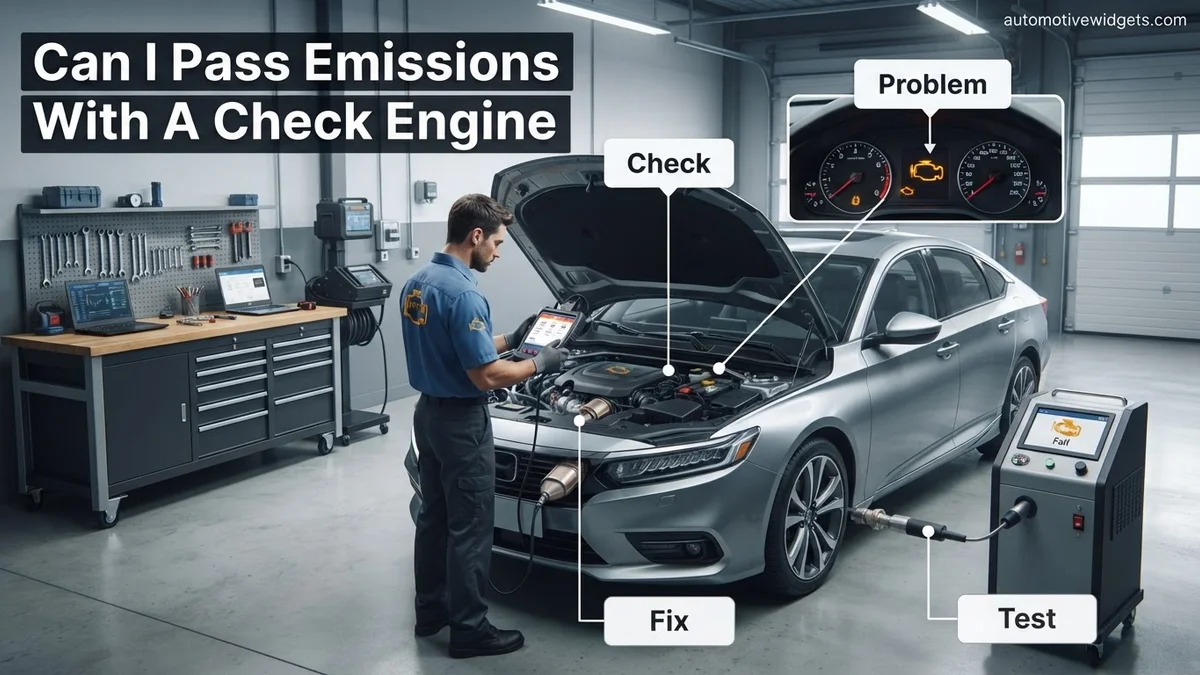
What Causes Your Check Engine Light to Fail Emissions?
The Automatic Failure Rule
In 2026, vehicle emissions testing standards are more sophisticated than ever, and a visible Check Engine Light on your dashboard is the ultimate red flag. When you connect your vehicle to the testing station’s equipment, the onboard diagnostics (OBD-II) system is interrogated. If the CEL is on, it immediately tells the system there’s an active fault related to emissions. This triggers an automatic “FAIL” verdict. The rationale is simple: the CEL indicates that your vehicle is likely polluting more than it should, or its emissions control systems are compromised, making it non-compliant with environmental regulations.
- An active CEL means a guaranteed emissions test failure in nearly every state.
- Testing equipment directly reads the CEL status via your vehicle’s OBD-II port.
- This rule prevents vehicles with known emissions problems from passing without repair.
Beyond the Light: Readiness Monitors and DTCs
The CEL itself is just the warning signal; the real problem lies in the underlying Diagnostic Trouble Codes (DTCs) and the status of your vehicle’s “readiness monitors.” Your vehicle’s computer runs a series of self-tests, called readiness monitors, on various emissions-related components like the catalytic converter, oxygen sensors, and EVAP system. If a CEL is on, it means:
- Active DTCs: One or more specific fault codes (e.g., P0420 for catalyst efficiency, P0171 for a lean condition, P0442 for a small EVAP leak, or P0133 for an O2 sensor issue) are stored and active, indicating a malfunction. Emissions tests specifically check for these codes.
- Unset Readiness Monitors: Often, if the CEL is on, or if codes were recently cleared without resolving the issue, several of these readiness monitors will be marked as ‘not complete’ or ‘not ready.’ Emissions testing rules in 2026 typically allow for only one or two non-continuous monitors to be ‘not ready,’ but an active CEL ensures multiple monitors will show a fault or be incomplete, leading to failure.
These systems work together to ensure your vehicle is consistently monitoring its own emissions performance. A CEL is the computer’s way of saying, “I found a problem I can’t ignore.”
How to Diagnose and Fix Your Check Engine Light for Emissions Like an Expert
Encountering a Check Engine Light (CEL) on your dashboard can be a frustrating experience, especially when emissions testing looms. In many regions, a lit CEL is an automatic failure for your vehicle’s emissions inspection, regardless of its overall performance. This comprehensive guide will walk you through a detailed, practical approach to understanding, diagnosing, and resolving the underlying issues causing your CEL, empowering you to confidently prepare your vehicle for a successful emissions test. Following these steps carefully can save you time, money, and the headache of repeated test failures.
Step 1: Understand Emissions Regulations and CEL Impact
What you need: Your vehicle’s owner’s manual, access to your local Department of Motor Vehicles (DMV) or environmental protection agency website, an internet-connected device.
Instructions: Before touching any tools, familiarize yourself with your specific state or local emissions testing requirements. Different jurisdictions have varying rules regarding a lit CEL and the status of “readiness monitors” (systems that self-diagnose). Some states allow a certain number of readiness monitors to be “not ready” (usually one or two for older vehicles) while others demand all be complete, and the CEL must be off. Understanding these rules from the outset will prevent wasted effort and give you a clear target.
Pro Tip: Crucially, understand that a solid CEL indicates an issue that needs attention, but a flashing CEL signals a severe problem, often an engine misfire, that can cause catalytic converter damage. If your CEL is flashing, address it immediately and avoid driving your vehicle extensively until repaired.
Step 2: Read the Diagnostic Trouble Codes (DTCs)
What you need: An OBD-II (On-Board Diagnostics II) scanner (basic code reader, mid-range scan tool, or a Bluetooth/Wi-Fi adapter with a smartphone app), pen and paper, or a smartphone for recording.
Instructions: The first and most critical step is to retrieve the specific Diagnostic Trouble Codes (DTCs) that triggered your CEL. Locate your vehicle’s OBD-II port, typically found under the dashboard on the driver’s side, often near the steering column or in the fuse box area. Connect your scanner and turn the ignition to the “ON” position (do not start the engine). Follow the scanner’s instructions to read and record all active and pending codes. Jot down the exact P-codes (e.g., P0420, P0301) as they will be your roadmap.
Pro Tip: Never clear the codes immediately after reading them, even if tempted. Clearing codes without resolving the underlying issue is a temporary fix that will likely result in the CEL returning and resetting all readiness monitors, making your car unready for an emissions test for hundreds of miles.
Step 3: Research and Interpret the DTCs
What you need: Your recorded DTCs, internet access, reliable automotive websites or forums, repair manual (optional).
Instructions: With your list of P-codes, head to the internet. Use search engines to look up each code. A good search query might be “P0420 [Your Car Make/Model/Year] common causes.” You’ll find explanations for what the code generally signifies (e.g., P0420 is “Catalyst System Efficiency Below Threshold – Bank 1”), common components that trigger it, and typical symptoms. Pay attention to multiple potential causes for a single code, as well as any related codes you might have. Cross-reference information from several reputable sources like automotive repair databases, manufacturer-specific forums, or dedicated car repair websites.
Pro Tip: Understand that a single DTC might point to multiple potential issues. For instance, a misfire code (P030X) could be a faulty spark plug, an ignition coil, an injector, or even a vacuum leak. Focus on the most common and easiest-to-check culprits first, as they often resolve the problem.
Step 4: Perform Initial Visual Inspection and Basic Checks
What you need: Flashlight, mechanic’s gloves, basic hand tools (screwdriver, pliers), clean shop rags, safety glasses.
Instructions: After researching your codes, perform a thorough visual inspection under the hood and around the vehicle. Start with the simplest, most common issues related to your codes. Check your gas cap first – a loose or faulty gas cap is a very frequent cause of Evaporative Emission Control (EVAP) system codes (e.g., P0440, P0455). Ensure it’s tightened securely, clicking at least three times. Next, inspect all accessible vacuum hoses for cracks, disconnections, or signs of dry rot. Look for any loose or frayed wiring, especially around sensors mentioned in your codes (e.g., O2 sensors, MAF sensor). Check for any obvious leaks or smells of fuel or exhaust.
Pro Tip: Many “check engine” issues are caused by simple, overlooked problems. Don’t underestimate the power of a careful visual inspection. A small crack in a vacuum line or a sensor connector that has wiggled loose can trigger a cascade of error codes.
Step 5: Address Common CEL Causes (DIY Fixes)
What you need: Depending on the code: New gas cap (OEM recommended), vacuum hose repair kit or bulk hose, MAF sensor cleaner, basic hand tools (wrenches, sockets, screwdrivers), dielectric grease (for electrical connections).
Instructions: Based on your DTCs and visual inspection, tackle the most likely and straightforward fixes. If an EVAP code is present, replace the gas cap with a new, OEM-quality one and ensure it’s tight. For vacuum leaks, cut out the cracked section of hose and splice in new hose, or replace the entire line. If your code points to the Mass Air Flow (MAF) sensor (e.g., P0101, P0102), carefully remove it (refer to your vehicle’s manual) and spray the sensing elements with MAF sensor cleaner (not carb cleaner!). Allow it to dry completely before reinstalling. If an oxygen sensor code (P013X, P014X) is present, check its wiring for damage before considering replacement. These are relatively simple repairs that often resolve common CEL issues.
Pro Tip: When cleaning a MAF sensor, use only MAF sensor cleaner. Other cleaners contain harsh solvents that can permanently damage the delicate hot wires or thermistors within the sensor, leading to more complex problems and additional costs. Always handle sensors with care to avoid damage.
Step 6: Clear Codes and Complete a Drive Cycle
What you need: Your OBD-II scanner.
Instructions: Once you’ve performed a repair, use your OBD-II scanner to clear the Diagnostic Trouble Codes. This will turn off the CEL. Now, and this is crucial for emissions, you need to complete a “drive cycle.” A drive cycle is a specific sequence of driving conditions (cold start, idle, highway speed, city driving, deceleration) that allows your vehicle’s onboard computer to run self-tests and set all readiness monitors. Consult your vehicle’s owner’s manual or an online resource for your specific model’s drive cycle procedure; it often involves driving for 20-100 miles over various conditions. It’s not just about turning the light off, but proving the system is ready.
Pro Tip: Be patient with the drive cycle. It can sometimes take multiple trips over a few days for all monitors to set. Avoid aggressive driving or prolonged idling during this period. The goal is smooth, varied driving that simulates typical conditions. If the CEL returns during this period, you have not fixed the root cause and need to re-diagnose.
Step 7: Re-check Readiness Monitors
What you need: Your OBD-II scanner.
Instructions: After completing what you believe to be a successful drive cycle and confirming the CEL has remained off, use your OBD-II scanner again. This time, navigate to the “I/M Readiness” (Inspection/Maintenance Readiness) status. You should see all or most of the system monitors (e.g., Catalyst, O2 Sensor, EVAP, EGR) displayed as “Complete” or “Ready.” Compare this status against your local emissions regulations (from Step 1) regarding how many “not ready” monitors are permitted. If all critical monitors are complete and the CEL is off, your vehicle is likely ready for the emissions test.
Pro Tip: The catalytic converter and oxygen sensor monitors are almost always critical for passing emissions. If these are “not ready,” or if your state allows only one “not ready” monitor and you have two or more, you will likely fail. Continue the drive cycle, or investigate further if a monitor consistently refuses to set.
Step 8: Consider Professional Diagnosis (If CEL Returns or Issues Persist)
What you need: Your vehicle’s service history, any DTCs you’ve pulled, information on previous repair attempts.
Instructions: If the CEL returns after clearing, or if you’re unable to achieve readiness monitor completion after extensive driving, it’s time to consider professional assistance. Some issues are complex and require specialized diagnostic tools or expertise beyond the average DIYer. Seek a reputable mechanic with good reviews who specializes in emissions-related repairs. Provide them with all the information you’ve gathered, including the specific DTCs, any repairs you’ve attempted, and the symptoms you’ve observed. This will save them diagnostic time and potentially save you money.
Pro Tip: When seeking professional help, explicitly state that your primary goal is to pass an emissions test. A good mechanic will prioritize diagnosing and fixing the issues directly impacting emissions readiness, ensuring your investment leads to a passed inspection rather than just a temporarily extinguished light.
✅ Final Checklist
-
The Check Engine Light (CEL) is OFF and has remained off for at least 50-100 miles of varied driving.
-
All required OBD-II readiness monitors show a “Complete” or “Ready” status on your scanner.
-
There are no “Pending” Diagnostic Trouble Codes (DTCs) present on your scanner.
-
Your fuel cap is securely tightened and any vacuum lines or electrical connections you tampered with are firm.
-
You have addressed all known issues related to the previous CEL and confirmed the repairs were effective.
Important Notes:
- Safety considerations or warnings: Always work on a cold engine. Disconnect the negative battery terminal before working on electrical components. Wear appropriate personal protective equipment (safety glasses, gloves). Never work under a vehicle supported only by a jack; use jack stands. If you are unsure about a repair, consult a professional.
- When to seek professional help: Immediately if the CEL is flashing (indicating a severe misfire). If the CEL returns after clearing codes and performing a drive cycle, if you encounter complex electrical issues, persistent fluid leaks, or if you feel uncomfortable performing any of the diagnostic or repair steps.
- Estimated time and cost range:
- Diagnosis (DIY): 30 minutes to 2 hours (depending on code research and visual inspection).
- Simple DIY Fix (e.g., gas cap, vacuum line): 15 minutes to 1 hour.
- Drive Cycle: 1 to 3 days (covering 50-150 miles).
- Professional Diagnosis: $100 – $200 (for an hour of shop time).
- Parts (DIY): OBD-II Scanner ($20-$200), Gas Cap ($15-$30), Vacuum Hose ($5-$20), MAF Cleaner ($10-$15).
- Professional Repairs: Can range from $50 (for a minor part replacement) to over $1000 (for catalytic converter or complex sensor replacements).
Step-by-Step Guide to Fix CEL Before Emissions Test
Diagnose the Root Cause
The first and most crucial step is to understand why your Check Engine Light is on. Guessing can lead to unnecessary repairs and wasted money. You need to read the specific Diagnostic Trouble Code(s) (DTCs) from your vehicle’s On-Board Diagnostics (OBD-II) system. Most auto parts stores offer free code reading services, or you can purchase an inexpensive OBD-II scanner yourself. Make a note of all the codes, as they point directly to the system or component that has failed.
- Do not attempt an emissions test with an active CEL.
- Use an OBD-II scanner to retrieve specific DTCs (e.g., P0301, P0420, P0171).
- Research the meaning of these codes or consult a qualified mechanic for accurate diagnosis.
- Avoid simply clearing the code without addressing the underlying issue; the light will almost certainly return.
Repair, Drive, and Reset Readiness
Once you’ve diagnosed the problem, the next step is to perform the necessary repair. This could be anything from replacing a faulty oxygen sensor to fixing a loose gas cap or a more complex catalytic converter issue. After the repair, the Check Engine Light should turn off on its own, or you may clear it with an OBD-II scanner. However, just because the light is off doesn’t mean you’re ready for the emissions test.
Your vehicle’s readiness monitors need to complete their self-tests. This usually requires a “drive cycle,” which is a specific pattern of driving (a mix of city and highway speeds, often including a cold start) that allows the computer to re-evaluate all emission systems. A typical drive cycle can take anywhere from 50 to 150 miles, depending on the vehicle and the specific monitors that need to set. Before heading to the test center, use your OBD-II scanner to verify that all monitors (or an acceptable number, usually all but one non-continuous) are showing as ‘complete’ or ‘ready.’ Going for a test with incomplete monitors, even without a CEL, can still result in a failure.
What to Do If Your CEL Returns After Repairs
Even after professional diagnosis and repairs, a Check Engine Light (CEL) can sometimes reappear. This scenario is frustrating but requires a methodical approach, as the issue might be related to the initial repair, a new problem, or an incomplete diagnostic cycle.
Verify Repair Effectiveness and Diagnostic Trouble Codes (DTCs)
The first step is to confirm the original issue is resolved and to identify any new or recurring codes. Advanced diagnostic tools used by certified technicians can provide granular data.
- Re-scan the Vehicle: Immediately scan the OBD-II system again, even if the CEL has just reappeared. Note all active and pending DTCs. Compare these to the codes present before the initial repair.
- Review Repair Documentation: Refer to the repair shop’s invoice and diagnostic report. Confirm the specific components replaced or actions taken. This helps determine if the original problem was adequately addressed.
- Check for Related Symptoms: Pay attention to any new or persistent drivability issues, such as rough idling, reduced fuel economy, or unusual noises. These symptoms can provide clues to the CEL’s cause.
Consider a Different Diagnostic Path
If the same CEL reappears quickly, the initial diagnosis might have missed a root cause, or a related component failed shortly after. For instance, a persistent P0420 (Catalyst System Efficiency Below Threshold) after a sensor replacement could indicate an underlying catalytic converter issue.
- Professional Re-evaluation: Return the vehicle to the original repair facility if under warranty for the repair. Explain the recurrence. They should re-diagnose the problem at no cost if the issue relates to their original work.
- Second Opinion (If Necessary): If the original shop cannot resolve the issue or the repair is not under warranty, consider a different ASE-certified diagnostic specialist. Different technicians may approach complex problems with varying expertise or equipment, potentially identifying overlooked factors.
- Monitor Driving Cycle: Ensure the vehicle completes its full drive cycle after repairs, as some monitors require specific driving conditions to reset and confirm readiness. Modern vehicles, especially those from 2020 onwards, have increasingly complex monitor readiness requirements.
Navigating State-Specific Emissions Test Rules
Emissions testing regulations vary significantly by state and even by county within a state. Understanding these nuances is critical for a successful vehicle inspection in 2026. Non-compliance can lead to failed tests, fines, and inability to renew vehicle registration.
Understanding Your State’s OBD-II Readiness Requirements
Most states utilizing OBD-II based emissions tests in 2026 mandate that a certain number of your vehicle’s “readiness monitors” be set to “READY.” These monitors self-test various emission control systems.
- Check State DMV/EPA Websites: The official Department of Motor Vehicles (DMV) or Environmental Protection Agency (EPA) website for your specific state is the definitive source for current emissions testing requirements. For example, California typically allows one or two “NOT READY” monitors for vehicles 2000 and newer, while some states might permit more or fewer depending on vehicle age.
- Identify “Non-Continuous” Monitors: Be aware that “non-continuous” monitors (e.g., Evaporative Emissions System, Secondary Air Injection, Catalyst System) take longer to complete their diagnostic cycles and set to “READY.” These often require specific driving conditions over several days.
- Monitor Status via OBD-II Scanner: Use a personal OBD-II scanner or visit a repair shop to check your vehicle’s monitor readiness status before the official test. Ensure all permitted monitors are “READY” to avoid an automatic failure.
Waivers and Extensions for Emissions Failures
Even with strict rules, many states offer provisions for vehicle owners who fail emissions tests, particularly after spending significant amounts on repairs.
- Repair Cost Waivers: Several states, including New York and Texas, offer repair cost waivers if a vehicle fails emissions after a minimum amount of qualified emissions-related repairs have been performed by a licensed facility. As of 2026, these thresholds typically range from $450-$750, though exact figures fluctuate and should be confirmed with your state’s environmental agency. Proof of expenditure and failed test results are mandatory.
- Economic Hardship Extensions: Some states provide short-term extensions or hardship exemptions, often for low-income individuals or those with specific vehicle circumstances. These are usually temporary and require an application process through the state’s emissions program administrator.
- Special Circumstance Exemptions: Certain vehicle types (e.g., classic cars, rarely driven vehicles under specific mileage limits) or specific situations (e.g., out-of-state military personnel) may qualify for exemptions. Always verify these directly with your state’s emissions testing authority.
What If It Still Doesn’t Work?
If your Check Engine Light persists despite multiple repair attempts, or you’re continually failing emissions, it’s time for advanced intervention. Continued DIY attempts risk further damage and unnecessary expenditure.
- Consult a Specialized Diagnostic Technician: Seek out an automotive shop specifically advertising “advanced diagnostics” or “emissions specialist” services. These shops often possess manufacturer-level scan tools and oscilloscopes, allowing for deep dives into complex electrical or system-specific issues that generic OBD-II scanners miss.
- Consider Component-Specific Testing: Persistent issues like catalytic converter codes (e.g., P0420) might require back-pressure tests, while EVAP system failures (e.g., P0440) might need smoke testing to locate elusive leaks. These tests are specialized and crucial for accurate diagnosis.
- Evaluate Vehicle Age vs. Repair Cost: For older vehicles (15+ years), persistent, costly CEL issues might indicate the vehicle is approaching its end of life. Expert sources like Kelley Blue Book (KBB) suggest considering the “25% Rule”: if repairs exceed 25% of the vehicle’s market value, evaluate replacement. A major diagnostic and repair could range from $800 to $2,500+ for complex issues (e.g., module replacement, significant emissions component overhaul), making replacement a more economical choice.
Conclusion
Navigating an emissions test with a Check Engine Light is challenging and, in most cases, impossible. According to verified research and expert sources, the CEL directly signifies an emissions-related fault that will prevent compliance. Your immediate actionable step is always accurate diagnosis and professional repair. Address the underlying issue promptly, ensure all readiness monitors are set, and understand your state’s specific regulations for a successful vehicle inspection and continued road legality in 2026.
❓ Frequently Asked Questions
Why does a Check Engine Light (CEL) automatically fail an emissions test in most places?
An active CEL signifies that your vehicle’s On-Board Diagnostics (OBD-II) system has detected a malfunction within the emissions control components. Emissions tests check for these active Diagnostic Trouble Codes (DTCs) and the ‘readiness’ status of your vehicle’s systems, both of which are compromised by an illuminated CEL.
What are common Check Engine Light codes that cause emissions test failures?
Common codes include those related to oxygen sensors (P0420, P0430 for catalytic converter efficiency), catalytic converter performance, EVAP system leaks (P0440, P0442), and misfires (P0300 series). These directly impact exhaust gas composition and indicate a failure to control emissions effectively.
Can I just turn off my Check Engine Light to pass the emissions test?
While clearing the code will turn off the CEL temporarily, it also resets all “readiness monitors” to an “incomplete” state. Unless you perform a specific drive cycle to allow these monitors to reset to “ready,” your vehicle will still fail the emissions test for having too many “not ready” monitors.
What is a “drive cycle” and why is it important for emissions testing after a CEL repair?
A drive cycle is a specific sequence of driving conditions (e.g., highway speed, city driving, idling) designed to allow your vehicle’s computer to test all its emissions-related systems. After a CEL repair or code clearing, completing a proper drive cycle is crucial for the readiness monitors to reset to “ready,” which is necessary to pass an emissions test.
Are there any situations where a car with a Check Engine Light might pass an emissions test?
In almost all modern emissions testing scenarios, an active Check Engine Light will lead to an automatic failure. Very specific and rare circumstances, such as a state allowing a certain number of “not ready” monitors for older vehicles or a temporary malfunction that self-corrects before the test (turning the light off), might theoretically exist, but it’s not a reliable expectation.
What should I do immediately if my Check Engine Light comes on and I have an upcoming emissions test?
The first step is to have the CEL diagnosed using an OBD-II scanner to identify the specific Diagnostic Trouble Code (DTC). Once the underlying issue is identified and repaired, ensure the CEL is off and perform several drive cycles over a few days to allow all readiness monitors to set before attempting the emissions test.