How Much Does It Cost to Replace a Oxygen Sensor in 2026
Replacing an oxygen sensor typically costs between $200 and $400 total, depending on your vehicle and mechanic rates. Parts generally cost $50 to $250, while professional labor adds another $100 to $200. Luxury vehicles or hard-to-reach sensors can push these costs even higher.
Replacing a car oxygen sensor typically costs between $200 and $400 in 2026, combining both parts and professional labor. If you take your vehicle to a mechanic or dealership, expect to pay anywhere from $50 to $250 for the actual sensor component and another $100 to $200 for the installation labor.
Ignoring a failing oxygen sensor will quickly cost you more money at the fuel pump. A bad sensor sends incorrect data to your car’s computer, ruining your fuel economy and potentially destroying your catalytic converter—a repair that can easily exceed $1,000. Getting this fixed promptly protects your wallet and keeps your engine running efficiently.
Key Takeaways
- Total replacement costs generally range from $200 to $400 per sensor.
- Parts account for $50 to $250 of the total price.
- Labor rates usually span $100 to $200 for a standard replacement.
- Upstream sensors are often more expensive than downstream options.
- Replacing a faulty sensor quickly prevents severe fuel economy loss.
What Causes an Oxygen Sensor to Fail and How to Diagnose It
Common Failure Triggers
Oxygen sensors live inside your exhaust pipe, enduring extreme heat and harsh chemical conditions every time you drive. Over time, several factors cause these vital components to stop working correctly:

- Contamination from engine oil or coolant leaks burning inside the exhaust system
- Normal wear and tear after reaching the 100,000-mile threshold
- Buildup of carbon deposits from rich fuel mixtures
- Internal electrical heater failure due to age or vibration
Spotting the Warning Signs
Your car usually gives you clear hints when an oxygen sensor goes bad. Watch out for these common symptoms before your next drive in 2026:
- The check engine light illuminates on your dashboard
- Your fuel economy drops noticeably between fill-ups
- The engine idles roughly or misfires when you stop at a light
- Your car fails a state emissions test
Oxygen Sensor Replacement Costs: What Causes It and How to Fix It
Dealing with a failing oxygen sensor can be frustrating, especially when that dreaded check engine light illuminates your dashboard. Understanding how much it costs to replace an oxygen sensor involves looking at parts, labor, and potential diagnostic fees. This comprehensive walkthrough breaks down the actual expenses you can expect, how to identify if you truly need a replacement, and whether you should tackle the job yourself or hire a professional mechanic.
Step 1: Scan for Diagnostic Trouble Codes
What you need: OBD2 scanner or code reader, vehicle owner manual.
Instructions: Before spending money on a new sensor, you must confirm the exact issue. Locate the OBD2 port under your driver-side dashboard, plug in your diagnostic scanner, and turn the ignition key to the “on” position without starting the engine. Read any stored codes. Oxygen sensor codes typically range from P0130 to P0167. Write down the specific codes to determine whether the issue is upstream (before the catalytic converter) or downstream, and which bank of cylinders is affected.
Pro Tip: Many auto parts stores will scan your codes for free in the parking lot, saving you the initial cost of purchasing a scanner.
Step 2: Calculate the Cost of Parts
What you need: Vehicle make, model, year, and internet access or a local auto parts store.
Instructions: Oxygen sensor prices vary widely depending on your vehicle. Universal sensors can cost as little as $20 to $40, but direct-fit OEM (Original Equipment Manufacturer) sensors generally range from $60 to $250. Luxury, diesel, or performance vehicles may feature wideband air-fuel ratio sensors that cost upwards of $300 to $500 each. Always purchase the correct sensor specified for your exact engine configuration to avoid poor fuel economy and recurring warning lights.
Pro Tip: Avoid ultra-cheap, unbranded sensors found online marketplaces, as they frequently fail prematurely and trigger persistent check engine lights.
Step 3: Factor in Professional Labor Rates
What you need: Local mechanic quotes, phone or email.
Instructions: If you decide not to do the work yourself, you will need to pay for labor. Most repair shops and dealerships charge between one to two hours of labor for an oxygen sensor replacement. Depending on your geographical location and shop rates, labor typically costs $100 to $250. Total professional replacement costs—combining parts and labor—usually land between $150 and $450 per sensor. Keep in mind that rusted or seized exhaust threads can add extra labor time and fees.
Pro Tip: Ask the shop for a written quote that separates parts and labor costs so you can verify you are not being overcharged for the components.
Step 4: Prepare the Vehicle for a DIY Replacement
What you need: Hydraulic floor jack, jack stands, wheel chocks, safety glasses.
Instructions: If you choose the DIY route to save on labor, safety comes first. Park your car on a flat, level surface, engage the emergency brake, and place wheel chocks behind the rear tires. Use the hydraulic floor jack to lift the vehicle securely and lower it onto sturdy jack stands. Never work under a vehicle supported only by a jack. Allow the exhaust system to cool completely for at least two hours; exhaust pipes can easily reach temperatures exceeding 500 degrees Fahrenheit and cause severe burns.
Pro Tip: Spray penetrating oil, such as PB Blaster or WD-40 Specialist, onto the sensor threads at least 30 minutes before you begin working to loosen stubborn rust.
Step 5: Locate and Unplug the Old Sensor
What you need: Flashlight, trim removal tool (optional).
Instructions: Trace your exhaust system to find the oxygen sensor, which looks like a spark plug with wires attached. Upstream sensors sit near the exhaust manifold, while downstream sensors sit after the catalytic converter. Follow the wiring harness up to its electrical connector. Press the plastic release tab on the connector and gently pull apart the two halves. You may need a flathead screwdriver or trim tool to release any plastic clips securing the wire to the vehicle’s undercarriage or heat shield.
Pro Tip: Take a photo of the wire routing with your smartphone before disconnecting it so you can route the new sensor’s wire identically.
Step 6: Remove and Inspect the Failing Sensor
What you need: Oxygen sensor socket (7/8-inch or 22mm with a side slot), breaker bar or ratchet.
Instructions: Slide the specialized oxygen sensor socket over the sensor body, aligning the side slot with the attached wires. Attach your ratchet or breaker bar. Turn counterclockwise to loosen the sensor. Because of extreme heat cycles, these sensors can be extremely tight; apply steady, firm pressure to break it loose. Once loose, unscrew it by hand. Inspect the tip of the old sensor: a heavy black soot coating points to an overly rich fuel mixture, while a white powdery buildup indicates coolant or oil contamination.
Pro Tip: If the sensor socket slips and rounds off the hex nut, use a torch to heat the surrounding exhaust metal slightly, or switch to locking pliers.
Step 7: Install the New Oxygen Sensor
What you need: Anti-seize lubricant (often pre-applied to new sensors), torque wrench.
Instructions: Check your new sensor to see if anti-seize compound is already on the threads. If not, apply a thin coat carefully, keeping the compound away from the louvered tip, as contamination will ruin the sensor. Screw the new sensor into the exhaust port by hand to ensure the threads engage smoothly without cross-threading. Tighten it securely using your oxygen sensor socket. If you have clearance, use a torque wrench to tighten it to the manufacturer specification, usually around 30 to 40 ft-lbs. Plug the electrical connector back in firmly until you hear a click.
Pro Tip: Secure any excess wiring with high-temperature zip ties so it cannot touch the hot exhaust pipes and melt.
Step 8: Clear Codes and Test Drive
What you need: OBD2 scanner.
Instructions: Once everything is reassembled and tools are cleared away, remove your jack stands and lower the vehicle back to the ground. Plug your OBD2 scanner back into the port and select the “Clear Codes” or “Reset Check Engine Light” function. Turn the ignition back on and start the engine. Take your car for a 15-minute test drive at varying speeds—city streets and highway driving—to allow the computer to run its internal self-tests and confirm the new sensor is communicating properly.
Pro Tip: If the check engine light returns immediately, re-check your electrical connector to ensure it clicked completely into place.
✅ Final Checklist
- Diagnostic trouble codes have been read, documented, and successfully cleared.
- The exact correct part number (OEM or high-quality aftermarket) was purchased and installed.
- Exhaust components have cooled completely before beginning physical work.
- The new sensor is threaded correctly and torqued securely without cross-threading.
- Wiring is safely secured away from hot exhaust pipes with high-temperature clips or zip ties.
- A test drive was completed without the check engine light returning.
Important Notes:
- Always wear safety glasses and gloves when working underneath a vehicle to protect against falling debris and sharp metal edges.
- Seek professional help if the exhaust threads are severely stripped or damaged during sensor removal, as this requires specialized re-threading tools or welding.
- Estimated total cost for DIY ranges from $30 to $300 depending on the part; professional replacement ranges from $150 to $450 with an estimated timeframe of 1 to 2 hours.
How Much Parts and Labor Actually Cost for an O2 Sensor
Breaking Down Component Costs
When you buy a replacement oxygen sensor, the price varies based on your specific vehicle and sensor type. Standard aftermarket sensors usually run between $50 and $150. If you drive a high-end luxury vehicle, a European import, or a specialized wideband air-fuel ratio sensor, parts prices can climb up to $250 or more.
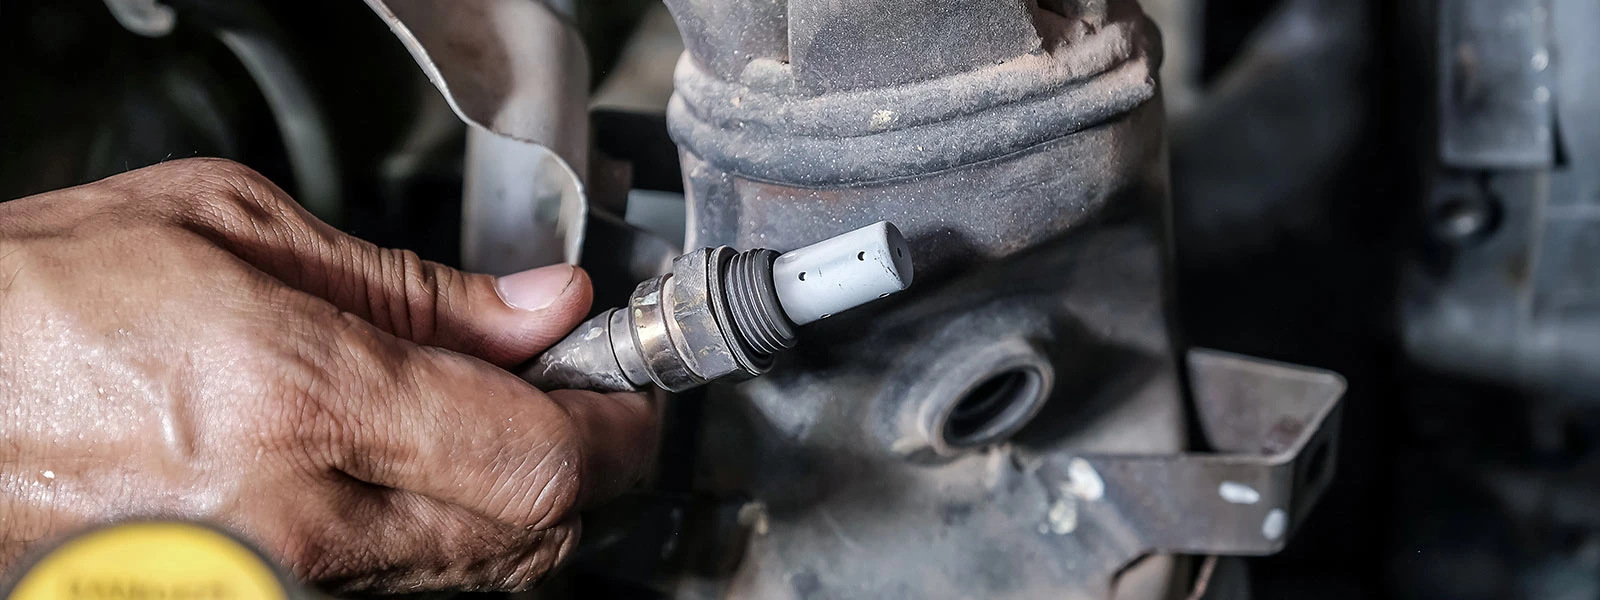
Universal sensors are cheaper upfront, but they require splicing wires. Most mechanics prefer exact-fit OEM or premium aftermarket sensors with factory plugs to ensure a reliable connection and avoid future electrical faults.
Understanding Labor Charges
Auto repair shops generally bill between one and two hours of labor for an oxygen sensor replacement. Depending on local shop rates, labor costs fall squarely between $100 and $200. Some sensors sit right out in the open on the exhaust manifold, taking a technician ten minutes to swap out. Other sensors are buried deep near the catalytic converter or firewall, requiring specialized sockets and extra time to access without breaking rusted exhaust studs.
How to Fix and Replace an Oxygen Sensor Step-by-Step
Replacing an oxygen sensor is a manageable DIY project for anyone with basic mechanical knowledge. According to automotive service standards, the entire process takes about 45 to 60 minutes. Proper preparation prevents stripped exhaust threads and burned knuckles.
Tools and Preparation
Before lifting the vehicle, gather the necessary equipment specified by technicians. You will need a standard socket set, a specialized 7/8-inch oxygen sensor socket with a cutout for the wiring harness, a breaker bar, and penetrating oil. Safety glasses and high-temperature anti-seize lubricant are mandatory for a successful installation.
Step-by-Step Replacement Procedure
- Disconnect the negative vehicle battery terminal to reset the electronic control unit and prevent electrical shorts.
- Safely elevate the vehicle using a hydraulic floor jack and secure it with heavy-duty jack stands. Never work under a car supported only by a jack.
- Locate the faulty sensor along the exhaust pipe. Follow the wiring harness to find its electrical connector, press the release tab, and unplug it.
- Apply a generous amount of penetrating oil to the sensor base. Let it sit for 15 minutes if the vehicle exhibits heavy rust.
- Slide the slotted oxygen sensor socket over the sensor. Attach your breaker bar and turn counterclockwise to loosen the component.
- Inspect the exhaust threads. Clean any carbon buildup using a wire brush before installing the new component.
- Coat the threads of the new oxygen sensor with high-temperature anti-seize compound, taking care not to contaminate the sensor tip.
- Thread the new sensor into the exhaust by hand to prevent cross-threading, then tighten it to the manufacturer’s specified torque rating, typically around 30 to 40 ft-lbs.
- Plug the wiring harness back into the connector until it clicks securely. Lower the vehicle and reconnect the battery.
What If It Still Doesn’t Work?
If the check engine light remains illuminated after installing a brand-new oxygen sensor, the underlying fault lies elsewhere in the emissions system. According to diagnostic standards, drivers should follow these sequential troubleshooting steps:
- Clear the diagnostic trouble codes using an OBD2 scanner, then drive the vehicle for 15 minutes to see if the error returns.
- Inspect the wiring harness and electrical fuses for melting, fraying, or loose pins that disrupt signal voltage to the engine computer.
- Test for upstream exhaust leaks near the manifold or gasket, which allow ambient air to enter and trick the new sensor into reading a lean condition.
- Check for a malfunctioning catalytic converter or failing mass airflow sensor, both of which trigger identical diagnostic codes.
- Seek professional diagnostic assistance from a certified mechanic if the code persists. Professional diagnostic fees typically range from $100 to $150 to pinpoint complex electrical faults.
Conclusion
Addressing a failing oxygen sensor promptly restores optimal fuel economy and prevents long-term damage to your catalytic converter. While replacement costs vary between $150 and $400 depending on labor and vehicle complexity, tackling the job yourself yields substantial savings. According to verified research and automotive service data from 2026, catching emissions issues early is the most cost-effective way to maintain vehicle longevity. Schedule your repair or diagnostic check today to ensure your vehicle runs efficiently and passes local emissions testing.
❓ Frequently Asked Questions
How many oxygen sensors does a standard car have?
Most modern vehicles have at least two oxygen sensors, but cars with V6 or V8 engines often feature four or more sensors located before and after the catalytic converters.
What is the difference between upstream and downstream sensors?
Upstream sensors sit before the catalytic converter to monitor air-fuel ratios, while downstream sensors sit after the converter to measure its efficiency. Upstream sensors are usually more expensive.
What are the common symptoms of a failing oxygen sensor?
Common warning signs include an illuminated check engine light, rough idling, engine stalling, decreased fuel efficiency, and a failing emissions test.
Do I need to replace all oxygen sensors at once?
No, you only need to replace the specific sensor that has failed and thrown a diagnostic trouble code, unless multiple sensors have reached the end of their lifespan simultaneously.
Will a new oxygen sensor turn off the check engine light automatically?
The light may turn off on its own after several normal driving cycles, or you can clear the trouble code immediately using an OBD-II scanner.
Why do luxury or imported vehicles cost more to service?
Imported and luxury cars often use specialized wideband sensors and feature tightly packed engine bays that require extra labor time to access.