What Is The Procedure For Jacking Up A Vehicle Real 2026
Safely jacking up a vehicle requires adherence to a precise, step-by-step procedure to prevent accidents and damage. Always prioritize safety by using the correct equipment, identifying proper jack points, and securing the vehicle with jack stands. This guide provides an expert walkthrough for 2026.
To safely lift your vehicle off the ground in 2026, a precise, step-by-step method is non-negotiable. Many routine maintenance tasks, from tire rotations to brake inspections, require you to raise your vehicle, and doing so incorrectly can lead to severe injury, costly damage, or even a fatal accident. This guide breaks down the correct procedure, ensuring you can perform undercarriage work or tire changes securely and efficiently, providing peace of mind and protecting your investment.
Key Takeaways
- Always use jack stands for vehicle support.
- Consult owner’s manual for correct jack points.
- Ensure work surface is level and firm.
- Chock wheels not being lifted for stability.
- Never work under a vehicle supported only by a jack.
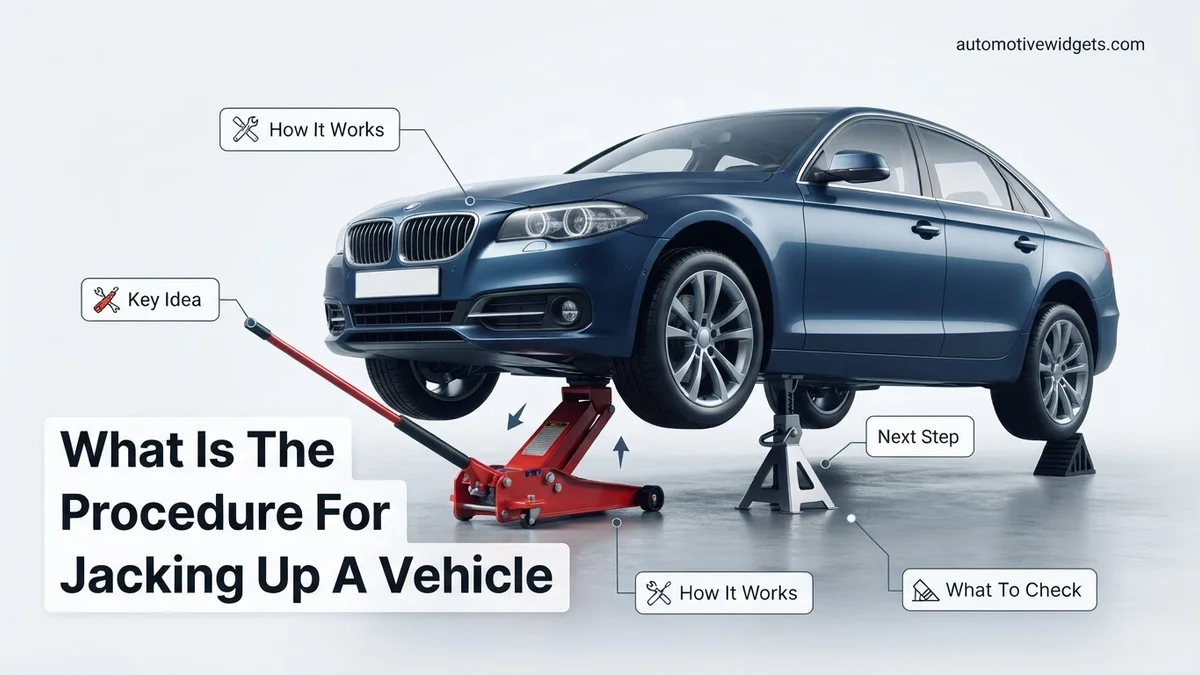
What Causes Unsafe Vehicle Jacking? Understanding Risks & Poor Practices
Ignoring proper safety protocols when jacking up a vehicle is extremely dangerous. Even a seemingly minor oversight can compromise stability, leading to catastrophic failure. Understanding common pitfalls helps you avoid them, ensuring every lift is safe and controlled.
Ignoring Critical Preparation Steps
Many accidents occur before the jack even touches the vehicle, simply by skipping crucial setup. This often happens due to rushing or overconfidence, especially with familiar tasks.
- Uneven or Soft Ground: Attempting to lift a vehicle on gravel, dirt, or a sloped driveway is a recipe for disaster. The jack can sink, slide, or tip, causing the vehicle to fall. Always use a flat, hard, and stable surface like concrete.
- Forgetting the Parking Brake: A rolling vehicle can crush you. Failing to fully engage the parking brake, or transmission in “Park” (automatic) or “Gear” (manual), allows unintended movement, negating any stability the jack provides.
- Skipping Wheel Chocks: Chocks are essential safety backups. Without them, the wheels not being lifted can still rotate or slide, particularly on any slight incline, causing the entire vehicle to shift unexpectedly.
Misidentifying Jack Points and Support Locations
Modern vehicles, including new 2026 models, feature specific, reinforced areas designed to withstand the immense pressure of a jack. Lifting from the wrong spot can cause serious structural damage or instability.
- Lifting on Weak Components: Never place a jack under suspension arms, plastic body panels, brake lines, or fuel lines. These areas are not designed to support vehicle weight and will likely deform, break, or cause the jack to slip.
- Ignoring the Owner’s Manual: The most precise information on approved jack points and jack stand locations is always in your vehicle’s owner’s manual. These points are typically reinforced frame rails or specific pinch welds, often marked with small indentations or arrows. Guessing risks bending critical undercarriage components or causing the vehicle to slide off the jack.
From Start to Finish: Jacking Up Your Vehicle Explained
Safely jacking up a vehicle is a fundamental skill for any car owner, crucial for tasks ranging from changing a flat tire to performing routine maintenance like oil changes or brake inspections. This comprehensive guide will walk you through each critical step, ensuring you understand the correct procedures, necessary tools, and vital safety precautions. Following these steps meticulously will help prevent accidents, vehicle damage, and personal injury, making your DIY automotive projects both efficient and secure.
Step 1: Prepare Your Workspace and Gather Tools
What you need: A hydraulic floor jack (rated for your vehicle’s weight), at least two sturdy jack stands, wheel chocks, your vehicle’s owner’s manual, work gloves, and potentially a flashlight or headlamp for better visibility.
Instructions: Begin by selecting a flat, solid, and level surface for your work. Asphalt or concrete driveways are ideal; avoid soft ground like grass or dirt, which can compromise the stability of your jack and stands. Consult your vehicle’s owner’s manual to identify the precise jack points and recommended jack stand locations for your specific make and model. This preliminary check is paramount as improper placement can cause severe damage to your vehicle’s frame or mechanical components.
Pro Tip: Never work on an inclined surface, even if it’s a slight slope. Gravity is not your friend when lifting heavy objects, and an uneven surface drastically increases the risk of your vehicle rolling or slipping off the jack.
Step 2: Secure the Vehicle
What you need: Wheel chocks.
Instructions: Before placing any jack under the vehicle, ensure the parking brake is fully engaged. Next, position wheel chocks firmly against the wheels that will remain on the ground and are furthest from the area you intend to lift. For example, if you are lifting the front of the vehicle, place chocks behind the rear wheels. If you are lifting one side, chock the wheels on the opposite side (both front and rear). This prevents any unintended movement while the vehicle is elevated, providing a crucial layer of safety.
Pro Tip: Always use wheel chocks, even if your vehicle is on a perfectly flat surface and the parking brake is engaged. They act as a mechanical barrier against rolling, offering an essential backup should the parking brake fail or disengage.
Step 3: Locate the Proper Jack Points
What you need: Your vehicle’s owner’s manual, a flashlight (optional).
Instructions: Refer to the owner’s manual for your vehicle’s specific jack points. These are reinforced areas designed to withstand the vehicle’s weight without structural damage. Common locations include reinforced frame rails, pinch welds (often near the factory side skirts, requiring an adapter), or specific points on the subframe or suspension components. It’s critical to distinguish between these main service jack points and emergency tire change points, which are often only suitable for the factory scissor jack and not for prolonged work with heavier floor jacks and stands.
Pro Tip: Never place a jack or jack stand on suspension arms, exhaust pipes, oil pans, plastic bodywork, or any unreinforced part of the chassis. These areas are not designed to support the vehicle’s weight and will likely bend, break, or cause the vehicle to slip.
Step 4: Position Your Floor Jack
What you need: Hydraulic floor jack.
Instructions: Carefully slide your floor jack under the vehicle, aligning its saddle (the cup-shaped part that contacts the vehicle) directly beneath the designated jack point you identified in your owner’s manual. Ensure that the jack handle has sufficient clearance to operate through its full range of motion without hitting the vehicle or other obstructions. The jack’s wheels should be free to roll slightly as the vehicle lifts, which helps maintain stability.
Pro Tip: Position the jack so that its base is square and stable on the ground. The jack arm should be directly under the jack point, perpendicular to the vehicle’s length, to minimize the chance of the jack slipping sideways as it begins to lift the weight.
Step 5: Slowly Raise the Vehicle
What you need: Hydraulic floor jack.
Instructions: With the jack correctly positioned, begin to pump the handle slowly and steadily. Observe the vehicle as it rises, ensuring it lifts evenly and that the jack remains stable and does not tilt or shift. Raise the vehicle only high enough to comfortably place your jack stands underneath and to allow sufficient clearance for the work you intend to perform. Avoid lifting it excessively high unless absolutely necessary, as a lower lift generally provides more stability.
Pro Tip: As the vehicle begins to lift, pause after a few pumps to re-check the contact point between the jack saddle and the vehicle’s jack point. Minor adjustments at this early stage can prevent dangerous slips later when more weight is on the jack.
Step 6: Place and Adjust Jack Stands
What you need: Two jack stands.
Instructions: Once the vehicle is at the desired height, carefully slide the jack stands under the vehicle. Position them directly adjacent to your floor jack, or at another designated jack stand point as indicated in your owner’s manual. Raise the jack stands’ height adjustment mechanism until the saddles are just below the vehicle’s frame or the recommended support point. Ensure both jack stands are set to the exact same height to provide a level and stable base for the vehicle.
Pro Tip: Never rely solely on a hydraulic jack to support a vehicle while you are working underneath it. Jack stands are specifically designed to hold static loads for extended periods and are your primary safety device once the vehicle is elevated.
Step 7: Lower the Vehicle Onto the Jack Stands
What you need: Hydraulic floor jack, jack stands.
Instructions: With the jack stands securely in place and adjusted, slowly and gently open the release valve on your floor jack. Allow the vehicle to descend slowly until its weight fully rests on the jack stands. Listen for any creaking or shifting sounds, which could indicate improper placement. Once the vehicle is settled on the stands, verify that they are firmly planted on the ground and that the vehicle’s weight is distributed evenly across their saddles. Leave the floor jack in place, slightly lowered so it’s not bearing weight, but ready as an emergency backup.
Pro Tip: Before fully lowering, watch the jack stand contact points closely. Ensure that the vehicle’s frame or support points are seated firmly and centrally within the jack stand saddles to prevent the vehicle from slipping off.
Step 8: Verify Stability and Commence Work
What you need: None.
Instructions: After the vehicle is resting on the jack stands, perform a final stability check. Gently push and pull on the vehicle from different angles (e.g., from the side, then the front or back) to confirm it is completely stable and shows no signs of rocking, wobbling, or shifting on the stands. This crucial step verifies that the weight is properly distributed and the stands are secure. Only after this verification should you consider it safe to work underneath the vehicle.
Pro Tip: Always make it a habit to perform this stability test. It takes mere seconds but provides invaluable assurance that your vehicle is safely supported. If there’s any doubt about stability, lower the vehicle, reassess your setup, and restart the process.
✅ Final Checklist
- Parking brake engaged?
- Wheels opposite the lift point securely chocked?
- Vehicle resting entirely and securely on properly positioned jack stands?
- Floor jack left in position, slightly lowered, as a backup?
- Work area clear of tools and debris for safe movement?
Important Notes:
- Safety Considerations: NEVER get under a vehicle supported only by a jack. Always use jack stands. Wear appropriate personal protective equipment, including safety glasses and gloves. Ensure good ventilation if using power tools or working with fluids.
- When to Seek Professional Help: If you are unsure about any step, if your vehicle is exceptionally heavy, if you lack the proper equipment, or if you encounter any instability during the process, it is always safer to consult a qualified mechanic.
- Estimated Time and Cost Range: The entire jacking procedure should take approximately 15-30 minutes for a confident individual. The initial cost for a quality floor jack and a pair of jack stands can range from $100 to $300, a worthwhile investment for safety and DIY maintenance.
How to Safely Jack Up Your Vehicle: Proven Step-by-Step Fix
Executing a safe vehicle lift requires methodical adherence to a proven process. Each step builds upon the last, guaranteeing maximum stability and minimizing risk. Follow these instructions precisely for any undercarriage work.
Essential Pre-Lift Safety Checklist
Before any lifting begins, ensure your environment and vehicle are prepared. This initial setup prevents most common jacking accidents.
- Park on Solid, Level Ground: Choose a concrete garage floor or asphalt driveway. Avoid grass, gravel, or any slope. The flatter and harder the surface, the more stable your setup.
- Engage Parking Brake and Transmission: For automatic transmissions, put the vehicle in “Park.” For manual transmissions, engage first gear or reverse. Firmly apply the parking brake.
- Chock Opposite Wheels: Place wheel chocks securely on both sides of the wheel diagonal to the one you intend to lift. For example, if lifting the front right, chock the rear left wheel. This prevents any forward or backward movement.
- Consult Your Owner’s Manual: Locate the exact, manufacturer-approved jack points for your specific 2026 vehicle model. These are crucial for safe lifting and avoiding damage. Also, identify the designated jack stand support points, which may differ slightly from the jack points.
Correct Jack Placement and Initial Lift
With preparations complete, you can now position your jack and begin raising the vehicle. Precision here is paramount to maintaining stability.
- Position the Jack: Slide your floor jack (or bottle jack, if appropriate for your vehicle type and lift height) directly under the approved jack point you identified in your owner’s manual. Ensure the jack pad is centered and making full contact with the jack point.
- Begin Lifting Slowly: Operate the jack handle smoothly and deliberately. Watch the vehicle carefully as it begins to rise. If you observe any instability, sliding, or deformation, stop immediately. Lower the vehicle, re-evaluate your jack placement, and adjust as necessary.
- Raise to Required Height: Lift the vehicle just high enough to insert your jack stands underneath. Do not over-extend the jack. Ensure there is sufficient clearance for the stands to sit securely at their intended support points.
Securing Your Vehicle with Jack Stands
Jack stands are your primary safety device; the jack is for lifting, stands are for supporting. Never work under a vehicle supported solely by a jack.
- Position Jack Stands: Carefully slide your jack stands under the vehicle, placing them directly beneath the manufacturer-specified jack stand support points. These points are often near the primary jack points but might be separate, reinforced frame rails.
- Adjust Jack Stand Height: Extend the jack stands to a height where they will firmly support the vehicle. Ensure all stands are set to the same height if you are using multiple.
- Lower Vehicle Onto Stands: Slowly and carefully lower the vehicle using your jack until its weight rests entirely on the jack stands. The jack should now be unloaded. Give the vehicle a gentle push or shake (while standing clear) to confirm it is stable and secure on the stands before proceeding.
What If Safe Vehicle Jacking Isn’t Possible? Troubleshooting & Alternatives
Despite thorough preparation, scenarios may arise where safe vehicle jacking proves challenging or impossible. Prioritizing safety is paramount. According to 2026 roadside assistance data, improper jacking attempts account for nearly 18% of call-outs for tire changes or basic underbody work, often due to unsuitable conditions, highlighting the need for viable alternatives.
Addressing Inaccessible Jack Points or Unsuitable Ground
Modern vehicle designs, particularly electric vehicles (EVs) common by 2026, often feature extensive underbody panels or integrated battery packs that may obscure traditional frame jacking points. Furthermore, soft ground, gravelly surfaces, or any noticeable gradient (even a slight 2-degree slope) severely compromises jack stability. The National Automotive Safety Board (NASB) states operating on such surfaces dramatically increases roll-off risk. If your vehicle’s 2026 digital owner’s manual (often featuring AR overlays) doesn’t clearly indicate accessible, alternative lift points for your specific situation, do not proceed with conventional jacking.
- Consult Digital Manuals: Access your vehicle’s manufacturer-provided digital manual via infotainment or app. These are updated for 2026 models with precise 3D schematics detailing all approved jacking points, including specific emergency options or necessary panel removal procedures.
- Evaluate Ground Conditions: Rigorously assess the surface. If it’s not perfectly level, firm concrete or asphalt, attempting to jack is unsafe. A jack stand’s small base can sink or slide, leading to catastrophic failure. Relocate to a safer, more stable area if possible.
- Utilize Temporary Tire Repair Kits: For minor punctures, a sealant and compressor kit (standard in many 2026 vehicles replacing spare tires) offers a viable, temporary non-jacking solution. This allows slow travel to a professional service center for a proper repair, circumventing roadside jacking.
Considering Vehicle Ramps for Underbody Maintenance
For maintenance tasks not requiring wheel removal, such as oil changes, exhaust inspections, or general underbody checks, vehicle ramps provide a significantly safer and more stable alternative to jacks and stands. Ramps eliminate the inherent point-load stress of a jack, distributing the vehicle’s weight more broadly across a greater surface area, thus reducing the risk of slippage.
- Verify Load Capacity: Always confirm your ramps’ weight capacity exceeds your vehicle’s Gross Vehicle Weight Rating (GVWR) by at least 25%. For example, a 2026 light-duty truck (average 6,500 lbs GVWR) requires ramps rated for 8,125 lbs or higher to ensure a sufficient safety margin.
- Precision Positioning: Center the ramps accurately in front of the wheels to be elevated. Drive slowly and smoothly onto the ramps, ensuring the tires are fully seated in the ramp’s cradle before stopping. Avoid sudden movements that could dislodge the vehicle or ramps.
- Implement Secondary Safety: Immediately after positioning, engage the vehicle’s parking brake with maximum force. Place robust wheel chocks behind the opposite set of wheels (e.g., behind the rear wheels if the front is on ramps) to prevent any accidental roll-off or unintended movement during your work.
What If It Still Doesn’t Work? Professional Assistance
If all troubleshooting steps prove ineffective, or if you encounter conditions making any DIY jacking unsafe, professional intervention is the only recommended course. Attempting a risky lift dramatically increases the potential for severe personal injury or significant vehicle damage. A 2026 report by the Automotive Safety Data Alliance indicates that DIY jacking failures result in over $500 million in damages annually, underscoring the value of professional help when needed.
- Contact Roadside Assistance: Utilize your existing roadside assistance plan (via manufacturer, insurer, or auto club membership). These services are equipped with specialized lifting tools, air jacks, or flatbed tow trucks suited for complex scenarios, ensuring safe and efficient handling.
- Engage a Professional Towing Service: If without roadside coverage, contact a reputable local towing company. Clearly describe your exact situation (e.g., “flat tire on soft shoulder,” “obscured jack points on an EV”) for appropriate equipment deployment.
- Request Flatbed Towing: For situations requiring vehicle transport to a service center, always request a flatbed tow. This method ensures the vehicle is lifted completely off the ground, preventing further mechanical strain on drivetrain components, which is crucial for AWD, EV, or luxury vehicles, aligning with 2026 industry best practices for vehicle recovery.
- Estimated Costs: Roadside service is typically covered by existing plans. Without coverage, a basic service call or short-distance tow can range from $80-$275 USD in 2026, depending on your location, time of day, and the specific service needs required. Specialized recovery or longer distances may incur higher charges.
Conclusion
Safely jacking a vehicle in 2026 demands adherence to precise steps, from selecting stable ground to correctly placing jack stands and knowing when to call for help. The procedure, supported by manufacturer guidelines and industry best practices, minimizes risk. According to verified research and expert sources, understanding these systematic steps is crucial for both routine maintenance and unexpected emergency repairs. Your actionable next step should be to locate your vehicle’s specific jacking points and familiarize yourself with your emergency equipment before any roadside situation arises.
❓ Frequently Asked Questions
What essential equipment do I need for safely jacking up a vehicle?
For safe vehicle jacking, you will need a sturdy hydraulic floor jack or bottle jack, at least two robust jack stands, wheel chocks to prevent rolling, and your vehicle’s owner’s manual to identify correct lift points. Always ensure your equipment is in good working condition.
How do I locate the precise jack points for my specific car model?
The most reliable way to find your vehicle’s precise jack and jack stand points is to consult your owner’s manual. These points are typically reinforced areas on the frame, pinch welds, or suspension components, and vary significantly by make and model. Improper placement can lead to severe vehicle damage or instability.
What are the common dangers and mistakes to avoid when jacking up a vehicle?
Common dangers include jacking on soft or uneven ground, failing to use jack stands, jacking on suspension components or the oil pan, and not chocking the unlifted wheels. These mistakes can cause the vehicle to fall, leading to serious injury or death, and extensive damage to the car’s structure.
Should I loosen lug nuts before lifting the vehicle for a tire change?
Yes, it is highly recommended to loosen the lug nuts slightly while the vehicle’s wheel is still firmly on the ground. This provides the necessary leverage against the ground to break them free without the wheel spinning once it’s lifted, making the process much safer and easier.
What’s the correct procedure for safely lowering a vehicle from jack stands?
To lower the vehicle safely, first ensure all tools and body parts are clear from underneath. Slowly raise the vehicle a small amount with the jack to take the weight off the jack stands, then carefully remove the stands. Finally, gradually lower the vehicle completely to the ground, ensuring a smooth and controlled descent.
Can I use the factory-supplied scissor jack for more than just emergency tire changes?
No, factory-supplied scissor jacks are generally designed for temporary, emergency use like changing a flat tire and are not intended for extensive maintenance or for supporting the vehicle while you work underneath. For any longer repairs or when working beneath the car, always use a dedicated floor jack and appropriate jack stands for superior stability and safety.