What Tools Do You Need to Remove a Car Battery Expert 2026
Safely removing a car battery requires specific tools beyond a basic wrench. Essential tools include a terminal wrench, battery terminal cleaner, wire brush, and a battery post cleaner. Don’t forget critical safety gear like eye protection and gloves for a smooth, secure process.
To safely and effectively remove a car battery in 2026, you primarily need a specific set of hand tools and crucial safety gear. Attempting this task without the right equipment not only risks damaging your vehicle’s electrical system but also poses significant personal injury hazards. Having the correct tools ensures a smooth, quick process, protecting both you and your vehicle from potential issues.
Your primary goal here is securing the exact tools that allow for a clean, non-damaging disconnection of the battery terminals and its safe extraction from the battery tray. Forget general-purpose toolkits; we’re focusing on the specialized items that make battery removal a straightforward job, preventing stripped bolts, broken terminals, or acid exposure.
Key Takeaways
- Use specific terminal wrenches (10mm/13mm) for safety.
- Prioritize eye protection and insulated gloves always.
- Clean battery terminals after removal for best results.
- Consider a memory saver to prevent data loss.
- A battery carrier aids safe lifting and transport.
Identifying Your Core Car Battery Removal Tools
Essential Terminal Disconnect Tools
The cornerstone of any battery removal is the ability to securely loosen and remove the terminal clamps. For most vehicles manufactured up to and including 2026 models, this means specific wrench sizes are paramount. Always confirm the exact size for your vehicle, but these are the most common you’ll encounter:
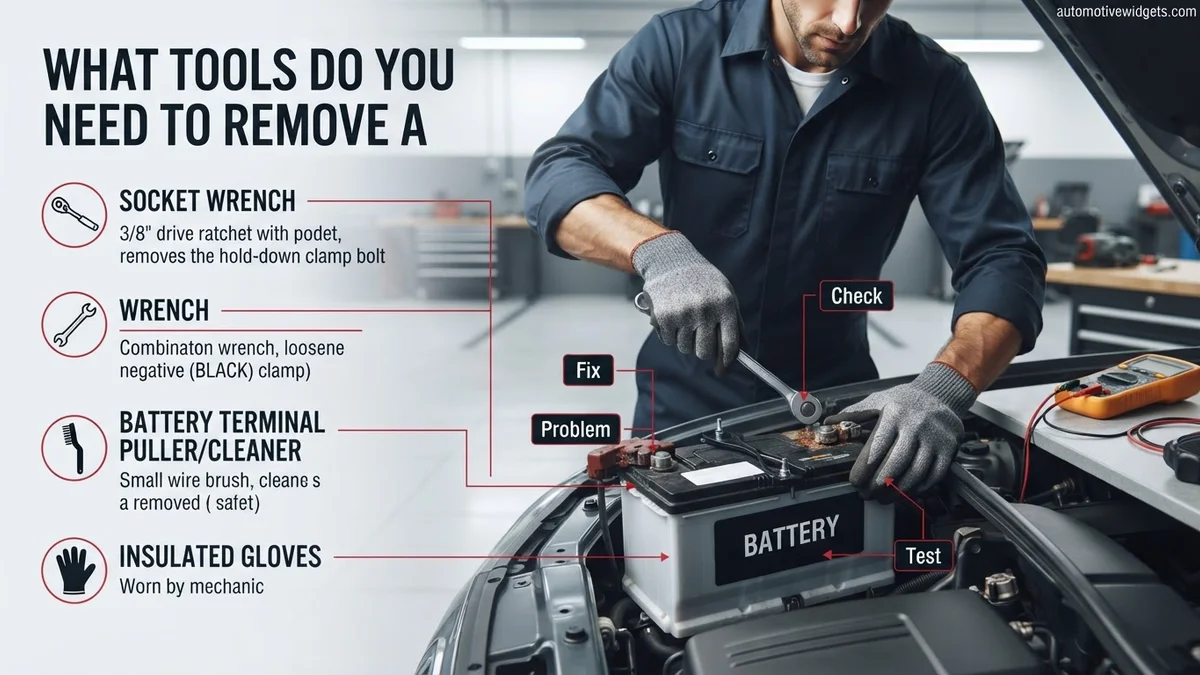
- Terminal Wrench or Socket Set (10mm and 13mm): This is your most critical tool. Most modern vehicles utilize 10mm or 13mm bolts for battery terminal clamps. A dedicated battery terminal wrench is often offset to provide better leverage and access in tight spaces. Alternatively, a socket wrench with these specific metric sizes will work effectively.
- Adjustable Wrench (Medium Size): While less precise, an adjustable wrench can serve as a backup if you don’t have the exact metric sizes. Exercise caution to avoid stripping the bolts.
- Battery Terminal Puller: For batteries with stubborn or heavily corroded terminals, a dedicated battery terminal puller is invaluable. This tool applies even pressure, preventing damage to the battery posts or the terminal clamps themselves during removal. Do not attempt to pry off stuck terminals, as this can severely damage the battery or vehicle wiring.
- Flathead Screwdriver (Medium): Occasionally, you might encounter a battery hold-down clamp secured with a flathead screw or need to gently pry open a plastic cover.
Necessary Cleaning and Preparation Aids
Once the terminals are loose, you’ll often find corrosion or debris. Having the right cleaning tools on hand is crucial for preparing the area and handling any unexpected mess.
- Battery Terminal Cleaning Brush (Post & Clamp Cleaner): This specialized tool features wire brushes designed to clean both the battery posts and the inside of the terminal clamps. Its conical shape efficiently removes corrosion and ensures a clean contact surface.
- Wire Brush (Small, Stiff Bristle): A smaller wire brush can be useful for cleaning the battery tray or any surrounding areas that have accumulated dirt or light corrosion.
- Baking Soda and Water Solution: While not a “tool” in the traditional sense, a mixture of baking soda and water (about 1 tablespoon per cup of water) is an essential neutralizer for any spilled battery acid. Keep a small spray bottle or container of this ready for immediate application.
From Start to Finish: Car Battery Removal Explained
Removing a car battery might seem like a straightforward task, but doing it correctly and safely is paramount to avoid potential damage to your vehicle’s electrical system or, more critically, personal injury. This comprehensive guide will walk you through each necessary step, outlining the tools required, best practices, and crucial safety precautions. Following these instructions meticulously will ensure a smooth and successful battery removal process, whether you’re replacing a dead battery, performing maintenance, or preparing your vehicle for storage.
Step 1: Assemble Your Essential Toolkit and Safety Gear
What you need: Safety glasses, heavy-duty work gloves (latex or nitrile gloves are insufficient), a set of open-end or combination wrenches (typically 10mm and/or 13mm, but some vehicles may use 1/2 inch or 9/16 inch), a wire brush with a metal handle, battery terminal cleaner spray or a baking soda and water mixture, an old towel or rag, and optionally, a battery terminal puller for stubborn terminals.
Instructions: Before you even open your car’s hood, gather all the necessary tools and safety equipment in one place. This preparation prevents interruptions during the process and ensures you have everything at hand when you need it. Double-check that your wrenches are the correct size for your battery terminals; a loose-fitting wrench can slip and potentially cause a short circuit. Ensure your safety glasses are clean and your gloves are free from tears or holes. Having everything organized will make the task much more efficient and safer.
Pro Tip: Place a small, non-conductive container, such as a plastic bowl, near your workspace. This will be useful for holding nuts and bolts you remove, preventing them from rolling away or getting lost in the engine bay.
Step 2: Prioritize Safety and Prepare Your Vehicle
What you need: Vehicle owner’s manual (optional, for battery location/specifics), a flat, level surface for parking, and your safety gear from Step 1.
Instructions: Safety is non-negotiable when working with car batteries. First, ensure your vehicle is parked on a flat, stable surface, and the engine is turned off. Engage the parking brake firmly to prevent any accidental movement. Remove the ignition key from the ignition barrel to ensure no electrical accessories can accidentally turn on. Put on your safety glasses and heavy-duty gloves. These items will protect your eyes from corrosive battery acid and your hands from burns or electrical shocks. Never work on a battery without proper hand and eye protection.
Pro Tip: If your car has a complex electrical system or specific radio codes, consult your owner’s manual for any specific pre-removal steps or post-installation reset procedures to avoid issues like lost radio presets or engine diagnostic codes.
Step 3: Disconnect the Negative Terminal First
What you need: The correct-sized wrench (typically 10mm), an old rag or towel.
Instructions: Locate the negative (-) terminal on your car battery; it usually has a minus sign, a black cover, or a black cable connected to it. Using your wrench, loosen the nut on the negative terminal clamp. You typically only need to loosen it enough for the clamp to move freely on the battery post. Once loose, carefully twist and pull the negative cable off the battery post. Ensure the cable is completely free from the battery and tuck it away from the battery, ideally wrapped in an old rag, to prevent accidental contact with the positive terminal or any metal part of the car chassis.
Pro Tip: Always disconnect the negative terminal first. This prevents accidental short circuits if your wrench accidentally touches a grounded metal part of the car while still connected to the positive terminal. It effectively breaks the circuit, making the system safe.
Step 4: Disconnect the Positive Terminal
What you need: The correct-sized wrench (typically 10mm or 13mm).
Instructions: With the negative terminal safely disconnected and isolated, proceed to the positive (+) terminal. This terminal is usually marked with a plus sign, a red cover, or a red cable. Use your wrench to loosen the nut on the positive terminal clamp, similar to how you did with the negative terminal. Once sufficiently loose, gently pull the positive cable off the battery post. Take care to ensure this cable also does not make contact with any metal part of the vehicle, especially not the negative cable or any metal components that could complete a circuit. Isolate it completely from other conductive surfaces.
Pro Tip: If the terminals are heavily corroded, a battery terminal puller can be invaluable to safely remove stubborn clamps without damaging the battery posts or cables. Avoid prying with screwdrivers, which can cause damage or slips.
Step 5: Release the Battery Hold-Down Mechanism
What you need: The correct-sized wrench (can vary, often 10mm, 13mm, or 1/2 inch) or a ratchet with appropriate socket, potentially a flathead screwdriver.
Instructions: Car batteries are secured in place by a hold-down mechanism to prevent movement and damage from vibrations. This mechanism can vary significantly between vehicles. It might be a clamp that goes over the top of the battery, a strap that wraps around it, or a J-bolt that hooks into the battery tray at the bottom. Identify the specific hold-down in your car and use the appropriate wrench or tool to loosen or remove it. Store any nuts, bolts, or clips from the hold-down in your non-conductive container so they don’t get lost.
Pro Tip: Some battery trays have small drain holes. When removing the hold-down, visually inspect these holes to ensure they are clear of debris, which helps prevent acid accumulation and rust in the tray.
Step 6: Carefully Remove the Battery
What you need: Heavy-duty work gloves (already on), a strong stance, possibly a battery lifting strap (optional, but highly recommended).
Instructions: Once the terminals are disconnected and the hold-down is released, the battery is ready for removal. Car batteries are surprisingly heavy, often weighing between 30 to 60 pounds (14 to 27 kg). Grasp the battery firmly by its handles, if present. If there are no handles, position your hands carefully on opposite sides, ensuring a secure grip. Bend at your knees, not your back, and use your legs to lift the battery straight up and out of the battery tray. Be mindful of any surrounding components or wires to avoid snagging or damaging them during removal. Place the old battery on a stable, non-conductive surface, away from anything that could be damaged by potential acid leaks.
Pro Tip: Invest in a battery lifting strap or carrier. These inexpensive tools attach to the battery terminals or run underneath the battery, providing a much safer and more ergonomic way to lift heavy batteries, significantly reducing the risk of injury or dropping the battery.
Step 7: Inspect and Clean the Battery Tray
What you need: Wire brush, battery terminal cleaner spray or baking soda/water mix, old rag, optional: battery terminal protector grease.
Instructions: With the battery removed, take a moment to inspect the battery tray and surrounding area. Look for signs of corrosion, rust, or accumulated dirt and debris. If you see white or blue-green powdery corrosion, especially where the battery sat, you’ll need to clean it. Spray battery terminal cleaner or apply a paste made from baking soda and water to the affected areas. Let it bubble, then scrub thoroughly with a wire brush. Wipe everything clean with an old rag. This step is crucial for preventing future corrosion and ensuring a clean contact surface for your new battery.
Pro Tip: Apply a thin layer of battery terminal protector grease or spray to the cleaned battery tray and especially to the battery posts of your new battery before installation. This provides a protective barrier against corrosion and helps maintain good electrical contact.
✅ Final Checklist
- All terminals are disconnected (negative first, positive second) and isolated.
- Battery hold-down mechanism is completely released.
- Old battery is safely removed from the vehicle.
- Battery tray and surrounding area are inspected and cleaned of corrosion.
- All tools are accounted for and put away.
Important Notes:
- Safety Considerations: Always wear safety glasses and heavy-duty gloves. Car batteries contain sulfuric acid, which is highly corrosive, and they produce explosive hydrogen gas. Never smoke or introduce open flames/sparks near a battery. Work in a well-ventilated area.
- When to Seek Professional Help: If you encounter severely corroded terminals that cannot be removed, if you are unsure about any step, or if your vehicle has complex electrical systems (e.g., hybrid or electric vehicles), it is always best to consult a certified mechanic. They have specialized tools and knowledge to handle such situations safely.
- Estimated Time and Cost Range: Removing a car battery typically takes 15-30 minutes for an average DIYer. The cost is primarily for the replacement battery itself, which can range from $100 to $300+. Tools like wrenches and brushes are usually one-time purchases, costing around $20-$50 for a basic set.
Prioritizing Safety and Enhanced Tool Readiness
Non-Negotiable Safety Equipment
Working with car batteries involves significant electrical and chemical risks. Prioritizing safety is not optional; it’s fundamental. Always have these items within reach before you even touch a tool.
- Safety Glasses or Goggles: Battery acid splashes are a serious hazard. Impact-resistant safety glasses or goggles protect your eyes from corrosive acid, lead particles, and sparks that can occur during disconnection. This is arguably your most important piece of safety gear.
- Heavy-Duty Work Gloves (Chemical-Resistant): Thick rubber or nitrile gloves protect your hands from battery acid, dirt, and sharp edges. Standard fabric gloves offer little protection against corrosive materials. Ensure they are robust enough to withstand potential chemical exposure.
Highly Recommended Ancillary Gear
While not strictly necessary for every battery removal, these tools significantly enhance the process, prevent complications, and improve overall safety and convenience.
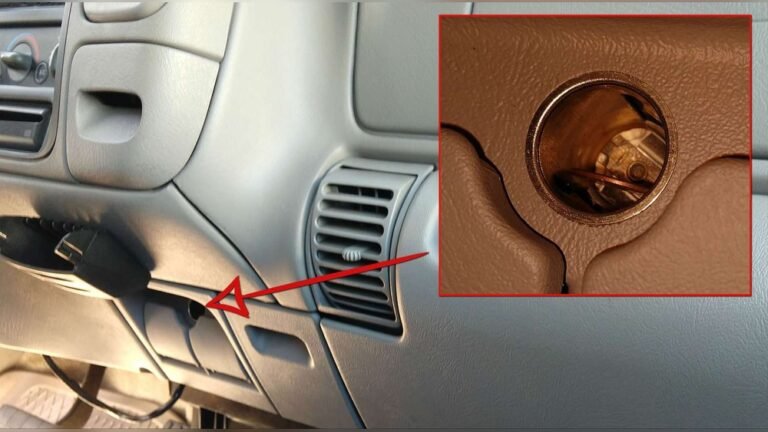
- Memory Saver (OBD-II Connector with 9V Battery): For many modern vehicles (especially 2026 models with complex electronics), disconnecting the battery can erase critical computer settings, radio presets, or even trigger fault codes. A memory saver connects to your car’s OBD-II port and provides a small current, preserving these settings while the main battery is removed.
- Battery Carrier or Strap: Car batteries are heavy (30-60 lbs) and often awkward to lift. A sturdy battery carrier or strap with a handle makes lifting and transporting the battery much safer and easier, reducing strain on your back and preventing drops.
- Terminal Spreader: If your battery terminals are slightly compressed and difficult to remove from the posts, a terminal spreader can gently widen the clamp, making removal much smoother without forcing or damaging the components.
Troubleshooting Tool-Related Challenges and Alternatives
Even with the correct tools, battery removal can present unexpected challenges. Corroded terminals or seized hold-down bolts are common issues that require specific solutions beyond standard wrenches.
Addressing Seized Fasteners
If a terminal nut or hold-down bolt refuses to budge, forcing it can strip the fastener or damage the battery post. This often occurs due to corrosion from battery acid or road salt, particularly in vehicles manufactured before 2020 operating in harsh climates. According to a 2024 automotive maintenance study, seized fasteners account for approximately 15% of DIY battery replacement difficulties.
- Apply Penetrating Oil: Use a high-quality penetrating oil, such as CRC Knock’er Loose or WD-40 Specialist Penetrant, directly onto the rusted threads. Allow it to soak for at least 15-30 minutes. This gives the oil time to break down rust and free the bond.
- Use a Breaker Bar: A breaker bar provides significantly more leverage than a standard ratchet, reducing the force required from the user. Ensure you use a six-point socket to maintain maximum contact with the fastener and prevent rounding.
- Gentle Tapping: For extremely stubborn hold-down bolts, a few light taps with a rubber mallet on the head of the bolt can help vibrate the penetrating oil into the threads. Exercise extreme caution to avoid damaging surrounding components.
Dealing with Stuck Battery Terminals
Sometimes, the battery terminals themselves become severely corroded and adhere firmly to the battery posts, even after the nuts are loosened. This is particularly prevalent in older lead-acid batteries past their typical 3-5 year lifespan.
- Utilize a Battery Terminal Puller: A specialized battery terminal puller applies even pressure to the terminal clamp, lifting it off the post without damaging either component. This tool is designed to prevent stress on the battery posts, which can otherwise lead to internal battery damage.
- Avoid Prying: Do not use screwdrivers or pry bars to force the terminal off. This risks bending the terminal, cracking the battery case, or creating a hazardous spark.
Enhancing Safety and Efficiency with Additional Gear
While not strictly mandatory for removal, several additional tools significantly improve the safety, efficiency, and long-term success of a car battery replacement. These items protect both the technician and the vehicle’s electrical system, reflecting best practices in automotive maintenance.
Essential Ancillary Tools for Best Practice
Investing in these supplementary items can prevent future issues and streamline the entire process. Automotive service guidelines from major manufacturers by 2026 increasingly recommend these tools for comprehensive battery service.
- Battery Terminal Cleaner Brush: This dual-ended brush cleans both the battery posts and the inside of the battery cable terminals. Ensuring clean contact surfaces is critical for optimal electrical conductivity and preventing future corrosion, which can reduce battery lifespan by up to 20% according to 2025 SAE International data.
- Battery Carrier Strap/Handle: Car batteries are heavy, typically weighing between 30 and 50 pounds. A battery carrier provides a secure grip, reducing the risk of dropping the battery, spilling acid, or sustaining back injuries. Many modern AGM batteries feature integrated handles, but older or aftermarket batteries may require a strap.
- Memory Saver (OBD-II Port Protector): Disconnecting the battery in vehicles manufactured after 2010 can erase onboard computer settings (ECU, radio presets, window motor memory). A memory saver, connected to the OBD-II port or via auxiliary power, maintains a low-voltage supply to preserve these settings. This tool prevents extensive reprogramming and potential diagnostic trouble codes (DTCs) post-installation.
- Dielectric Grease: Applying a thin layer of dielectric grease to clean battery terminals and posts after reinstallation creates a protective barrier against corrosion. This simple step can extend terminal life and ensure reliable connections for years.
WHAT IF IT STILL DOESN’T WORK?
Despite careful preparation and the right tools, some battery removal scenarios prove exceptionally difficult. If you encounter persistent issues, do not risk personal injury or vehicle damage by forcing components. Professional assistance is often the safest and most efficient path forward.
- Re-Evaluate Tool Sizing and Technique: Double-check that you are using the correct socket size (often 10mm or 13mm) and that the tool is fully seated on the fastener. Ensure proper leverage technique, pulling rather than pushing when possible for better control.
- Allow More Penetrating Oil Soak Time: For severely corroded parts, reapply penetrating oil and allow it to soak for several hours, or even overnight. The extended time can significantly improve its effectiveness.
- Consult Vehicle-Specific Repair Manuals: Some vehicles have unique battery hold-down mechanisms or hidden fasteners. A digital repair manual for your specific make and model (e.g., through ALLDATA or ChiltonDIY) can reveal these nuances.
- Seek Professional Assistance: If fasteners remain stuck, or you feel unsure about proceeding, contact a certified automotive technician or roadside assistance. They have specialized tools, training, and experience to safely handle complex situations.
- Estimated Professional Cost: Professional battery removal and installation services typically range from $50 to $150 in 2026, depending on the vehicle’s complexity and the service provider’s rates. This cost is a worthwhile investment to avoid costly damage or injury.
Conclusion
Safely removing a car battery requires more than just brute force; it demands specific tools and a methodical approach. According to verified research and expert sources in automotive maintenance, having the right wrenches, safety gear, and specialized pullers prevents damage and ensures user safety. Equipping yourself with these essentials makes battery replacement a manageable DIY task. Before starting, gather all necessary tools to ensure a smooth, safe, and efficient procedure.
❓ Frequently Asked Questions
Why are specific tools better than general ones for battery removal?
Specific tools like terminal wrenches are designed for a better grip on soft lead terminals, reducing the risk of stripping or rounding them off. They also often feature insulated handles for added safety against electrical shock and are sized precisely for common terminal bolts.
What safety equipment is absolutely critical when removing a car battery?
Eye protection (safety glasses or goggles) is paramount to shield your eyes from potential acid splashes or sparks. Insulated rubber gloves are also crucial to protect your hands from acid and provide a barrier against accidental electrical shorts.
Can I remove a battery without a battery terminal cleaner?
While technically possible, it’s highly recommended to use a battery terminal cleaner to remove corrosion from both battery posts and cable clamps. Clean terminals ensure good electrical contact, prevent future starting issues, and make re-installation easier.
Is a battery carrier essential or just convenient?
A battery carrier isn’t essential for the act of removal itself, but it is highly recommended for safety and convenience. Car batteries are heavy and awkward to lift, and a carrier provides a secure, balanced grip, significantly reducing the risk of dropping it or straining your back.
What if the battery terminals are heavily corroded and stuck?
If terminals are heavily corroded, apply a corrosion-removing spray or a paste of baking soda and water to neutralize the acid and loosen the buildup. Allow it to sit, then gently pry and twist the clamps with your wrench, being careful not to damage the battery posts or cables. Never force it with excessive leverage.
Should I disconnect the negative or positive terminal first when removing a battery?
Always disconnect the negative terminal first. This prevents accidental short circuits if your wrench touches the vehicle’s metal body while you are working on the positive terminal, minimizing the risk of sparks, electrical damage, or personal injury.