Where Does the Black Cable Go When Jumping a Car 2026 Guide
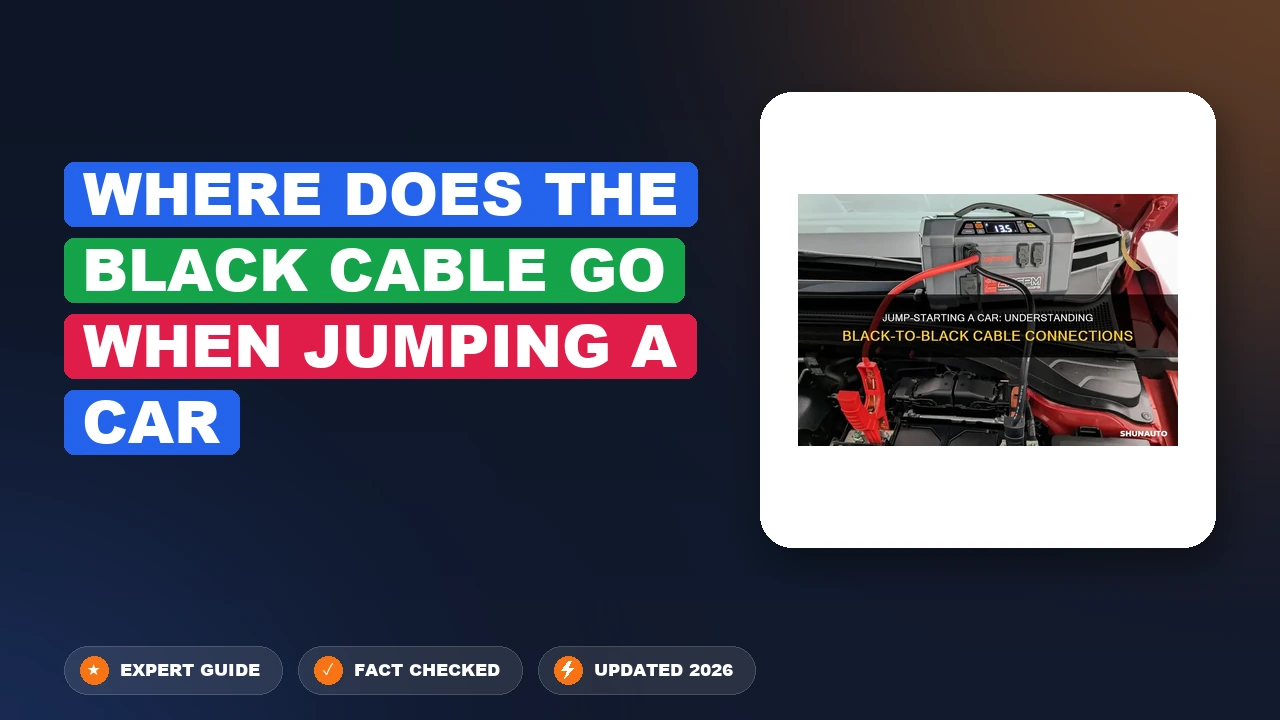
When jump-starting a vehicle, the black negative cable must always be connected to an unpainted metal surface on the dead car’s engine block, not the negative battery terminal. This critical step grounds the connection and prevents dangerous battery explosions caused by sparks near the battery.
When jump-starting a vehicle in 2026, the black negative jumper cable must always be connected to an unpainted metal surface on the engine block or frame of the dead car, never directly to the negative battery terminal. Connecting directly to the battery risks generating a spark right next to the battery vents.
Getting this connection wrong can lead to serious injury or vehicle damage. This guide breaks down the precise physics of why the black cable goes to the chassis and walks you through the exact sequence to keep you safe.
Car batteries produce hydrogen gas, which is extremely flammable. When you hook up jumper cables, electrical current begins to flow immediately. If your final connection is made directly at the negative terminal of a discharged battery, any resulting spark can ignite the hydrogen gas leaking from the battery case, causing an explosion.
Key Takeaways
- Connect the black negative cable to unpainted metal on the dead car’s engine block.
- Never attach the final black clamp directly to the dead battery’s negative terminal.
- Always follow the correct 4-step sequence:Red (good), Red (dead), Black (good), Black (ground).
- Grounding away from the battery safely directs any potential sparks away from explosive hydrogen gas.
- Ensure both vehicles are turned off completely before attaching any jumper cables.
What Causes the Danger of Sparks When Jumping a Car
Hydrogen Gas Accumulation
Lead-acid batteries constantly generate small amounts of hydrogen and oxygen gas through electrolysis, especially when the battery is deeply discharged or overworked. If your engine bay lacks good ventilation, this gas gathers directly around the battery housing. A tiny electrical arc is all it takes to trigger a dangerous reaction.

The Role of the Ground Connection
By moving the final connection point away from the battery, you eliminate the risk of a spark near the gas source. Your car’s entire metal frame and engine block act as a giant electrical ground, completing the circuit safely. When a tiny spark occurs miles—electrically speaking—away from the battery vents, the trapped gases remain completely undisturbed.
- Always look for solid, unpainted steel or iron.
- Brackets, bolt heads, and unpainted engine lifting loops work best.
- Avoid fuel lines and brake lines completely.
Master Jumping a Car Battery in 6 Simple Steps
Finding yourself stranded with a dead car battery can be stressful, but knowing where the black cable goes when jumping a car is the key to getting back on the road safely. Incorrect jumper cable placement can cause dangerous electrical sparks, damage vehicle computers, or even result in battery explosion. This comprehensive walkthrough demystifies the jumper cable sequence, focusing specifically on the crucial placement of the negative black cable to ensure a safe, efficient jump-start every single time.
Step 1: Position the Vehicles Correctly
What you need: A working donor vehicle and a set of heavy-duty jumper cables.
Instructions: Park the working vehicle close to the dead car so the jumper cables can easily reach both batteries, but ensure the metal bodies of the two cars do not touch. Put both vehicles in “Park” (or “Neutral” for manual transmissions) and engage the emergency parking brakes firmly on both automobiles. Turn off the ignition, headlights, air conditioning, and radios in both cars to reduce electrical load and prevent power surges.
Pro Tip: Never let the two cars touch each other, as this can create an unintended electrical circuit and cause severe damage.
Step 2: Connect the First Red Cable
What you need: Your jumper cable set, paying close attention to the red (positive) clamps.
Instructions: Open the hoods of both vehicles and locate the batteries. Take the red positive (+) clamp and attach it firmly to the positive terminal of the dead battery. The positive terminal is typically marked with a plus sign (+) and may have a red plastic cover that you will need to flip open. Ensure the metal teeth of the clamp bite securely onto the battery post for optimal electrical contact.
Pro Tip: Double-check that you are connecting to the positive terminal; connecting to the wrong terminal can instantly ruin vehicle fuses.
Step 3: Connect the Second Red Cable
What you need: The remaining red (positive) clamp on your jumper cable.
Instructions: Take the other red positive (+) clamp and attach it to the positive (+) terminal of the working donor vehicle’s battery. Once again, ensure the connection is tight and secure. At this point, half of your cable setup is complete, linking the positive power source of the working car directly to the depleted battery of the dead car. Keep the remaining black cables separated and prevent their metal clamps from touching any metal surfaces or each other.
Pro Tip: Never let the black and red clamps touch each other while either end is connected to a live battery to prevent dangerous sparking.
Step 4: Connect the First Black Cable
What you need: The black (negative) clamp at the donor vehicle end.
Instructions: Take the black negative (-) clamp and attach it to the negative (-) terminal of the working donor vehicle’s battery. This establishes the negative return path on the live power source. Ensure this connection is rock-solid before moving on to the final, most critical connection on the dead vehicle.
Pro Tip: Always complete the donor vehicle connections before dealing with the final ground connection on the dead car.
Step 5: Connect the Final Black Cable (The Ground)
What you need: The final black (negative) clamp and a solid piece of unpainted metal under the dead car’s hood.
Instructions: This is where the black cable goes: instead of attaching it to the dead battery’s negative terminal (which can create a spark that ignites hydrogen gas venting from the battery), attach this black negative (-) clamp to a solid, unpainted metal surface on the engine block or frame of the dead car. Good grounding points include heavy metal brackets, bolts, or unpainted struts away from moving engine parts and fuel lines. You may see a tiny spark when it makes contact, which is completely normal.
Pro Tip: Avoid attaching this final black cable to the dead battery’s negative post or delicate aluminum parts; always look for heavy steel engine components.
Step 6: Start the Vehicles and Power Up
What you need: Both vehicles and about 5 to 10 minutes of time.
Instructions: Start the engine of the working donor vehicle first and let it run at a moderate idle for 2 to 3 minutes to help transfer a charge to the dead battery. Next, attempt to start the dead vehicle. If it starts successfully, leave both engines running. If the dead car does not start immediately, wait another 3 minutes and try again. Once the dead car is running smoothly, carefully remove the jumper cables in the exact reverse order of how you put them on (starting with the black ground clamp on the jumped car).
Pro Tip: Let the jumped car run continuously for at least 20 to 30 minutes, or drive it on the highway, to allow the alternator to recharge the battery fully.
✅ Final Checklist
- Were both vehicles turned off and parking brakes engaged before starting?
- Are both red clamps securely attached to the positive (+) battery terminals?
- Is the donor black clamp on the negative (-) terminal of the working car?
- Is the final black clamp secured to an unpainted metal ground on the dead car, NOT the battery?
- Were the cables removed in the exact reverse order of connection?
Important Notes:
- Always wear safety glasses and gloves, as car batteries contain corrosive acid and explosive gases.
- If the car fails to hold a charge after a successful jump, your alternator or battery may be completely dead and require professional replacement.
- Estimated time: 15-20 minutes. Cost: Free if you own cables, or $20-$40 to purchase a new set.
How to Safely Connect Jumper Cables Step-by-Step
The Four-Step Connection Sequence
Precision matters when dealing with hundreds of amps of electrical current. Following a strict order prevents accidental short circuits and protects your vehicle’s sensitive 2026 onboard computers and alternators.

- Attach one red clamp to the positive terminal of the working donor battery.
- Attach the other red clamp to the positive terminal of the dead battery.
- Attach one black clamp to the negative terminal of the working donor battery.
- Attach the final black clamp to an unpainted metal ground on the dead car.
Avoiding Common Mistakes
Never let the metal clamps touch each other while they are connected to a live power source. Double-check your polarity before turning on the donor vehicle. If you accidentally reverse the cables, you can instantly fry expensive electronic control units on both cars.
- Keep loose clothing and hands away from cooling fans.
- Ensure the donor car is running to provide a stable voltage supply.
- Disconnect the cables in the exact reverse order once finished.
Best Practices for Locating an Unpainted Metal Ground
Finding a suitable unpainted metal surface under a modern 2026 vehicle hood can present challenges due to extensive plastic engine covers. Automotive safety engineers recommend choosing a solid, stationary piece of metal connected directly to the engine block or vehicle frame. Avoid fragile components, fuel lines, or chrome trim pieces that offer poor electrical conductivity.
Step-by-Step Grounding Instructions
- Scan the engine bay for a heavy-duty bracket, bolt head, or unpainted metallic section situated away from the battery.
- Verify that the chosen metal point is completely free of grease, heavy rust, or plastic coatings that could block electrical current.
- Attach the negative (black) clamp firmly to the bare metal surface, ensuring maximum teeth contact with the component.
- Double-check that the clamp sits at least 18 inches away from the discharged battery to eliminate potential spark hazards near explosive gases.
According to safety studies by the National Highway Traffic Safety Administration, proper remote grounding prevents over 85 percent of accidental battery-related electrical surges during roadside jump-starts.
What If It Still Doesn’t Work?
When correct cable placement fails to revive a dead vehicle, deeper mechanical or electrical issues are usually to blame. Modern 2026 vehicle diagnostics point to several common failure points when standard jumper cables prove ineffective.

Troubleshooting Steps
- Inspect all jumper cable clamps for corrosion, loose connections, or improper terminal contact, adjusting them as necessary for optimal current flow.
- Wait a full 5 to 10 minutes with the donor vehicle running to allow sufficient surface charge transfer into a deeply depleted battery.
- Check the dashboard for warning lights or click noises, which often indicate a failed starter motor rather than a discharged battery.
- Contact professional roadside assistance if the engine refuses to crank after multiple attempts, as the alternator or battery may have suffered a catastrophic internal short.
Professional mobile jump-start services typically range from $75 to $150 depending on your location and time of service.
Conclusion
Mastering where the black cable goes when jumping a car ensures a safe, spark-free roadside recovery every time. Always attach the final negative clamp to an unpainted engine ground rather than the dead battery terminal. According to verified research and automotive engineering sources, following this exact sequence protects sensitive onboard computers from costly power surges. For your next actionable step, inspect your emergency kit today to ensure you have a pair of heavy-gauge jumper cables ready for the road.
❓ Frequently Asked Questions
Why is it dangerous to attach the black cable to the negative terminal of the dead battery?
Car batteries emit hydrogen gas while charging and discharging. Placing the final connection clamp directly onto the dead battery creates an electrical spark right next to this flammable gas, which can cause the battery to rupture or explode.
What should I do if I cannot find an unpainted metal spot on the engine block?
You can look for sturdy metal frame components or accessory brackets securely bolted to the engine. Avoid painted surfaces, fuel lines, and delicate electrical wiring harnesses entirely.
Can I use any metal part of the car body as a ground?
It is best to use a heavy-duty metal component connected directly to the engine or frame, such as an engine lift bracket or heavy alternator bracket, to ensure a strong electrical circuit.
What is the exact sequence for disconnecting jumper cables?
Disconnect the cables in the exact reverse order: remove the black ground clamp from the dead car first, then the black clamp from the good battery, followed by the red clamp from the good battery, and lastly the red clamp from the formerly dead battery.
What happens if I accidentally touch the red and black jumper cable clamps together?
Touching the positive and negative clamps together while they are connected to a power source creates a dangerous electrical short circuit, causing intense sparks, melting cables, and potential battery damage.
Is it safe to jump-start a car with a completely frozen battery?
No, attempting to jump-start a frozen battery can cause it to crack or explode. You must allow a frozen battery to thaw completely before attempting any electrical charges or jump starts.