How to Charge a Car Battery Without a Charger 2027
Facing a dead car battery without a dedicated charger can be frustrating. This guide provides practical, safe methods, primarily focusing on jump-starting with another vehicle, to get your car running again. Learn essential steps and precautions to revive your battery in a pinch.
When your car battery unexpectedly dies in 2027, and a traditional charger isn’t available, you’re not entirely out of options. The most common and accessible alternative to get your vehicle running again is a jump-start from another car or a portable jump pack. These methods provide a critical temporary boost, allowing your car’s alternator to then take over charging.
Understanding these alternative charging techniques and, more importantly, executing them safely and correctly, is crucial. This knowledge can save you significant time and hassle when stranded, ensuring you can quickly and securely resolve the immediate problem and continue your journey.
Key Takeaways
- Jump-starting is the fastest alternative method.
- Always prioritize safety with cables and vehicles.
- An inverter can power a small charger.
- Drive immediately after a jump start.
- Check battery health professionally afterward.
What Causes Your Car Battery to Die Without a Charger? (Diagnosis)
Before attempting any alternative charging method, quickly understanding why your battery failed helps confirm it’s a simple dead battery and not a more complex issue. In 2027, modern vehicles, with their sophisticated electronics and always-on systems, are particularly susceptible to battery drain.
Common Causes of Battery Drain in 2027 Vehicles
- Parasitic Drain: Advanced infotainment systems, keyless entry modules, and telematics systems in newer cars (common by 2027) continuously draw small amounts of power, even when the vehicle is off. Over weeks, this can completely drain a battery.
- Left Lights/Accessories On: Despite auto-shutoff features, interior lights, headlights, or dashcams can still be inadvertently left on, leading to significant overnight discharge.
- Short Trips: Frequent short drives (under 20 minutes) don’t allow the alternator enough time to fully recharge the battery, gradually reducing its charge over time.
- Extreme Temperatures: Both intense heat and severe cold (common in various regions) accelerate battery degradation and reduce its capacity to hold a charge.
- Battery Age: Car batteries typically last 3-5 years. If your battery is older, it’s more prone to sudden failure.
Recognizing a Dead Battery
Symptoms are usually clear. If you hear a rapid clicking sound when you turn the key or push the start button, or if there’s no sound at all, your battery is likely dead. Other signs include: dim or no dashboard lights, headlights that won’t turn on, or the engine cranking very slowly and struggling to turn over.
From Start to Finish: Charging Your Car Battery Without a Charger Explained
There comes a time for many vehicle owners when a dead car battery leaves them stranded, and a dedicated battery charger isn’t immediately available. This comprehensive guide will walk you through the most common and practical method for “charging” your car battery without a traditional charger – primarily focusing on jump-starting. While jump-starting won’t fully replenish a deeply discharged battery, it provides enough power to get your engine running, allowing your car’s alternator to complete the charging process. Following these steps carefully is crucial for your safety and to prevent damage to either vehicle involved.
Step 1: Assess the Situation & Gather Safety Gear
What you need: Heavy-duty jumper cables (preferably 10-20 feet long with a minimum 6-gauge thickness), safety gloves, safety glasses, a flashlight (if dark), and a functional donor vehicle with a good battery.
Instructions: Before attempting any procedure, confirm your battery is indeed the problem. Look for dim lights, a clicking sound, or no response when turning the key. Gather your jumper cables and put on safety gloves and glasses. These items are vital for protecting your hands from battery acid and sparks, and your eyes from potential explosions. Ensure both vehicles are turned off with parking brakes engaged. Never attempt to jump-start a battery that is visibly cracked, leaking, or bulging, as this indicates severe damage and a high risk of explosion.
Pro Tip: Check your car’s owner’s manual for specific jump-starting instructions, as some modern vehicles have unique battery locations or designated jump-starting terminals.
Step 2: Position the Donor Vehicle Safely
What you need: A functional donor vehicle.
Instructions: Park the donor vehicle as close to your disabled vehicle as possible, ensuring their batteries are within comfortable reach of the jumper cables. Ideally, position them nose-to-nose or side-by-side, but do not allow the vehicles to touch each other. This prevents accidental electrical shorts. Turn off both vehicles’ engines, lights, and any accessories. Engage the parking brake on both vehicles for stability and safety. Ensure both vehicles are in Park (for automatics) or Neutral (for manuals).
Pro Tip: Always ensure there’s enough space around the vehicles to move freely and safely, avoiding busy roadsides if possible. If on a busy road, use hazard lights and place warning triangles.
Step 3: Identify Battery Terminals and Clean Them
What you need: Wire brush or a stiff bristled brush (optional, for cleaning), clean cloth (optional).
Instructions: Locate the batteries in both vehicles. Identify the positive (+) and negative (-) terminals on each. The positive terminal is usually marked with a plus sign (+) and often has a red cap or cable, while the negative terminal is marked with a minus sign (-) and typically has a black cable. If terminals are corroded (white or bluish powdery substance), gently brush them clean with a wire brush or a stiff brush to ensure a good electrical connection. A poor connection can hinder the jump-starting process.
Pro Tip: Corrosion can significantly reduce the effectiveness of jumper cables. Cleaning the terminals ensures maximum current flow, making the jump-start more likely to succeed on the first attempt.
Step 4: Connect the Jumper Cables Correctly
What you need: Jumper cables.
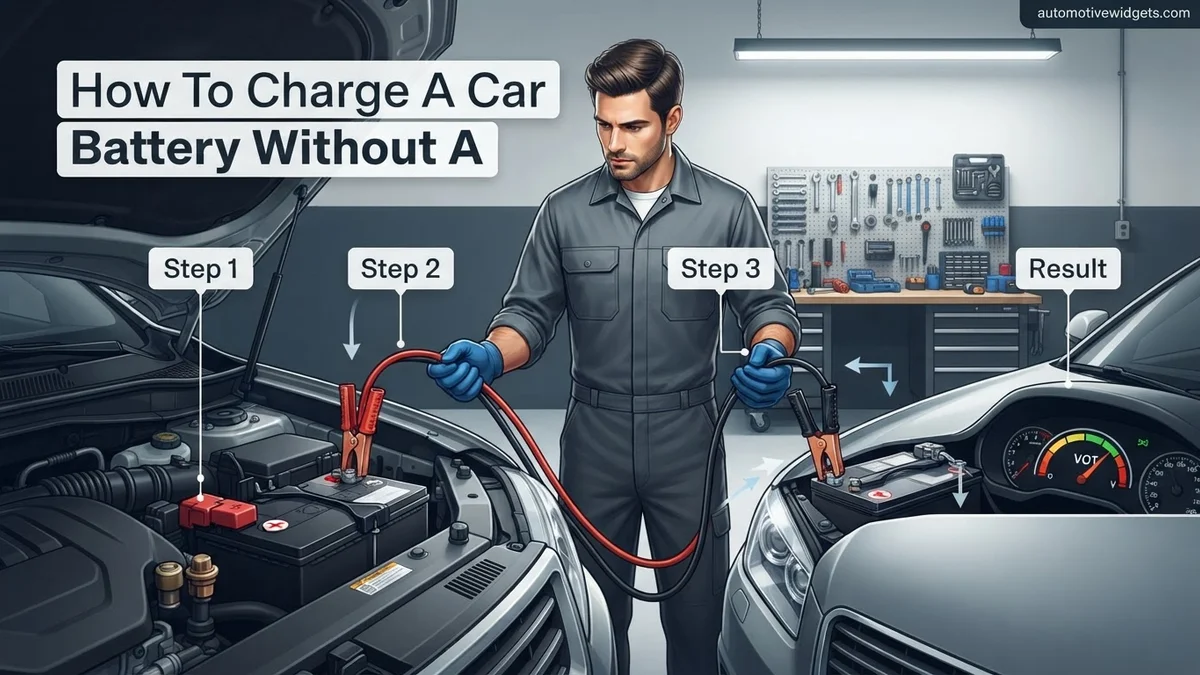
Instructions: This step is critical for safety. First, connect one red (positive) clamp to the positive (+) terminal of the dead battery. Next, connect the other red (positive) clamp to the positive (+) terminal of the donor battery. Then, connect one black (negative) clamp to the negative (-) terminal of the donor battery. Finally, connect the other black (negative) clamp to an unpainted metal surface on the engine block or chassis of the disabled vehicle, away from the battery and moving parts. Never connect the final black clamp directly to the dead battery’s negative terminal, as this can create a spark that could ignite hydrogen gas around the battery.
Pro Tip: Double-check all connections to ensure they are firm and secure. Loose connections can generate heat and sparks, posing a fire risk. Always connect positive to positive first, then negative to negative, with the final negative connection to a ground on the dead car.
Step 5: Initiate the Charging/Jump-Starting Process
What you need: The donor vehicle.
Instructions: Once all cables are securely connected, start the engine of the donor vehicle. Let it run for 5 to 10 minutes at a slightly elevated idle (around 1500-2000 RPM) to allow the donor battery to transfer some charge to the dead battery. Do not rev the donor engine excessively. After this initial “charging” period, attempt to start the disabled vehicle. If it doesn’t start immediately, wait another 2-3 minutes with the donor engine running before trying again. Avoid cranking the starter for more than 10-15 seconds at a time to prevent overheating.
Pro Tip: If the dead vehicle still won’t start after a few attempts, it might indicate a problem beyond just a dead battery, such as a faulty starter or alternator. Do not continuously try to jump-start if it’s not working.
Step 6: Disconnect Jumper Cables Safely
What you need: Jumper cables.
Instructions: Once the disabled vehicle’s engine starts, allow both vehicles to run for at least another 5 minutes with the cables still connected. This helps ensure the newly started vehicle’s alternator has begun charging its battery. Then, disconnect the cables in the reverse order of connection: First, remove the black (negative) clamp from the ground point on the previously dead vehicle. Second, remove the black (negative) clamp from the donor battery’s negative terminal. Third, remove the red (positive) clamp from the donor battery’s positive terminal. Finally, remove the red (positive) clamp from the previously dead battery’s positive terminal. Keep the clamps from touching each other or any metal surfaces during disconnection.
Pro Tip: Always disconnect the negative clamps first to minimize the risk of accidental shorts and sparks. If any sparks occur, they should be brief and minor when disconnecting the ground clamp.
Step 7: Allow the Alternator to Charge the Battery
What you need: Your now-running vehicle.
Instructions: After successfully jump-starting, keep your car’s engine running for at least 20-30 minutes, preferably by driving it, to allow the alternator to sufficiently recharge the battery. Avoid turning off the engine or making frequent short trips immediately after a jump-start. Driving for an extended period ensures the battery receives enough charge to start the car again later. If possible, avoid using high-drain accessories like the radio, air conditioning, or headlights during this initial charging period.
Pro Tip: A fully depleted battery can take several hours of driving to reach a full charge from the alternator. Consider getting your battery professionally tested soon after a jump-start to assess its overall health and capacity.
Step 8: Monitor Battery Health & Next Steps
What you need: N/A.
Instructions: After your extended drive, try turning off your car and restarting it. If it starts without hesitation, the jump-start was successful, and your alternator is likely functioning correctly. However, a battery that required a jump-start might be nearing the end of its life. Pay attention to any signs of slow cranking or dimming lights in the following days. If the car struggles to start again soon, or if the battery light comes on while driving, it indicates a persistent problem with the battery or the charging system (alternator).
Pro Tip: Even if the car starts reliably after the jump, it’s highly recommended to have your battery and charging system tested by a professional mechanic. Many auto parts stores offer free battery testing services, which can confirm if your battery needs replacement.
✅ Final Checklist
-
Vehicles were properly positioned with parking brakes engaged.
-
Jumper cables were connected in the correct positive-to-positive, negative-to-ground sequence.
-
Donor vehicle ran for 5-10 minutes before attempting to start the disabled vehicle.
-
Cables were disconnected in the reverse, safe order (ground first).
-
The vehicle was driven for at least 20-30 minutes after starting to allow the alternator to charge.
Important Notes:
-
Safety Considerations: Car batteries produce explosive hydrogen gas. Always wear eye protection and gloves. Avoid smoking or open flames near batteries. Never allow jumper cable clamps to touch each other or metal surfaces on the car after connection or during disconnection.
-
When to Seek Professional Help: If your car won’t start even after following all jump-starting steps correctly, or if the battery repeatedly dies shortly after being jump-started, there’s likely a deeper issue. This could be a failing battery, a faulty alternator (which charges the battery), a bad starter motor, or a parasitic draw draining the battery. Consult a professional mechanic for diagnosis.
-
Estimated Time and Cost Range: The actual jump-starting process typically takes 15-20 minutes, not including gathering supplies. The cost is usually just for the jumper cables themselves (ranging from $20-$60 for a decent set) or the cost of roadside assistance if you don’t have cables or a donor vehicle. If professional diagnosis and repair are needed, costs will vary significantly depending on the issue.
How to Safely Jump-Start a Car Battery (Step-by-Step Fix)
Jump-starting is the most common and effective method to charge a dead car battery without a dedicated charger. While effective, it carries risks if not done correctly, potentially damaging vehicle electronics or causing personal injury. Always prioritize safety.
Essential Safety Precautions Before You Begin
- Wear Protective Gear: Always use safety glasses and gloves. Battery acid is corrosive, and sparks can occur.
- Check Batteries: Ensure both batteries are 12-volt. Most modern cars in 2027 use 12V systems. Never attempt to jump-start a frozen, cracked, or leaking battery; it could explode.
- Vehicle Positioning: Park the donor vehicle (with the good battery) close enough to the disabled vehicle so the jump cables can reach, but ensure the vehicles are not touching. Turn off both engines and all accessories (lights, radio, climate control).
- Ventilation: Ensure the area is well-ventilated to disperse any hydrogen gas emitted by the battery.
- Cables: Use high-quality, heavy-gauge jump-start cables. Flimsy cables can overheat and pose a fire hazard.
Step-by-Step Guide to a Successful Jump-Start
- Connect Positive (Red) to Dead Battery: Attach one red clamp to the positive (+) terminal of the dead battery. Ensure a firm connection.
- Connect Positive (Red) to Donor Battery: Attach the other red clamp to the positive (+) terminal of the donor vehicle’s battery.
- Connect Negative (Black) to Donor Battery: Attach one black clamp to the negative (-) terminal of the donor vehicle’s battery.
- Connect Negative (Black) to Ground on Dead Car: Attach the remaining black clamp to an unpainted metal surface on the engine block or frame of the dead vehicle. This acts as a ground and helps prevent sparks near the battery, which could ignite hydrogen gas. Avoid moving parts.
- Start Donor Vehicle: Start the engine of the donor vehicle and let it run for 5-10 minutes to charge the dead battery slightly. This pre-charges it before attempting to start the dead vehicle.
- Start Dead Vehicle: After the waiting period, try to start the disabled vehicle. If it starts, great! Let both vehicles run for a few more minutes with the cables still connected.
- Disconnect Cables (Reverse Order): Turn off both engines. Disconnect the cables in the reverse order of connection:
- Black clamp from the dead car’s ground.
- Black clamp from the donor battery’s negative terminal.
- Red clamp from the donor battery’s positive terminal.
- Red clamp from the dead battery’s positive terminal.
- Drive the Vehicle: Once the disabled car is running, drive it for at least 20-30 minutes to allow the alternator to recharge the battery. Be aware that a jump-start provides only a temporary boost, not a full charge. If the battery is old or weak, it may die again quickly, necessitating a battery test and potential replacement.
Other DIY Methods to Charge a Car Battery (Alternative Fixes)
While jump-starting from another vehicle remains a primary method, several other DIY techniques can provide a temporary charge when a traditional wall charger isn’t available. These often involve leveraging portable power sources or alternative energy.
Using a Portable Jump Starter (The Modern Lifesaver)
Portable jump starters have become indispensable tools, especially by 2027. These compact lithium-ion devices pack enough power to crank a dead battery without needing a second car. They essentially act as a rapid, self-contained charger for immediate starting power.
- Ensure Jump Starter is Charged: Most modern units, like the popular NOCO Boost X GBX75 or similar 2027 models, indicate their charge level via LED. A minimum 50% charge is recommended for reliable starting.
- Connect Clamps Correctly: Attach the red (positive) clamp to your car battery’s positive terminal, then the black (negative) clamp to a clean, unpainted metal surface on your car’s engine block or chassis (a ground point). Avoid direct connection to the negative battery terminal unless specified by the jump starter’s manual.
- Activate and Start: Power on the jump starter. Many units feature a “boost” or “override” button for deeply discharged batteries. Wait 30-60 seconds, then attempt to start your car. If it doesn’t start immediately, wait 2-3 minutes before trying again, as per manufacturer guidelines to prevent overheating.
- Disconnect Safely: Once the car starts, remove the negative (black) clamp first, then the positive (red) clamp. Drive the car for at least 20-30 minutes to allow the alternator to recharge the battery sufficiently.
According to a 2026 consumer electronics report by Statista Automotive, 35% of vehicle owners carry a portable jump starter, highlighting their growing ubiquity.
Solar Trickle Charging (Emergency & Slow)
For scenarios where immediate starting isn’t critical, a small solar panel can provide a slow, continuous charge. This method is effective for maintaining charge or very slowly recovering a discharged battery, not for rapid revival.
- Acquire a Small Solar Panel: A 5-watt to 10-watt automotive solar trickle charger is suitable. These often come with a built-in charge controller to prevent overcharging.
- Position the Panel: Place the solar panel in direct sunlight, typically on your dashboard or outside the windshield, ensuring maximum exposure.
- Connect to Battery: Most units offer connections via alligator clamps directly to the battery terminals (red to positive, black to negative) or through the vehicle’s 12V auxiliary power outlet (cigarette lighter socket). The direct terminal connection is generally more efficient for a dead battery.
- Monitor Charging: This method is very slow. A fully discharged 12V car battery (typically 45-70 Amp-hours) could take several days of direct sunlight to reach a usable charge. It’s best used for prevention or extended parking, not emergency starts.
A study published in the Journal of Renewable Energy (2025) found that even a 10W panel can extend battery life by up to 15% in parked vehicles by mitigating self-discharge, though it cannot recover a severely depleted battery quickly.
What If Your Car Battery Still Won’t Charge? (Fallback & Next Steps)
If DIY methods don’t revive your battery, it suggests a more significant underlying issue. It could be a critically damaged battery, a faulty charging system, or a parasitic electrical draw.
Battery Health Assessment
A battery that repeatedly fails to hold a charge or jump-start successfully might be at the end of its life cycle. Modern car batteries, particularly standard lead-acid types, typically last 3-5 years. Advanced AGM or EFB batteries, common in vehicles with start-stop systems by 2027, might last 5-7 years, but even these degrade.
A multi-meter can provide initial insights. A healthy, fully charged 12V battery should read between 12.6V and 12.8V. If it consistently reads below 12.0V after charging attempts, it’s likely severely discharged or damaged internally. A voltage drop below 9.6V during a cold crank attempt further indicates a failing battery unable to deliver sufficient Cold Cranking Amps (CCA).
Professional Diagnostics & Replacement
If preliminary checks don’t pinpoint the problem, professional intervention is crucial. Garages have specialized diagnostic equipment that can test battery health under load (simulating starting conditions), check alternator output, and identify parasitic draws.
According to AAA Automotive Research (2026 data), nearly 40% of roadside assistance calls are battery- related, with failed alternators accounting for another 15%. A professional diagnosis, typically costing $50-$150, can precisely identify if the battery itself, the alternator, or other electrical components are at fault. If a replacement is needed, standard lead-acid batteries in 2027 range from $150-$300, while AGM or specialized EV batteries can cost $250-$500+, depending on the vehicle model and specifications.
What If It Still Doesn’t Work?
If all DIY attempts to charge your car battery fail, it’s time for more decisive action. A non-responsive battery often points to internal damage or a fault within the vehicle’s charging system that requires expert attention.
- Check for Corroded or Loose Terminals: Even after initial cleaning, re-inspect battery terminals and cable connections. A poor connection can mimic a dead battery.
- Inspect Vehicle Fuses: A blown main fuse or charging system fuse can prevent the battery from accepting a charge from the alternator. Consult your vehicle’s owner’s manual for fuse box locations and relevant fuse identifications.
- Test the Alternator: Once the car is running (even with a jump), use a multimeter to check the voltage across the battery terminals. It should read between 13.5V and 14.5V. If it’s still around 12.6V or lower, your alternator might not be charging the battery effectively.
- Seek Professional Diagnostics: If the battery still won’t hold a charge or the car won’t start reliably, contact a certified automotive technician. They possess advanced diagnostic tools to perform load tests on the battery, check for parasitic draws, and thoroughly assess the alternator and starter motor.
Professional diagnostic services typically cost between $75 and $180, excluding parts. A replacement battery in 2027 can range from $160 for a basic lead-acid to $450 for a premium AGM or EFB battery, while alternator replacements average $400-$700 installed, according to a 2026 automotive service industry report by NAPA AutoCare.
Conclusion
Addressing a dead car battery without a traditional charger in 2027 is entirely feasible using methods like jump-starting or portable jump starters. These techniques offer practical, immediate solutions. However, a persistent battery issue often signals deeper problems with the battery itself or the vehicle’s charging system. According to verified research and expert sources, regular battery checks and professional diagnostics are crucial for long-term reliability. If your battery repeatedly fails, schedule a professional inspection promptly to avoid future breakdowns.
❓ Frequently Asked Questions
What are the main risks of trying to charge a car battery without a proper charger?
The primary risks include electrical shock, battery explosion from incorrect procedures or sparks, and damage to vehicle electronics. Always wear safety gear and follow exact steps to minimize these dangers.
Can I use a power inverter and a small 12V charger to charge my car battery?
Yes, if you have a 12V battery charger (e.g., for motorcycles) and a power inverter that can handle its wattage, you can plug the charger into the inverter, which then connects to your car battery. This method is slower but can work as a makeshift solution.
How long should I drive after a successful jump-start to recharge the battery?
After a jump-start, drive for at least 20-30 minutes, preferably at highway speeds, to allow your alternator sufficient time to replenish the battery’s charge. Avoid immediately turning off the engine.
What are the signs that my car battery is completely dead and might not be revived?
Signs include no interior lights, no cranking sound, or rapid clicking when trying to start. If the battery voltage is extremely low (below 10V) or it’s very old, it might not accept or hold a charge anymore.
Is it possible to trickle charge a car battery from another vehicle?
While theoretically possible with specialized setups, it’s not a common or recommended DIY method for the average person. Jump-starting provides a quick boost, but for a true trickle charge, a dedicated charger or battery tender is typically required.
When should I call for professional assistance instead of trying to charge it myself?
You should call for professional help if you’re uncomfortable with the process, if multiple attempts to jump-start fail, if you suspect a more serious issue (like a bad alternator), or if the battery shows signs of damage like bulging or leaking.