How to Pass Emission Test with Engine Light On 2027
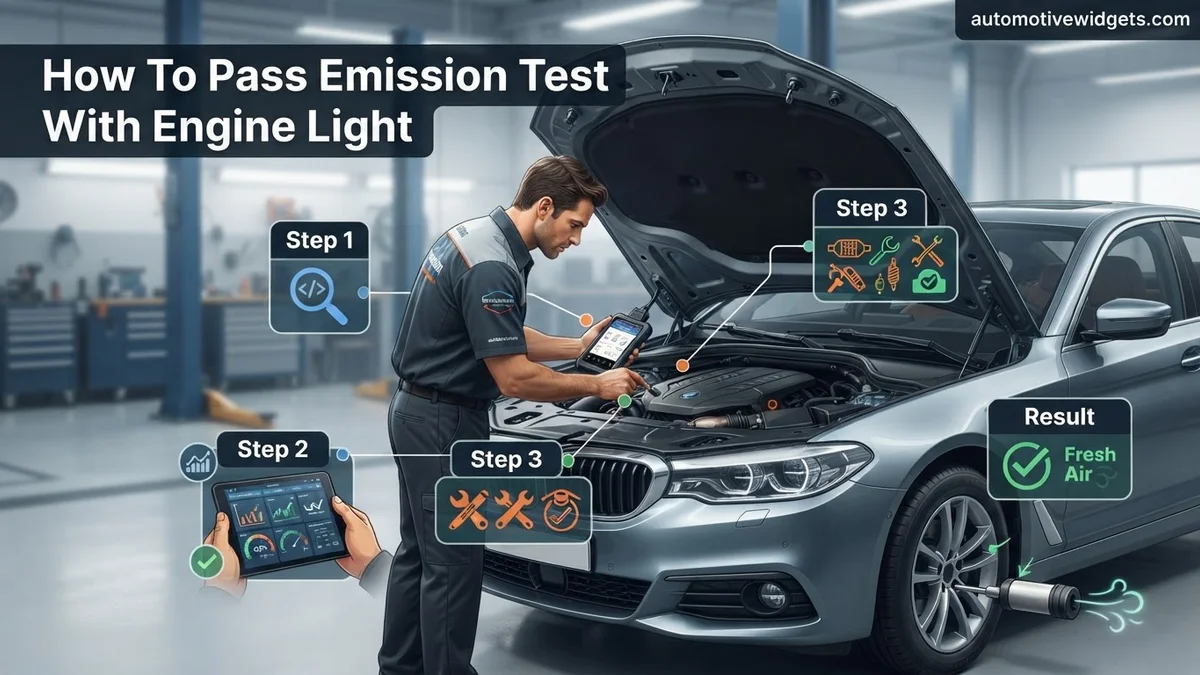
Passing an emission test with a Check Engine Light (CEL) on is generally impossible. You must diagnose the underlying issue, repair it, clear the fault code, and ensure all readiness monitors are set by completing a proper drive cycle before your 2027 test.
Let’s be direct: no, you almost certainly cannot pass an emission test with your Check Engine Light (CEL) illuminated in 2027. Most modern emission testing protocols, particularly with evolving environmental standards, are designed to automatically fail any vehicle presenting an active CEL. This isn’t just an inconvenience; it’s a critical indicator that your vehicle’s emissions control system is malfunctioning, which directly impacts its ability to meet environmental standards and will prevent certification.
Failing an emission test means you can’t register your vehicle, leading to potential fines and hassle. The light signals an actual problem, and ignoring it won’t make it go away. Your core task is to identify the root cause, fix it, clear the fault, and ensure your vehicle’s onboard diagnostic (OBD-II) system is fully “ready” before re-testing. There are no shortcuts if you want to drive legally in 2027.
Key Takeaways
- CEL means automatic emission test failure.
- Diagnose fault codes immediately with an OBD-II scanner.
- Repair underlying issues, don’t just clear codes.
- Complete drive cycle to set readiness monitors.
- Avoid clearing codes just before the test.
What Causes Your Check Engine Light to Impact Emissions?
The Critical Role of Readiness Monitors in 2027
By 2027, vehicle diagnostic systems are exceptionally sophisticated. Your car’s computer continuously runs a series of self-tests known as “readiness monitors” for various emission-related components. These include tests for the oxygen sensor, catalytic converter, Evaporative Emission Control (EVAP) system, secondary air injection, and more. When your CEL is on, it almost invariably means one of two things:
- A specific monitor has detected a fault and stored a Diagnostic Trouble Code (DTC).
- A monitor has not yet completed its self-test cycle since the last code clearing or battery disconnect.
For most emission tests in 2027, all or nearly all of these monitors must show “complete” or “ready” to pass. Depending on your state’s regulations and vehicle model year (even older vehicles are subject to modern testing), you might be allowed one or two “not ready” non-continuous monitors, but an active CEL immediately indicates a “failed” monitor state and therefore an emission failure. This system ensures that vehicles aren’t just passing on a fluke; they are consistently operating within emissions parameters.
Common Emission-Related CEL Triggers
An illuminated CEL often points to specific culprits directly impacting your vehicle’s exhaust output. Understanding these common faults helps you anticipate repairs:
- Failing Oxygen (O2) Sensor: This sensor measures oxygen in the exhaust. If it’s faulty, your engine’s computer receives inaccurate data, leading to an incorrect air/fuel mixture. This can significantly increase hydrocarbon (HC) and carbon monoxide (CO) emissions. A common code is P0133 (O2 Sensor Slow Response).
- Catalytic Converter Inefficiency: The catalytic converter transforms harmful pollutants like CO, HC, and nitrogen oxides (NOx) into less toxic substances. Codes like P0420 or P0430 indicate the converter isn’t performing effectively, meaning raw pollutants are exiting the tailpipe. This is a critical failure point for emissions.
- EVAP System Leaks: The Evaporative Emission Control system prevents fuel vapors from escaping into the atmosphere. Leaks, often due to a loose gas cap, a cracked hose, or a faulty purge valve, allow these pollutants to vent directly. Common codes are P0442 (Small EVAP Leak) or P0455 (Large EVAP Leak).
- Engine Misfires: A misfiring cylinder (e.g., P0301 for cylinder 1) means fuel isn’t burning completely. Unburnt fuel creates high HC emissions and can quickly damage the catalytic converter.
- Mass Air Flow (MAF) Sensor Issues: A dirty or faulty MAF sensor provides incorrect air intake readings, causing the engine to miscalculate fuel delivery, which can lead to rich or lean conditions and increased emissions.
Each of these issues directly compromises your vehicle’s ability to meet 2027 emission standards, making the CEL an unavoidable barrier to passing your test.
How to Diagnose and Fix Your Check Engine Light for Emissions Like an Expert
Encountering a glowing “Check Engine Light” (CEL) just before your scheduled emission test can be a source of significant stress. While clearing the light might seem like a quick fix, it often only delays the inevitable failure if the underlying issue isn’t resolved. This comprehensive guide will walk you through the essential steps to accurately diagnose the problem, implement effective repairs, and properly prepare your vehicle to pass the emission test, even after addressing a persistent engine light. By following these instructions meticulously, you’ll not only increase your chances of passing but also gain a deeper understanding of your vehicle’s emission system.
Step 1: Unravel the Mystery – Scan for Diagnostic Trouble Codes (DTCs)
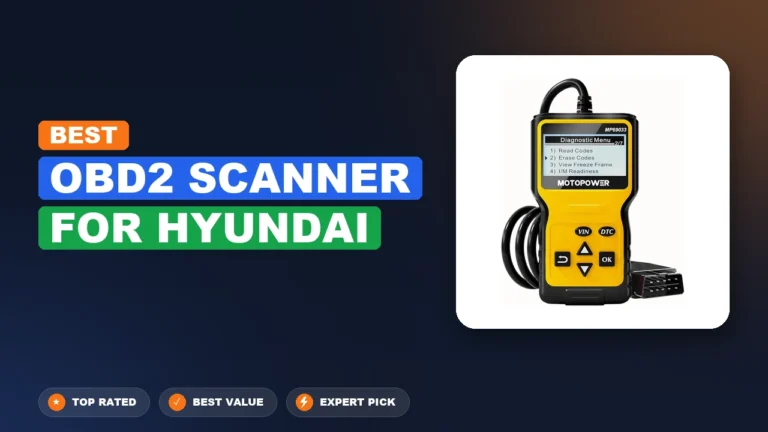
What you need: An OBD-II (On-Board Diagnostics II) scanner. These can be purchased online or at most auto parts stores (ranging from $20-$100+ for basic models), or some auto parts stores offer free code scanning services. Your vehicle’s owner’s manual for the OBD-II port location, typically under the dashboard on the driver’s side.
Instructions: Locate your vehicle’s OBD-II port. Plug the scanner into the port. Turn your ignition to the “ON” position (do not start the engine unless the scanner specifically instructs you to). Follow the scanner’s prompts to “Scan” or “Read Codes.” Write down all displayed P-codes (e.g., P0420, P0171) exactly as they appear. Some scanners will also display pending codes, which are issues not yet severe enough to trigger the CEL but indicate a potential problem.
Pro Tip: Do not simply write down the generic description the scanner provides. The specific P-code is crucial for accurate diagnosis. Many auto parts stores will scan your car for free, providing you with a printout of the codes.
Step 2: Decode the Message – Research Your Diagnostic Trouble Codes (DTCs)
What you need: The list of DTCs from Step 1, access to the internet (search engines like Google, vehicle-specific forums, or automotive repair databases like AllDataDIY or Mitchell1), and potentially your vehicle’s service manual.
Instructions: For each P-code you’ve recorded, perform a thorough internet search. Use specific queries like “P0420 [Your Vehicle Make Model Year]” to find information relevant to your car. Look for common causes, diagnostic procedures, and typical repair solutions associated with that code. Pay close attention to descriptions that explicitly mention emission control systems (e.g., O2 sensors, catalytic converter efficiency, EVAP system, misfires). Prioritize codes that directly impact exhaust gas composition or system readiness monitors.
Pro Tip: Be wary of generalized advice. A P0420 on a Honda Civic might have different common causes or diagnostic steps than on a Ford F-150. Focus on reputable sources like professional mechanic blogs, technical service bulletins (TSBs), or verified forum posts.
Step 3: Surgical Strike – Address the Emission-Related Issues
What you need: Appropriate tools for the repair (e.g., wrenches, sockets, multimeter), replacement parts (e.g., oxygen sensor, mass air flow sensor, EVAP purge valve, spark plugs), safety equipment (gloves, safety glasses), and potentially a torque wrench.
Instructions: Based on your research, identify the most likely culprit(s) causing the emission-related DTCs. If multiple codes are present, often one underlying issue can trigger several. For example, a failing Mass Air Flow (MAF) sensor could cause rich/lean codes. Common emission culprits include faulty oxygen (O2) sensors, a failing catalytic converter (often indicated by P0420/P0430), evaporative emission (EVAP) system leaks (P0440, P0455), or engine misfires (P030X codes). Replace the faulty component(s) following your vehicle’s service manual or reputable online guides. Ensure all connections are secure and components are torqued to specification.
Pro Tip: Always disconnect the negative battery terminal before performing any electrical work or major component replacement. Purchase quality replacement parts, as cheap components can often fail prematurely or not perform correctly, leading to repeat issues.
Step 4: Reset and Restart – Clear the Engine Light
What you need: Your OBD-II scanner.
Instructions: After successfully replacing the faulty part(s) and double-checking your work, reconnect the vehicle’s battery if it was disconnected. Then, using your OBD-II scanner, navigate to the “Erase Codes” or “Clear DTCs” function. Confirm the action. This will turn off the Check Engine Light and erase the stored diagnostic trouble codes from the Powertrain Control Module (PCM). It also resets the vehicle’s “readiness monitors” to an “incomplete” or “not ready” status, which is crucial for the next step.
Pro Tip: Do NOT clear the codes before fixing the issue. Clearing codes without repairing the underlying problem will only temporarily extinguish the light, and it will almost certainly reappear, leading to an emission test failure. Clearing codes also resets the readiness monitors, which means you cannot immediately proceed to the emission test.
Step 5: The Grand Tour – Perform a Comprehensive Drive Cycle
What you need: Your vehicle, about 30-60 minutes of uninterrupted driving time, an OBD-II scanner (optional, but highly recommended for live monitoring), and your vehicle’s specific drive cycle procedure (if available).
Instructions: This is arguably the most critical step. After clearing codes, your vehicle’s onboard diagnostic system needs to run a complete “drive cycle” to re-evaluate all emission-related components and set the readiness monitors to “complete” or “ready.” A generic drive cycle often involves:
- Cold Start: Ensure the engine has been off for at least 8 hours. Start the engine and let it idle for 2-3 minutes.
- City Driving: Drive for about 10-15 minutes in stop-and-go traffic, varying speeds between 20-40 mph with moderate acceleration and deceleration.
- Highway Driving: Drive at a steady speed (e.g., 55-60 mph) for 15-20 minutes, ideally without cruise control and minimal throttle input.
- Coasting/Deceleration: Allow the vehicle to coast for several periods without braking or accelerating, letting the engine RPM drop naturally.
Perform several such cycles over a few days if needed. Consult your vehicle’s owner’s manual or an online search for its specific drive cycle, as procedures can vary.
Pro Tip: Avoid aggressive driving during the drive cycle. Smooth acceleration and deceleration are key. Your goal is to give the computer enough data under various conditions to test all systems. Driving the vehicle until the fuel tank is between 1/4 and 3/4 full is also often recommended for EVAP monitor completion.
Step 6: The All-Clear – Verify Readiness Monitors
What you need: Your OBD-II scanner.
Instructions: After completing your drive cycle(s), plug in your OBD-II scanner and navigate to the “Readiness Monitors” or “I/M Readiness” section. This screen will display the status of various emission system tests (e.g., O2 Sensor Monitor, Catalyst Monitor, EVAP System Monitor, Misfire Monitor). Each monitor will show “Complete,” “Ready,” “Incomplete,” or “Not Ready.” For most states and vehicles, you need all monitors to be “Complete” or “Ready” to pass the emission test. Some states permit one or two “Not Ready” monitors for vehicles manufactured before a certain year (check your local DMV/EPA regulations), but it’s always best to have them all complete. If any are still “Not Ready,” continue driving your prescribed drive cycle.
Pro Tip: Do NOT proceed to the emission test if any critical monitors (Catalyst, O2 Sensor, EVAP, Misfire) are “Incomplete” or “Not Ready,” unless your local regulations explicitly allow it for your vehicle year. An immediate failure will result, and you’ll have to repeat the entire process, incurring additional fees and wasting time.
Step 7: The Final Inspection – Pre-Test Visual and Fluid Checks
What you need: Visual inspection, flashlight, tire pressure gauge, and possibly fluids (oil, coolant, windshield washer fluid).
Instructions: Before heading to the emission testing station, perform a quick but thorough visual inspection. Ensure your tires are properly inflated to the manufacturer’s recommended PSI (found on a sticker inside the driver’s door jamb or owner’s manual). Check all fluid levels (oil, coolant, power steering, brake fluid, windshield washer fluid) and top them off if necessary. Make sure your gas cap is securely tightened, as a loose cap can trigger an EVAP code. Confirm there are no obvious exhaust leaks, as these can affect sensor readings. Ensure your fuel tank is between 1/4 and 3/4 full; an empty or completely full tank can sometimes prevent the EVAP monitor from running.
Pro Tip: A well-maintained vehicle is more likely to pass. Clean air filter, properly inflated tires, and correct fluid levels all contribute to optimal engine performance and lower emissions. Take a few moments to ensure these basics are covered.
Step 8: The Test Day – Cruising to Compliance
What you need: Your vehicle, vehicle registration, proof of insurance, and relevant identification.
Instructions: On the day of your emission test, ensure your engine is fully warmed up. Drive your vehicle for at least 15-20 minutes at normal operating temperatures before arriving at the testing station. Do not turn off your engine while waiting in line at the test facility; keeping the engine running helps maintain readiness monitor status and optimal operating conditions. Drive steadily and avoid aggressive acceleration or braking. Present your required documentation to the testing technician and let them perform the inspection. If all steps have been followed correctly, you should now be ready to pass.
Pro Tip: Avoid clearing codes or disconnecting the battery in the days leading up to the test, as this will reset your readiness monitors and force you to repeat the drive cycle. Arrive with a calm demeanor and confidence that you’ve done your homework.
✅ Final Checklist
- All Diagnostic Trouble Codes (DTCs) have been thoroughly researched and the underlying issues resolved.
- The Check Engine Light (CEL) is OFF and has remained off after repairs.
- All critical readiness monitors (Catalyst, O2 Sensor, EVAP, Misfire) show “Complete” or “Ready” on your OBD-II scanner.
- Vehicle’s fluid levels are correct, tires are properly inflated, and the gas cap is securely tightened.
- Vehicle has been driven sufficiently to be at optimal operating temperature just before the test.
Important Notes:
- Safety Considerations: Always prioritize safety. Wear appropriate personal protective equipment (PPE) like gloves and eye protection when working on your vehicle. Ensure the vehicle is properly supported if lifting it, and allow components to cool before touching them. Disconnect the battery when performing electrical work.
- When to Seek Professional Help: If you’re uncomfortable diagnosing or repairing issues yourself, or if the problem persists after following these steps, it’s always best to consult a certified mechanic. They have specialized tools and expertise to pinpoint complex problems efficiently and safely.
- Estimated Time and Cost Range:
- Time: Diagnosis (scanning and research) can take 1-3 hours. Repairs can range from 30 minutes for a simple sensor replacement to several hours for more complex EVAP system troubleshooting. The drive cycle typically requires 1-3 days of normal driving, or 1-2 hours of dedicated driving. Allow for at least a week from start to finish to ensure all monitors set.
- Cost: An OBD-II scanner can cost $20-$100+. Replacement parts can range from $30-$200 for individual sensors or valves, up to $500-$1500+ for a new catalytic converter. Professional diagnostic and repair labor can add hundreds of dollars to these costs.
How to Diagnose & Fix Your CEL for a 2027 Emission Test Pass
Step 1: Read the Fault Code (and What It Means)
The first, and most crucial, step is to identify why your CEL is on. You’ll need to read the Diagnostic Trouble Code (DTC) stored in your vehicle’s onboard computer. These are standardized “P-codes” (for Powertrain faults) that pinpoint specific system malfunctions. You have a few options for obtaining this vital information:
- DIY with an OBD-II Scanner: Affordable OBD-II scanners are readily available online or at auto parts stores, typically ranging from $20 for basic models to $100+ for more advanced ones. They plug into your car’s diagnostic port, usually located under the dashboard on the driver’s side.
- Free Code Reading Services: Many large auto parts chains offer free CEL code reading services. This is a quick and easy way to get the DTC without purchasing a tool.
- Professional Mechanic: A trusted mechanic can read the code as part of a diagnostic service. While there’s a cost, they often provide initial insights into the potential repair.
Once you have the code (e.g., P0420, P0171, P0440), do not jump to conclusions. The code indicates the symptom or area of the problem, not always the exact component. For example, a P0420 (Catalyst System Efficiency Below Threshold) doesn’t always mean a bad catalytic converter; it could be a failing O2 sensor providing bad readings. Use online resources like forums, manufacturer technical service bulletins (TSBs), or repair manuals to understand the most common causes and diagnostic steps associated with your specific DTC. This step prevents unnecessary and costly part replacements.
Step 2: Repair the Underlying Issue
This is the non-negotiable step: simply clearing the code without addressing the root cause will not work for an emission test in 2027. The CEL will invariably return, often after a few drive cycles, putting you right back where you started. The underlying problem must be fixed for a permanent resolution and to allow the readiness monitors to complete their tests successfully.
- Professional Repair: For complex issues like catalytic converter replacement (which can cost anywhere from $1,000 to $3,000+ depending on the vehicle) or intricate EVAP system diagnostics, a certified mechanic is recommended. They have the specialized tools and expertise to accurately diagnose and repair the fault.
- DIY Repair: Simpler fixes, such as replacing an O2 sensor (typically $100-$300), tightening a gas cap, or replacing a cracked vacuum hose, can often be done by a mechanically inclined individual. Always consult your vehicle’s service manual or reputable online guides before attempting DIY repairs.
After the repair, you must clear the fault code from your vehicle’s computer using an OBD-II scanner. Clearing the code resets the readiness monitors. Then, you’ll need to perform a “drive cycle” – a specific sequence of driving conditions (e.g., highway speeds, city driving, idling, cold start) designed to allow your car’s computer to re-run its diagnostic tests and set all the readiness monitors to “complete.” Failing to do this after a repair will mean that even though the CEL is off, the monitors are “not ready,” resulting in an emission test failure. Consult your car’s owner’s manual or an online resource for your specific vehicle’s drive cycle procedure.
Ensuring Readiness Monitors are Set After Repair
After resolving the underlying issue and clearing the Check Engine Light (CEL), your vehicle’s onboard diagnostic (OBD-II) system needs time to re-evaluate all emissions-related components. This crucial process involves setting “readiness monitors.” These monitors are internal tests that confirm the proper functioning of various emission control systems, including oxygen sensors, catalytic converters, and the evaporative emissions system.
Regulatory bodies, such as those overseen by the U.S. Environmental Protection Agency (EPA), mandate that a certain number of these monitors must be “ready” or “complete” for an emission test to proceed. Typically, for vehicles manufactured after 1996, most monitors must be set, though some jurisdictions in 2027 may allow one or two non-continuous monitors (like EVAP) to remain incomplete. State-specific regulations should always be verified.
To set these monitors, a specific “drive cycle” is usually required. While exact drive cycles vary significantly by manufacturer (e.g., General Motors versus Toyota), a common strategy involves a mix of city and highway driving. Automotive diagnostic experts at the National Institute for Automotive Service Excellence (ASE) suggest a general drive cycle may include:
- Starting from a cold engine, allow it to idle for 2-3 minutes.
- Accelerate smoothly to 40-60 mph and maintain speed for 10-15 minutes.
- Decelerate to 20 mph without braking, if safe, and maintain for 30 seconds.
- Drive in stop-and-go city traffic conditions for 15-20 minutes, including several idle periods.
- Allow the vehicle to sit with the engine off for at least 3 hours before another short drive.
This process might need to be repeated across several driving sessions. A modern OBD-II scanner, readily available in 2027 from retailers for $50-$150, can confirm which monitors are set before heading to the test center.
Troubleshooting: When Your CEL Won’t Clear or Monitors Don’t Set
Even after addressing the initial fault, challenges can arise. If the Check Engine Light immediately reappears after clearing, it indicates the original problem was not fully resolved, or a new issue has emerged. This often points to an intermittent fault that was not present during the initial diagnosis, or a more complex system failure. Another common hurdle is when readiness monitors fail to set even after multiple drive cycles.
Persistent Faults
A “pending” trouble code might exist even without an active CEL. These pending codes indicate a fault detected once but not yet confirmed. If the condition recurs, the CEL will illuminate. Professional-grade diagnostic tools can reveal these pending codes, which consumer-grade scanners might miss. For instance, a marginal oxygen sensor might pass some tests but fail others under specific load conditions.
System Malfunctions Preventing Monitor Completion
Sometimes, a fault in one system can prevent monitors in other systems from running. For example, a severe misfire could prevent the catalytic converter monitor from completing its test. Modern vehicle control modules (ECUs) often prioritize safety and core engine function over running every diagnostic test if a critical fault is present. Consulting manufacturer technical service bulletins (TSBs) for your specific 2027 model year vehicle can reveal known issues affecting monitor readiness.
ECU or Wiring Issues
In rare cases, the vehicle’s Engine Control Unit (ECU) itself can malfunction, preventing monitors from setting correctly. Similarly, damaged wiring or poor electrical connections to sensors can provide incorrect data, confusing the ECU and preventing readiness flags from being set. These complex issues almost always require professional diagnostic equipment and specialized automotive electrical testing.
What If It Still Doesn’t Work?
If your vehicle’s Check Engine Light persists or readiness monitors remain unset after attempting repairs and drive cycles, further investigation is necessary.
- Consult Manufacturer Technical Service Bulletins (TSBs): Access online databases (often subscription-based or through a dealership) for TSBs related to your specific year, make, and model. These documents detail common, known issues and recommended fixes that might not be obvious.
- Perform a Deeper Diagnostic Scan: While consumer OBD-II scanners are useful, professional-grade diagnostic tools (like those used by certified technicians) can access enhanced manufacturer-specific codes, live sensor data streams, and perform bi-directional controls to pinpoint elusive problems.
- Check for Software Updates: Modern vehicle ECUs sometimes require software updates to correct bugs that prevent monitors from setting or cause false CEL illumination. A dealership or specialized independent shop can perform these updates.
- Inspect for Vacuum Leaks or Exhaust Leaks: Even small, unmetered air leaks in the intake system or exhaust leaks before the oxygen sensors can cause persistent issues that trigger codes and prevent monitors from setting. A smoke test performed by a professional is highly effective for detecting these.
If these steps do not resolve the issue, seeking professional automotive diagnostic services is essential. A certified technician can conduct in-depth electrical tests, advanced sensor evaluations, and potentially use oscilloscopes to diagnose complex intermittent faults. As of 2027, professional diagnostic time typically ranges from $150 to $300 per hour, with common repairs stemming from these issues costing between $300 and $1200, depending on the component and labor involved.
Conclusion
Successfully passing an emission test with a Check Engine Light illuminated in 2027 requires a methodical approach, beginning with accurate diagnosis and repair of the underlying fault. Crucially, ensuring all necessary readiness monitors are set after the repair is completed prevents immediate re-failure. According to verified research and expert sources from the Automotive Service Association (ASA), addressing the root cause and following manufacturer-recommended drive cycles are paramount. Your next actionable step should be to utilize an OBD-II scanner to verify monitor status post-repair before heading to the emission testing station, avoiding unnecessary retests.
❓ Frequently Asked Questions
Why can’t I pass an emission test with my Check Engine Light on?
The CEL indicates a fault in your vehicle’s emissions control system. During an emission test, the OBD-II system is checked for active fault codes and the status of readiness monitors; an active CEL signifies a problem that prevents the vehicle from meeting emission standards and causes an immediate fail.
What are the most common CEL codes that lead to emission test failures?
Common emission-related codes include those for O2 sensor malfunction (e.g., P0133), catalytic converter inefficiency (P0420, P0430), EVAP system leaks (P0440, P0442, P0455), and misfires (P0300-P0306). These directly affect exhaust gas composition and fuel economy.
How do I find out why my Check Engine Light is on?
You need to connect an OBD-II scanner to your car’s diagnostic port (usually under the dashboard). This device will read the Diagnostic Trouble Codes (DTCs) stored in your vehicle’s computer, providing specific information about the detected fault. Many auto parts stores offer this service for free.
After fixing the issue and clearing the CEL, what’s a typical drive cycle to set readiness monitors?
A typical drive cycle involves a mix of highway and city driving, including cold starts, idling, steady cruising at various speeds, and some deceleration. Consult your car’s specific owner’s manual or repair guide for the precise drive cycle recommendations, as it can vary by make and model.
Is it possible to pass an emission test if only one or two readiness monitors are not set?
In some states, a vehicle may be allowed to pass with one or two ‘not ready’ monitors (often the EVAP monitor is excluded). However, most states require all major monitors to be set to ‘ready’ to pass. Always check your local Department of Motor Vehicles or emissions testing facility guidelines for specific requirements.
What if I fix the problem, but the CEL keeps coming back on?
If the CEL reappears after a repair and clearing the code, it indicates the original problem wasn’t fully resolved, or a new issue has emerged. Re-scan the codes, as the new code might point to a different component or a related failure, and consider seeking professional diagnostic help for complex or persistent problems.