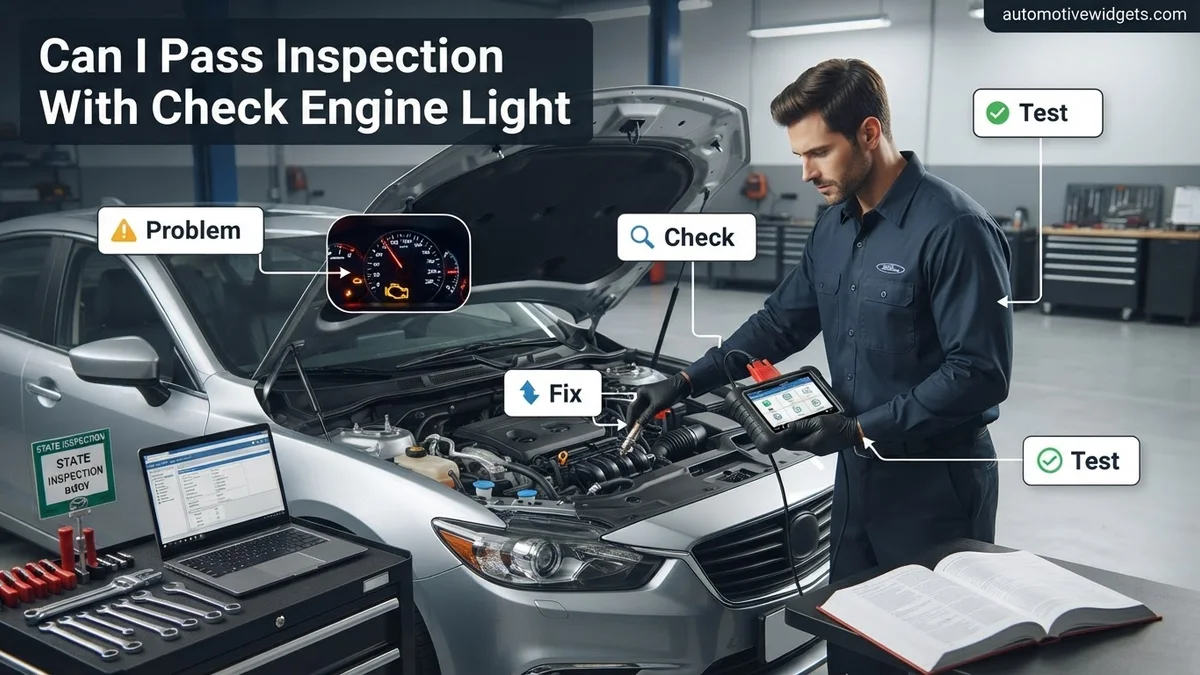
Can I Pass Inspection with Check Engine Light? 2027
Having a ‘Check Engine Light’ (CEL) illuminated will almost always result in an immediate failure of mandatory vehicle inspections in 2027, primarily due to emissions and safety concerns. This strict rule is highly state-dependent, so it’s crucial to consult your local DMV or environmental agency’s specific regulations before your test. Addressing the underlying issue and ensuring all readiness monitors are set is essential for passing.
Driving with your Check Engine Light (CEL) illuminated and wondering if your vehicle will pass its mandatory inspection in 2027? The direct answer is almost universally no, your car will not pass inspection with an active Check Engine Light. This isn’t just a minor issue; it’s a critical indicator that your vehicle’s emissions control system is malfunctioning, which is a primary focus of state inspections across the United United States and many other regions. Ignoring this light will lead to an immediate inspection failure, costing you time and money.
The rules governing vehicle inspections, especially concerning the CEL, vary significantly by state or jurisdiction. While nearly all states mandate that the CEL must be off for a successful emissions inspection, the specifics of how they enforce this, what codes are permissible (very few), and how they handle ‘readiness monitors’ can differ. Understanding your specific state’s regulations for 2027 is crucial before you even consider taking your car in.
Key Takeaways
- Active CEL usually means inspection failure.
- Regulations vary greatly by state; check local laws.
- Diagnose CEL code with OBD-II scanner.
- Repair underlying issue, don’t just clear code.
- Complete drive cycle for readiness monitors.
What Causes Inspection Failure with a Check Engine Light?
Your vehicle’s Check Engine Light is more than just a warning; it’s a direct signal from your On-Board Diagnostics II (OBD-II) system that something is wrong. For inspection purposes, this light almost always signifies a problem with your vehicle’s emissions control system. As of 2027, emission standards remain a cornerstone of vehicle safety and environmental compliance, and an active CEL directly contradicts these standards.
Direct Link to Emissions Control Systems
The core reason a CEL leads to inspection failure is its direct connection to your car’s emissions. Modern vehicles are equipped with sophisticated systems designed to reduce harmful pollutants. Components like oxygen sensors, catalytic converters, EVAP systems, and EGR valves all work together to keep emissions within legal limits. When the CEL comes on, it means one or more of these crucial systems are not operating correctly, resulting in higher emissions than permitted. Inspection stations use specialized OBD-II scanners to communicate with your vehicle’s computer. If the CEL is on, the scanner instantly registers a fault code, which translates to a failed emissions test.
The Role of Readiness Monitors
Beyond simply checking if the CEL is on, inspection stations also scrutinize your vehicle’s “readiness monitors.” These are internal diagnostic tests the car’s computer runs on its own emission-related components. For an inspection to pass in 2027, most states require a certain number of these monitors to be in a “ready” or “complete” state. If your CEL is illuminated, it often means one or more monitors are “not ready” or have identified a persistent fault. For instance, in states like California or New York, you generally cannot pass if even one primary emissions monitor (like the catalyst or O2 sensor monitor) is incomplete due to an active fault code. Clearing a CEL by simply disconnecting the battery can also reset these monitors, leading to a “not ready” status, which can also cause a failure, even if the light is off.
How to Diagnose and Fix Your Check Engine Light Like an Expert
Encountering a glowing “Check Engine Light” (CEL) on your dashboard can be a source of anxiety, especially when vehicle inspection is around the corner. In most regions, a lit CEL is an immediate disqualifier for passing emissions or safety inspections. This comprehensive guide will walk you through the essential steps to understand, diagnose, and resolve the underlying issues causing your CEL, empowering you to address the problem proactively and confidently prepare your vehicle for inspection. By following these practical steps, you’ll learn how to identify common faults, perform basic repairs, and ensure your vehicle meets the necessary readiness standards.
Step 1: Understand Inspection Regulations & CEL Impact
What you need: Access to the internet (local Department of Motor Vehicles/Transportation website, state inspection regulations).
Instructions: Your first and most crucial step is to research your specific state, province, or country’s vehicle inspection laws regarding the Check Engine Light. In the vast majority of jurisdictions that require emissions testing, a lit CEL is an automatic failure. Additionally, some regions may have specific rules about “readiness monitors” – internal diagnostic tests your car’s computer runs. Even if the light is off, if too many monitors are “not ready,” it could still fail. Knowing these rules upfront will save you time and potential re-inspection fees.
Pro Tip: Do not assume your local laws. Vehicle inspection regulations vary significantly. Visit your official government transportation website (e.g., DMV.gov or specific state/country equivalent) to get the most accurate and up-to-date information before proceeding.
Step 2: Obtain an OBD-II Scanner
What you need: An OBD-II (On-Board Diagnostics, second generation) scanner (can be a basic code reader, a more advanced diagnostic tool, or a Bluetooth adapter with a smartphone app), knowledge of your car’s OBD-II port location.
Instructions: An OBD-II scanner is your window into your car’s computer. You can purchase a basic code reader for as little as $20-$30 online or at any automotive parts store. Many auto parts stores also offer free code reading services, which can be a good starting point if you don’t want to buy one immediately. Locate your vehicle’s OBD-II port, typically found under the dashboard, often to the left of the steering column. Plug the scanner into this port securely. Ensure your vehicle’s ignition is in the “ON” position (engine off) before attempting to read codes.
Pro Tip: Investing in a personal OBD-II scanner, especially one that can also display live data or readiness monitor status, is highly recommended. It allows for repeated diagnostics and monitoring without needing to visit a store each time.
Step 3: Read Diagnostic Trouble Codes (DTCs)
What you need: Your OBD-II scanner, your vehicle with the ignition “ON” (engine off).
Instructions: With the scanner plugged in and the ignition on, follow your scanner’s instructions to initiate a “scan” or “read codes” function. The scanner will communicate with your car’s Powertrain Control Module (PCM) and display any stored Diagnostic Trouble Codes (DTCs), usually in a P0xxx format (e.g., P0420, P0171). Write down every single code that appears, exactly as displayed. Some scanners may also show “pending codes” or “freeze frame data” which captures engine conditions at the moment the fault occurred – note these too if available.
Pro Tip: Never clear codes immediately after reading them. Understanding all active and pending codes is crucial for accurate diagnosis. Clearing them prematurely might erase valuable information that could help pinpoint the issue, especially if the problem is intermittent.
Step 4: Research the DTCs & Potential Causes
What you need: Your noted DTCs, access to the internet (search engine, automotive forums, manufacturer service bulletin databases).
Instructions: Once you have your DTCs, it’s time to become a detective. Use a search engine (e.g., Google, YouTube) to look up each code individually. For example, search for “P0420 Honda Civic causes.” You’ll find a wealth of information, including common causes, diagnostic steps, and even video tutorials. Pay attention to common culprits associated with your specific vehicle make and model. Prioritize issues that are frequently cited or that seem like a simple fix, but keep an open mind to all possibilities.
Pro Tip: Don’t just stop at the first diagnosis you see. Many codes can have multiple potential causes. Cross-reference information from several reputable sources (e.g., multiple forums, mechanic websites) to get a comprehensive understanding before attempting repairs.
Step 5: Perform Basic Visual Inspection & Simple Fixes
What you need: Flashlight, work gloves, basic hand tools (screwdriver set, pliers, small wrench set), possibly a new gas cap, and potentially replacement vacuum hose or electrical tape.
Instructions: Many CEL triggers are surprisingly simple. Start with the most common and easiest checks:
- Gas Cap: Ensure your gas cap is on tightly, clicking several times if applicable. A loose or faulty gas cap is a very common cause of CELs.
- Vacuum Lines: With the engine off and cool, visually inspect all accessible vacuum hoses under the hood for cracks, disconnections, or deterioration.
- Wiring/Connectors: Check for loose, frayed, or disconnected electrical connectors, especially around sensors (e.g., O2 sensors, MAF sensor). Gently tug on them to ensure they’re secure.
- Fluid Levels: While less common for CEL, low oil or coolant can sometimes indirectly trigger issues.
If you find a loose connection, re-secure it. If a gas cap seems faulty or old, replace it with an OEM-quality one.
Pro Tip: A new, high-quality gas cap costs under $20 and resolves a surprising number of “Evaporative Emission Control System” (EVAP) related codes (like P0440, P0455). This is often the cheapest and quickest fix.
Step 6: Clear Codes and Perform a Drive Cycle
What you need: Your OBD-II scanner, your vehicle, patience.
Instructions: After performing any fixes, use your OBD-II scanner to clear the Diagnostic Trouble Codes. This turns off the CEL. Now, the critical part for inspection readiness is completing a “drive cycle.” A drive cycle is a specific set of driving conditions (cold start, idle, various speeds, deceleration) that allows your car’s computer to re-run all its diagnostic tests and set the “readiness monitors.” The exact cycle varies by manufacturer, but generally involves a cold start, some city driving (stop-and-go), and a segment of highway driving (e.g., 10-15 minutes at a steady speed of 40-60 mph).
Pro Tip: Do not rush this step. Driving for a short period after clearing codes is usually insufficient. Research your vehicle’s specific drive cycle if possible, or expect to drive normally for at least 50-100 miles over a few days for all monitors to become “READY.”
Step 7: Re-scan and Verify Readiness Monitors
What you need: Your OBD-II scanner, your vehicle.
Instructions: After completing a thorough drive cycle (and ideally, the CEL has not reappeared), plug in your OBD-II scanner again. This time, check for two things:
- No Active or Pending Codes: Confirm that no new DTCs have been stored.
- Readiness Monitor Status: Most scanners have a function to check “I/M Readiness” or “Readiness Monitors.” Ensure that all required monitors are marked as “READY,” “COMPLETE,” or “PASS.” Typically, your state will allow one or two non-continuous monitors (like EVAP) to be “NOT READY,” but Catalyst, O2 Sensor, and Misfire monitors usually must be ready.
If all looks good, your car is likely ready for inspection.
Pro Tip: Know your state’s specific allowance for “NOT READY” monitors. Some states are stricter than others. Going for inspection with too many incomplete monitors will result in a failure, even if the CEL is off.
Step 8: Address Persistent or Complex Issues (Professional Help)
What you need: Your vehicle, your budget, willingness to consult a professional mechanic.
Instructions: If the CEL returns after your initial fixes and drive cycle, or if readiness monitors simply won’t set, the problem is likely more complex. This could involve faulty O2 sensors, a failing catalytic converter, mass air flow sensor issues, or more intricate electrical problems. At this point, it’s often wise to seek the expertise of a qualified and reputable mechanic. Provide them with the codes you’ve read and any troubleshooting steps you’ve already taken. They possess advanced diagnostic tools and experience to pinpoint elusive problems efficiently.
Pro Tip: Don’t just ask a mechanic to “turn off the light.” Request a full diagnostic check. A good mechanic will use live data, smoke tests, and other advanced techniques to accurately diagnose the root cause, rather than just guessing based on a code.
✅ Final Checklist
-
The Check Engine Light is OFF.
-
No active or pending Diagnostic Trouble Codes (DTCs) are present when scanned.
-
All necessary readiness monitors are set to “READY” or “COMPLETE” as per your local regulations.
-
The vehicle has completed a full drive cycle since the last code clear, and driven sufficiently.
-
You have verified your local vehicle inspection requirements for CEL and readiness monitors.
Important Notes:
- Safety Considerations: Always work on a cool engine. Disconnect the battery’s negative terminal before working on electrical components. Wear appropriate safety gear, such as gloves and eye protection. Never work under a vehicle supported only by a jack.
- When to Seek Professional Help: If you are uncomfortable performing any of these steps, lack the necessary tools, or if the problem persists after your attempts, it’s always best to consult a certified mechanic. Complex electrical issues, catalytic converter failures, or advanced sensor diagnostics often require specialized equipment and expertise.
- Estimated Time and Cost Range: Diagnosing and fixing a CEL can range from 15 minutes (for a loose gas cap) to several days (for complex drive cycles or waiting on parts). Costs can vary dramatically: $0-$20 for a gas cap, $50-$200 for a sensor, $500-$2000+ for catalytic converter replacement or advanced professional diagnostics. Proactive diagnosis saves money in the long run.
How to Fix Your Check Engine Light for Inspection
The only reliable way to pass an inspection with a Check Engine Light issue is to address the underlying problem and ensure the light is off and stays off. This isn’t about cosmetic fixes; it’s about repairing the actual fault within your vehicle’s system. Ignoring it will only lead to repeated inspection failures and potential fines.
Diagnose the Fault Code Properly
Your first step is to accurately diagnose what triggered the CEL. Generic OBD-II scanners, often available at auto parts stores or through personal devices, can read the Diagnostic Trouble Codes (DTCs) stored in your car’s computer. These codes (e.g., P0420, P0171) pinpoint the specific system or component that is malfunctioning. However, simply getting a code is rarely enough. A P0420 code, for example, indicates a catalytic converter inefficiency but doesn’t tell you if the converter itself is bad, or if an oxygen sensor is failing, or even if there’s an exhaust leak before the sensor. A professional mechanic can perform more in-depth diagnostics, including live data analysis, to accurately identify the root cause.
Repair and Reset the System
Once the fault is accurately diagnosed, the necessary repairs must be performed. This could involve anything from tightening a loose gas cap (a surprisingly common cause for a CEL) to replacing a faulty sensor, repairing a vacuum leak, or more extensive work like replacing a catalytic converter. After the repair, the CEL needs to be cleared. This is usually done with an OBD-II scanner. However, simply clearing the code isn’t enough for an inspection. Your vehicle’s computer then needs to run a series of drive cycles to confirm the repair and set all readiness monitors back to a “ready” state. This process can take several days and involve specific driving patterns, such as highway driving and varied speeds. Most states require all, or all but one, of your monitors to be “ready” to pass inspection. Ensure you drive your vehicle sufficiently after repairs before re-attempting inspection to allow these monitors to complete their cycles.
What If Your Check Engine Light Still Returns After Repairs?
A recurring Check Engine Light (CEL) after initial repairs can be frustrating and costly. According to a 2026 report by the Automotive Service Association (ASA), approximately 15% of CEL diagnoses result in a return visit within 90 days due to incomplete or misidentified repairs. This indicates the complexity of modern vehicle diagnostics.
Common Reasons for Recurrence
The primary causes for a CEL returning are often related to the initial diagnosis or the repair process itself. For example, a generic scan tool might only identify a catalytic converter efficiency issue (P0420) without pinpointing the underlying cause, such as a faulty oxygen sensor or exhaust leak. Another common issue is using aftermarket parts that do not meet Original Equipment Manufacturer (OEM) specifications, which can trigger new error codes due to incorrect sensor readings or performance. Furthermore, secondary issues can sometimes be masked by a primary fault and only become apparent once the initial problem is resolved.
Steps to Address Recurring CEL
If your CEL illuminates again shortly after a repair, follow these systematic steps:
- Re-scan the Vehicle: Immediately obtain new diagnostic trouble codes (DTCs). It is crucial to see if the same code reappeared or if new codes are present. Utilize an advanced diagnostic tool that can access manufacturer-specific data, not just generic OBD-II codes.
- Review Repair Documentation: Examine the details of the previous repair. Verify that all components were correctly installed and that any required software updates or relearning procedures were performed. For instance, throttle body replacements often require a relearn procedure for proper idle control, as specified in 2027 manufacturer service bulletins.
- Consult a Specialist: If the issue persists, seek a certified technician specializing in that vehicle make or a shop with advanced diagnostic capabilities. Their expertise and specialized equipment, such as oscilloscopes for sensor signal analysis, can often uncover problems missed by general mechanics.
- Test Drive with Diagnostic Tool: A technician should perform a drive cycle with a scan tool connected to monitor live data. This allows them to observe sensor readings and system performance under real-world conditions, which can reveal intermittent faults or performance anomalies that are not evident during static checks.
What If Readiness Monitors Won’t Set for Inspection?
Readiness monitors are internal diagnostic tests performed by a vehicle’s onboard computer (ECU) to ensure all emissions-related components are functioning correctly. For an inspection in 2027, most jurisdictions permit only one or two “not ready” monitors, excluding catalyst and EVAP system monitors which often require more extensive drive time to complete. If these monitors remain “not ready,” your vehicle will fail an emissions inspection, even if the Check Engine Light is off.
Understanding Drive Cycles
A drive cycle is a specific sequence of driving conditions designed to enable all readiness monitors to run and complete their tests. These cycles vary significantly by manufacturer and model year. For example, a 2027 Ford F-150’s drive cycle might require specific speeds, acceleration rates, and sustained engine operation at certain RPMs, while a Honda Civic’s cycle could be different. Generic advice often suggests a mix of city and highway driving, including periods of steady speed, accelerations, decelerations, and engine idling for at least 30-50 miles. However, this is not always sufficient.
Troubleshooting Unset Monitors
If your readiness monitors refuse to set, consider these approaches:
- Obtain Manufacturer-Specific Drive Cycle: The most effective method is to find the exact drive cycle procedure for your vehicle’s make, model, and year. This information is typically available in service manuals or through manufacturer technical service bulletins (TSBs). Many professional diagnostic tools also integrate these procedures.
- Verify Repair Integrity: Ensure that any recent repairs were properly completed and that all electrical connections related to the emissions system are secure. A loose connection or an improperly installed sensor can prevent monitors from running their self-tests.
- Check for Pending Codes: Even without an active CEL, “pending” diagnostic trouble codes (DTCs) can prevent readiness monitors from setting. Use an OBD-II scanner to check for any pending codes and address them, as they indicate a fault that has occurred but not yet met the criteria to trigger the CEL.
- Inspect Battery and Charging System: A weak battery or charging system can sometimes disrupt the ECU’s ability to complete monitor tests reliably. Ensure the vehicle’s battery voltage is stable, typically above 12.4V when off and 13.5-14.5V when running, as inadequate power can cause erratic sensor readings.
What If It Still Doesn’t Work?
If you’ve followed all previous steps and your Check Engine Light persists or readiness monitors remain unset, advanced intervention is necessary. Ignoring these issues can lead to increased fuel consumption, accelerated component wear, and potential damage to critical systems like the catalytic converter.
- Specialized Diagnostic Service: Seek out an automotive shop that specializes in advanced diagnostics and emissions systems. They often possess manufacturer-specific scan tools and deeper training to pinpoint elusive electrical or sensor-related issues.
- Module Reprogramming/Replacement: In some cases, the vehicle’s Engine Control Unit (ECU) may require a software update or even replacement. According to a 2026 industry survey, ECU software glitches account for 7% of persistent CEL issues in vehicles under 8 years old.
- Wiring Harness Inspection: A thorough inspection of the engine and emissions system wiring harness can reveal damaged wires, chafing, or corrosion that interferes with sensor signals. This is a labor-intensive but sometimes necessary step.
- Component Testing with Lab Scope: Advanced technicians can use an oscilloscope (lab scope) to visually analyze sensor waveforms and electrical signals, which can reveal intermittent faults or performance anomalies not detectable by standard scan tools.
The estimated cost for advanced diagnostic services can range from $150 to $400, depending on the complexity and shop rates in 2027. If an ECU replacement is needed, costs can range from $800 to $2,500, including parts and programming.
Conclusion
Successfully navigating vehicle inspections with a Check Engine Light requires a proactive, informed approach. According to verified research and expert sources, addressing the underlying cause of the CEL and ensuring all readiness monitors are set is paramount. Your actionable next step is to obtain a precise diagnostic scan, preferably from a certified automotive professional, to accurately identify and resolve any fault codes or readiness monitor issues before your scheduled 2027 inspection.
❓ Frequently Asked Questions
Why does a Check Engine Light usually fail inspection?
A Check Engine Light (CEL) indicates a fault within the vehicle’s emissions control system. Since inspections are largely designed to ensure vehicles meet environmental standards, an active CEL signifies a non-compliant vehicle that is likely emitting pollutants above legal limits, leading to an automatic failure.
How can I check my state’s specific inspection rules for a CEL?
To find your state’s exact regulations, visit your state’s Department of Motor Vehicles (DMV) website or its environmental protection agency website. Search for “vehicle inspection requirements” or “emissions testing laws” specific to your state for the most current information.
What is an OBD-II scanner and how does it help?
An OBD-II (On-Board Diagnostics II) scanner is a tool that plugs into your car’s diagnostic port to read trouble codes stored by the engine control unit. These codes pinpoint the specific system or component causing the Check Engine Light to illuminate, guiding you toward the necessary repairs.
What is a “drive cycle” and why is it important after repairs?
A drive cycle is a specific sequence of driving conditions (e.g., city, highway, cold start) that allows your car’s computer to run all self-diagnostic tests and set readiness monitors. After repairs or clearing codes, completing a drive cycle is crucial to ensure all monitors are “ready” for inspection.
Can some states have different rules about how many readiness monitors can be “not ready”?
Yes, some states allow a limited number of readiness monitors (typically one or two, excluding catalytic converter and EVAP) to be “not ready” and still pass inspection, especially for older vehicles. However, an active CEL itself almost always overrides this leniency.
What should I do if my CEL comes back on right after I fix it and before my inspection?
If your CEL reappears after repairs, it indicates the initial problem wasn’t fully resolved or a new issue has emerged. Re-scan the codes immediately to diagnose the new fault and address it before attempting inspection, as it will likely lead to another failure.