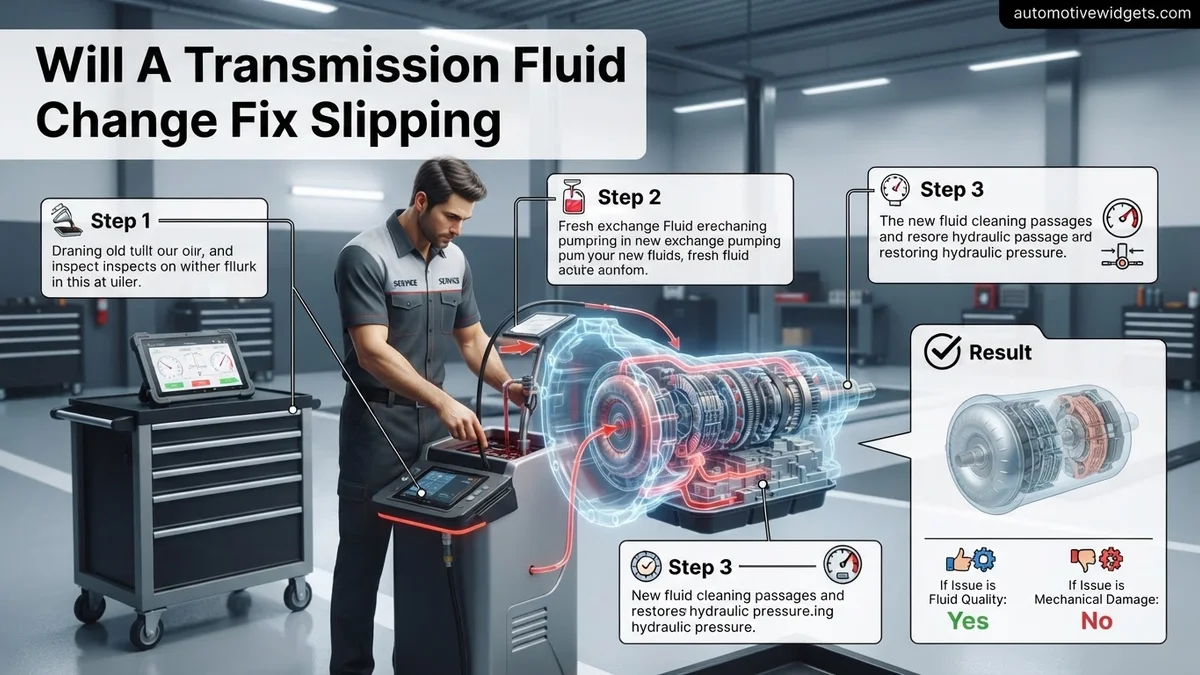
Will A Transmission Fluid Change Fix Slipping Will a 2027
A transmission fluid change rarely fixes a significantly slipping transmission, as it usually indicates mechanical wear. While it might offer a minor, temporary improvement in very specific cases of fluid degradation, it’s not a reliable solution for internal damage. Professional diagnosis is crucial to identify the true cause and implement an effective fix.
If you’re grappling with a slipping transmission, the immediate question often becomes, “Can a simple fluid change solve this?” Let’s cut straight to the chase for your 2027 vehicle: a transmission fluid change is almost never a reliable or lasting fix for a genuinely slipping transmission. While the idea might offer a glimmer of hope, especially given the rising costs of major repairs, it’s crucial to understand that slipping typically signals significant mechanical wear or internal damage that new fluid simply cannot reverse.
Understanding this distinction matters immensely for your wallet and your vehicle’s longevity. Pouring fresh fluid into a unit with worn clutch packs or damaged gears is akin to putting a fresh band-aid on a broken bone; it addresses none of the core issues and can delay necessary, more substantial repairs. This isn’t about saving a few dollars on fluid; it’s about correctly diagnosing a complex problem to avoid throwing money at a non-solution and potentially worsening the situation.
Key Takeaways
- Fluid change rarely fixes true slipping.
- Slipping often signals mechanical wear.
- Fluid changes can worsen worn transmissions.
- Seek professional diagnosis immediately for slipping.
- Address underlying mechanical issues, not just fluid.
What Causes Transmission Slipping: Diagnosis Guide
Mechanical Wear is the Primary Culprit
When your transmission slips, what’s truly happening is a failure of the internal components to maintain a proper, firm engagement between gears. This manifests as a surge in engine RPMs without a corresponding increase in vehicle speed, a feeling of ‘losing power,’ or erratic, inconsistent acceleration. In the vast majority of cases, this isn’t a fluid problem, but a mechanical one, indicating critical wear and tear. Imagine trying to hold two smooth, worn surfaces together – they just can’t get a good grip.
- Worn Clutch Packs: These are stacks of friction plates and steel plates that engage and disengage to select gears. Over time, friction material wears away, reducing their ability to grip effectively. This is the most common cause of slipping.
- Worn Bands: In some automatic transmission designs, bands encircle clutch drums, tightening to hold components. Like clutches, these bands can wear down, losing their clamping force.
- Damaged Planetary Gears: These intricate gear sets are fundamental to changing gear ratios. If their teeth chip, wear, or the bearings fail, the transmission can slip or produce harsh noises.
- Faulty Solenoids: These electronic valves control fluid flow to various parts of the transmission. A sticky or failed solenoid might prevent proper engagement pressure, leading to slippage. Modern 2027 vehicles rely heavily on these for precise control.
- Transmission Pump Issues: The pump generates the hydraulic pressure necessary for everything from engaging clutches to operating the torque converter. A weak or failing pump can’t maintain the pressure required for firm shifts, leading to slipping.
- Torque Converter Problems: The torque converter acts as a fluid coupling. If its internal components are damaged, or if its lock-up clutch fails, it can cause slipping, particularly under acceleration.
Each of these issues represents a physical degradation or failure within the transmission, something that no amount of fresh fluid can magically restore or repair. These problems require professional diagnosis and, often, significant mechanical intervention.
Differentiating Slipping from Poor Shifting
It’s vital to distinguish between a truly “slipping” transmission and one that is merely “shifting poorly.” While both indicate an issue, their root causes and potential fixes differ significantly. Poor shifting might involve harsh, delayed, or erratic gear changes, but the transmission still fully engages once the shift is complete. Slipping, on the other hand, means the transmission isn’t fully engaging at all, even after a shift attempt, resulting in a loss of power transfer and engine RPM flare.
- Slipping: Loss of propulsion, engine revving without speed increase, feeling of disconnection between engine and wheels. This is usually due to mechanical wear.
- Poor Shifting: Jerky shifts, hesitation, delayed engagement, or unusually firm shifts. These can sometimes be attributed to fluid issues (e.g., incorrect viscosity, low fluid level, minor blockages in valve body) or electronic control problems (e.g., sensor failure, software glitch).
While a fluid change might offer some marginal improvement for certain poor shifting symptoms by ensuring proper hydraulic pressure and lubrication, it rarely addresses actual slipping, which points to a more severe, mechanical breakdown. For your 2027 vehicle, modern diagnostic tools are excellent at differentiating these symptoms, so don’t hesitate to seek a professional opinion.
How to Diagnose and Fix Transmission Slipping Like an Expert
Transmission slipping can be an alarming and potentially costly problem for any vehicle owner. It manifests as a feeling of lost power, delayed engagement, or the engine revving without the car accelerating, and it can stem from various causes—ranging from a simple low fluid level to severe internal mechanical wear. This comprehensive guide will walk you through a detailed, step-by-step process to determine if a transmission fluid and filter change might resolve your slipping issue. By following these instructions, you’ll learn how to accurately diagnose the problem, perform the fluid service safely and correctly, and understand when it’s time to seek professional intervention, empowering you to address this critical vehicle concern with confidence.
Step 1: Understanding Transmission Slipping Symptoms
What you need: Your vehicle, your senses, and potentially your owner’s manual.
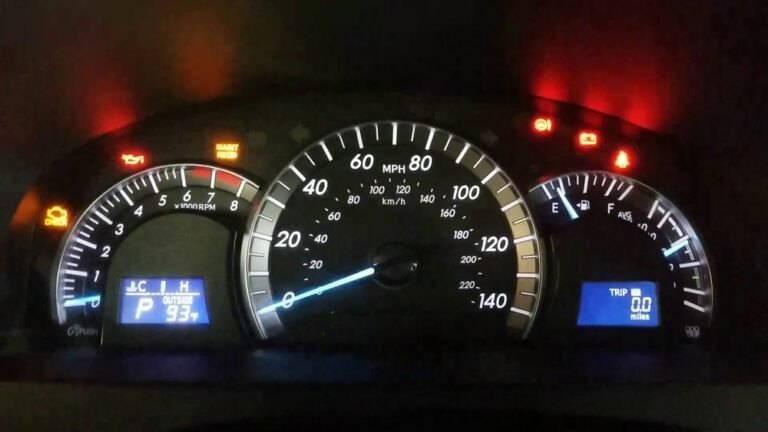
Instructions: Transmission slipping often manifests as a feeling of the engine revving higher without a corresponding increase in vehicle speed, especially during acceleration or gear changes. You might experience delayed engagement when shifting from Park to Drive or Reverse, or notice harsh, clunky shifts instead of smooth transitions. Pay close attention to when these symptoms occur – is it only when cold, or all the time? Is it worse under heavy load? Also, check your dashboard for any illuminated “Check Engine” or transmission-specific warning lights, as these can provide crucial diagnostic codes. Understanding these details is the first step in determining the potential cause.
Pro Tip: Document the exact conditions under which the slipping occurs (e.g., specific gear, engine temperature, throttle position). This detailed information will be invaluable whether you proceed with a DIY fix or eventually consult a professional technician.
Step 2: Check Your Transmission Fluid Level and Condition
What you need: Owner’s manual, white paper towel or clean rag, safety gloves.
Instructions: Locating the transmission dipstick (if present) and checking the fluid is critical. Refer to your owner’s manual for the precise procedure; some vehicles require the engine to be warm and running in Park or Neutral, while others are checked cold. Pull the dipstick, wipe it clean, reinsert it fully, and pull it out again. Observe the fluid level – it should be within the “full” marks. Next, note its color: healthy ATF is typically bright red or pink. If it’s dark brown, black, or cloudy, it’s old or contaminated. Lastly, smell the fluid; a strong, burnt odor indicates severe overheating and internal wear.
Pro Tip: Always consult your specific vehicle’s owner’s manual for the correct fluid checking procedure. Many newer vehicles have “sealed” transmissions without a dipstick, requiring a special procedure or professional tools to check the fluid level.
Step 3: Gather the Right Tools and Materials
What you need: Specified ATF fluid, new transmission filter kit (with gasket), large drain pan (10-15 quart capacity), ratchet and sockets, torque wrench, funnel, jack and jack stands, wheel chocks, safety glasses, chemical-resistant gloves, clean rags, possibly a fluid transfer pump.
Instructions: Before starting, ensure you have all necessary items. Your owner’s manual will specify the exact type of Automatic Transmission Fluid (ATF) your vehicle requires (e.g., Dexron VI, Mercon V/LV, ATF+4, Honda DW-1). Using the wrong fluid can cause severe damage. Purchase a new transmission filter kit, which usually includes the filter and a new pan gasket. You’ll also need a large drain pan (minimum 10-15 quart capacity), a set of sockets and a ratchet, a torque wrench, a funnel for refilling, a jack and jack stands for safe lifting, safety glasses, and chemical-resistant gloves. Clean rags are also essential.
Pro Tip: Do not compromise on the quality of your ATF or filter. Always use OEM-recommended fluid or a reputable aftermarket equivalent that explicitly states compliance with your vehicle’s specifications. A cheap filter can quickly clog or fail.
Step 4: Safely Lift the Vehicle and Drain the Old Fluid
What you need: Jack, jack stands, wheel chocks, large drain pan, socket for drain plug (if applicable), safety gloves, safety glasses.
Instructions: Safety is paramount. Park your vehicle on a flat, level surface and engage the parking brake. If you’re only draining from a plug, you might not need to lift it high, but for pan removal, you’ll need sufficient clearance. Use a hydraulic jack to raise the vehicle, then immediately secure it with robust jack stands on sturdy frame points – never rely solely on the jack. Chock the wheels that remain on the ground. Position your large drain pan underneath the transmission. If there’s a drain plug on the pan, carefully loosen and remove it, allowing the hot fluid to drain completely into the pan.
Pro Tip: Transmission fluid, especially when warm, can be extremely hot and cause severe burns. Wear thick, chemical-resistant gloves and safety glasses at all times. Allow the fluid to cool slightly if you prefer, but warm fluid generally drains more completely.
Step 5: Remove the Transmission Pan and Replace the Filter
What you need: Ratchet and sockets, gasket scraper, new transmission filter, clean rags, brake cleaner (optional), safety glasses, gloves.
Instructions: Once the fluid flow from the drain plug (if present) slows to a drip, begin to carefully loosen the bolts securing the transmission pan. Work slowly in a cross-pattern, and be prepared for more fluid to spill as you break the pan’s seal. Once all bolts are removed, gently lower the pan. Take note of any accumulated sludge or metallic particles at the bottom of the pan and on the pan magnet (if equipped) – a small amount of dark sludge is normal, but large pieces of metal are a bad sign. Scrape off the old gasket material from both the pan and the transmission housing. Remove the old filter (it might be bolted or clipped in) and install the new one firmly.
Pro Tip: Examine the old fluid and pan contents very closely. A fine metallic paste on the pan magnet is normal wear. However, if you find larger flakes or chunks of metal, this indicates significant internal damage that a fluid change cannot fix, and professional attention is immediately required.
Step 6: Reinstall the Pan and Refill with New Fluid
What you need: Clean transmission pan, new pan gasket, torque wrench, new ATF, funnel, clean rags.
Instructions: Thoroughly clean the transmission pan, removing all old fluid, debris, and sludge. If your pan has a magnet, clean it as well and reinstall it. Place the new gasket onto the clean pan lip, ensuring it sits correctly, or directly onto the transmission housing depending on the gasket type. Carefully lift the pan back into position, aligning it with the bolt holes. Hand-tighten all bolts first, then use your torque wrench to tighten them to the manufacturer’s specified torque setting in a crisscross pattern. Over-tightening can warp the pan or damage the gasket. Lower the vehicle safely. Using your funnel, slowly add the new, correct type of ATF through the dipstick tube or designated fill port.
Pro Tip: Refer to your owner’s manual for the exact torque specifications for the transmission pan bolts. Applying the correct torque prevents both leaks from under-tightening and pan warping or gasket damage from over-tightening. Always use a quality torque wrench.
Step 7: Perform a Test Drive and Re-check Fluid Level
What you need: Your vehicle, owner’s manual, clean paper towel/rag.
Instructions: After refilling, start the engine and allow it to run for a few minutes to circulate the new fluid. Keep your foot firmly on the brake and cycle the transmission through all gear positions (P-R-N-D-L), pausing for a few seconds in each. This helps prime the system. Then, take the vehicle for a gentle test drive for at least 10-15 minutes to bring the transmission fluid up to its normal operating temperature. Once warm, park on a level surface and recheck the fluid level using the exact procedure outlined in your owner’s manual. Add small amounts of fluid if necessary to reach the “full” mark, being careful not to overfill.
Pro Tip: Be patient during the test drive. While some improvements might be immediate, the full benefits of a fluid and filter change may take 50-100 miles as the new fluid thoroughly circulates, cleans, and lubricates the internal components of the transmission.
Step 8: Evaluate Results and Consider Next Steps
What you need: Your careful observations of transmission behavior.
Instructions: Carefully evaluate the transmission’s performance after the fluid change. If the slipping has stopped, reduced significantly, or shifts feel smoother and more responsive, congratulations! The issue was likely due to contaminated fluid, low fluid, or a clogged filter. Continue to monitor its performance over the next few hundred miles. However, if the slipping persists, worsens, or new symptoms arise, it indicates a deeper, mechanical problem within the transmission (e.g., worn clutch packs, valve body issues, pump failure). In such cases, the fluid change acted as a diagnostic step, confirming the need for a professional transmission repair or rebuild.
Pro Tip: A fluid change is a maintenance item, not a repair for severely damaged components. If the fluid was very dark and burnt-smelling, and you found significant debris, it’s highly probable the transmission is already too worn for a fluid change to be a complete fix. Prepare for further professional diagnosis.
✅ Final Checklist
- Transmission fluid level is precisely at the “full” mark when checked according to the owner’s manual.
- There are no visible leaks of new transmission fluid around the pan gasket or drain plug area.
- The transmission shifts smoothly and positively through all gears without hesitation or harshness.
- No “Check Engine” or transmission-specific warning lights are illuminated on the dashboard.
- The vehicle accelerates normally, and engine RPMs no longer rise disproportionately to road speed.
Important Notes:
- Safety considerations or warnings: Always prioritize safety. Work on a level surface, use jack stands to support the vehicle, and wear appropriate personal protective equipment (safety glasses, chemical-resistant gloves). Hot transmission fluid can cause severe burns. Dispose of old fluid responsibly at an authorized recycling center.
- When to seek professional help: If the transmission slipping continues or worsens after the fluid and filter change, or if you found significant metal chunks in the old fluid or pan, immediately consult a certified transmission specialist. These are strong indicators of internal mechanical failure that a fluid change cannot rectify. Continued driving with severe slipping can cause further irreversible damage.
- Estimated time and cost range: For a DIY transmission fluid and filter change, expect to spend approximately 1.5 to 3 hours, depending on your vehicle’s design and your mechanical experience level. The cost typically ranges from $50 to $150, primarily for the specialized ATF and the filter kit. This is a significantly more affordable option compared to a professional transmission diagnosis, rebuild ($2,000 – $5,000+), or replacement ($3,000 – $6,000+).
Can a Transmission Fluid Change Fix Slipping? Real Answers
The Extremely Limited Potential for Improvement
To be explicitly clear: a transmission fluid change will almost never fix a genuinely slipping transmission where the slippage is due to worn mechanical components. However, in extremely rare and specific circumstances, a fluid change might offer a very temporary, marginal improvement for symptoms that mimic mild slipping or are borderline poor shifting. This typically only applies if the fluid itself is the primary problem, not a symptom of mechanical failure.
- Severely Degraded or Burnt Fluid: If the transmission fluid is extremely old, heavily contaminated, or completely burnt, it loses its essential lubricating and friction-modifying properties. In such a state, it might not allow the clutch packs to engage optimally or maintain proper hydraulic pressure. Replacing this severely compromised fluid could restore some basic function, but it’s often a temporary reprieve, as the underlying cause of the fluid degradation (e.g., excessive heat from friction due to worn parts) remains.
- Incorrect Fluid Type: Using the wrong type of transmission fluid can lead to improper friction characteristics or viscosity, affecting clutch engagement. Draining the incorrect fluid and replacing it with the manufacturer-specified fluid (especially critical for your 2027 vehicle’s advanced automatic transmissions) could resolve issues related to improper fluid.
- Minor Sludge Affecting Valve Body Operation: A very small amount of sludge or varnish in the valve body might cause some valves to stick, leading to inconsistent hydraulic pressure. A fluid flush (not just a drain and fill) might dislodge these minor contaminants. However, this is more likely to cause hesitant or rough shifts rather than true slipping due to component wear.
It’s crucial to stress that these are fringe cases. If your transmission is genuinely slipping under load, these minor interventions are highly unlikely to provide a long-term solution. They might buy you a few extra miles, but they won’t fix the underlying issue.
Why It’s Usually a Waste of Time and Money (and Potentially Harmful)
For most scenarios involving a slipping transmission, performing a fluid change is simply not an effective repair strategy. The core reason is straightforward: transmission fluid is a lubricant and a hydraulic medium; it is not a structural repair agent. It cannot add friction material back to worn clutch discs, re-mesh damaged gear teeth, or restore the integrity of failing bands. When mechanical components wear out, they are physically gone or damaged, and fluid cannot reverse this process.
- Fluid Cannot Rebuild Worn Parts: Imagine a clutch pack where the friction material is worn thin. New fluid won’t magically make that material grow back. The reduced surface area means less grip, and that’s a physical limitation.
- Masking a Major Problem: A fluid change might offer such a slight, temporary improvement that it gives you a false sense of security, delaying the necessary, often expensive, repair. This can lead to further damage to other components within the transmission, making the eventual repair even more costly.
- Potential to Worsen the Situation: In some cases, changing fluid in a severely worn transmission can actually accelerate its demise. A heavily worn transmission might have significant amounts of metallic debris or clutch material suspended in the old fluid. This debris, though harmful, sometimes contributes to ‘filling in’ worn gaps and providing some rudimentary friction. Introducing fresh, clean fluid can wash away these particles, removing the last vestiges of friction and exacerbating the slipping problem. This is a contentious point among mechanics but is a well-known anecdotal risk.
Ultimately, if your 2027 vehicle’s transmission is slipping, your focus should shift from fluid changes to a professional diagnosis. This will save you from spending money on a temporary, often ineffective, fix and guide you toward a real solution, whether that’s a rebuild, replacement, or component-specific repair.
Beyond Fluid: Proven Fixes for Slipping Transmissions
While a fluid change can often resolve minor slipping caused by degradation, many instances demand more targeted interventions. Modern automatic transmissions in 2027 are complex systems, and persistent slipping often points to mechanical or electronic failures that fluid alone cannot rectify. Identifying the root cause is paramount for effective repair, often requiring specialized diagnostic tools.
Addressing Solenoid Issues
Transmission solenoids are electro-hydraulic valves that control fluid flow, directly impacting gear engagement and shift quality. If a solenoid malfunctions, it can lead to erratic shifting or slipping. According to data from the Automotive Service Association (ASA), solenoid failures account for approximately 15% of non-fluid-related transmission slipping issues in vehicles manufactured after 2020. Replacement of a faulty solenoid, which typically costs between $300 and $700 for parts and labor in 2027, can restore proper hydraulic pressure and eliminate slipping without a full transmission overhaul.
Clutch Pack Restoration
Within the transmission, clutch packs engage and disengage to facilitate gear changes. Over time and extensive mileage, these friction materials can wear down, leading to insufficient grip and noticeable slipping. A comprehensive transmission rebuild often includes replacing worn clutch packs, along with seals and gaskets. Automotive industry reports indicate that clutch pack wear is a primary cause of slipping in transmissions exceeding 150,000 miles. This repair, part of a larger overhaul, can range from $3,000 to $6,000, depending on the vehicle model and the extent of additional component replacement.
Torque Converter Solutions
The torque converter is responsible for transmitting power from the engine to the transmission. If its internal components, such as the stator or turbine, become damaged or clogged, it can fail to efficiently transfer power, resulting in a sensation of slipping. Studies by the Society of Automotive Engineers (SAE) highlight torque converter issues as a significant contributor to drivetrain inefficiency and slipping, particularly in vehicles experiencing shuddering during acceleration. Replacing a faulty torque converter typically costs between $1,200 and $2,500 in 2027, addressing a critical component that impacts overall transmission performance.
When to Call a Professional: Expert Advice for Transmission Issues
Attempting complex transmission repairs without proper training and tools can lead to further damage and significantly higher repair costs. Recognizing the signs that warrant professional intervention is crucial for maintaining vehicle longevity and safety.
Recognizing Advanced Symptoms
While minor slipping might initially seem resolved by a fluid change, persistent or worsening symptoms indicate a deeper problem. These include consistent gear engagement delays, grinding noises during shifts, a burning smell (often indicative of severely degraded fluid or overheating components), or the illumination of the “Check Engine” light specifically for transmission codes. According to a 2027 report by J.D. Power on vehicle reliability, ignoring these advanced symptoms often leads to catastrophic transmission failure, with repair costs escalating by an average of 40% compared to addressing issues promptly.
The Value of Diagnostic Scans
Modern vehicles are equipped with sophisticated onboard diagnostic (OBD-II) systems capable of detecting and reporting transmission faults. A professional automotive technician utilizes advanced diagnostic scanners to retrieve specific trouble codes (DTCs) from the Transmission Control Module (TCM). These codes, combined with real-time sensor data, provide precise insights into component failures, such as solenoid malfunctions, pressure irregularities, or sensor errors. A professional diagnostic service, typically costing between $150 and $300 in 2027, is a small investment that can prevent extensive, guesswork-based repairs.
Choosing a Reputable Specialist
When selecting a repair facility, opt for certified transmission specialists. Look for certifications from organizations like the National Institute for Automotive Service Excellence (ASE) specializing in automatic transmission/transaxle. Verify their experience with your vehicle’s make and model, and inquire about warranties on parts and labor. Reputable shops will provide a detailed estimate of repairs, outlining parts, labor, and expected timelines. The Transmissions Rebuilders Association (TRA) recommends choosing shops with at least a 24-month/24,000-mile warranty on major transmission work, a standard practice among leading service centers in 2027.
What If It Still Doesn’t Work?
If your transmission continues to slip even after a fluid change, it’s a clear indication that a more significant issue is at play. Do not delay seeking expert help to prevent further damage. Here are fallback steps:
- Re-verify Fluid Level and Condition: Ensure the fluid level is precisely correct as per manufacturer specifications (e.g., Ford F-150 owners should check fluid at operating temperature, approximately 200°F). Confirm there are no immediate signs of burning or excessive debris. Sometimes, an initial fluid change doesn’t completely remove all contaminants from hidden pockets.
- Seek a Professional Diagnostic Scan: This is the most crucial next step. A certified technician will connect specialized diagnostic equipment to your vehicle’s OBD-II port. This scan will retrieve any stored trouble codes (DTCs) from the Transmission Control Module (TCM) that pinpoint specific component failures, such as faulty solenoids or pressure sensor issues. Expect diagnostic costs to range from $150 to $300 in 2027.
- Consider Solenoid Replacement: If the diagnostic scan indicates a faulty shift solenoid, replacement is a targeted repair. This can resolve slipping caused by incorrect hydraulic pressure regulation. The estimated cost for solenoid replacement, including parts and labor, typically ranges from $400 to $1,200 in 2027, depending on accessibility and component cost.
- Prepare for Major Repair or Replacement: If diagnostics reveal severe internal mechanical wear, such as damaged clutch packs, planetary gears, or a failing torque converter, a full transmission rebuild or replacement may be necessary. A rebuild can cost between $3,000 and $6,000, while a complete replacement (new or re-manufactured) can range from $4,000 to over $9,000 in 2027, depending on vehicle type and transmission complexity. Professional help is essential here; attempting this DIY is not recommended for the average car owner.
Conclusion
A transmission fluid change in 2027 can effectively resolve minor slipping caused by degraded fluid or low levels. However, it is not a universal cure. According to verified research and leading automotive experts, persistent slipping often signals deeper mechanical or electronic issues requiring professional diagnosis and repair. If your vehicle continues to exhibit slipping after a fluid service, promptly seek an advanced diagnostic scan from a certified transmission specialist to identify and rectify the underlying problem efficiently, safeguarding your investment and ensuring reliable vehicle operation.
❓ Frequently Asked Questions
Why won’t a transmission fluid change fix a slipping transmission?
A fluid change primarily replaces degraded lubrication. Slipping is typically caused by mechanical wear in components like clutch packs or bands, or internal pressure problems, which fluid alone cannot rectify. These issues require physical repair or replacement.
Under what rare circumstances might a fluid change help minor slipping?
In very specific, mild cases where the fluid is extremely old, burnt, or the wrong type, a fluid change might slightly improve shifting by restoring proper friction characteristics or freeing sticky valve bodies. However, this is usually temporary and for very early-stage, minor issues, not significant slipping.
What are the common mechanical causes of transmission slipping?
Common mechanical causes include worn-out clutch packs, damaged bands, low or incorrect fluid levels, faulty solenoids, a failing torque converter, or internal pressure leaks due to worn seals. These problems require mechanical intervention.
Should I try a transmission additive for slipping?
Transmission additives are generally not recommended as a fix for slipping. They might offer a temporary placebo effect but do not address the underlying mechanical wear. Relying on additives can delay necessary repairs and potentially worsen damage.
What are the risks of changing fluid in a severely slipping transmission?
Changing fluid in a severely slipping transmission can sometimes dislodge beneficial deposits that are helping worn components to grip, potentially worsening the slipping. It can also introduce fresh detergents that further clean away necessary friction material, speeding up failure.
When is it safe to change transmission fluid if I suspect an issue?
It’s generally safe to perform a fluid change as part of routine maintenance if there are no slipping symptoms. If slipping is already present, consult a professional, as a fluid change might not only be ineffective but could potentially exacerbate the problem.